A store-bought dog gate runs thirty to eighty dollars and still wobbles the first time your dog leans on it. A homemade one costs a fraction of that and fits the exact opening you need it for.
These fifteen projects range from a no-drill fabric panel to a barn-door slider. Want ready-made options instead? Start there.
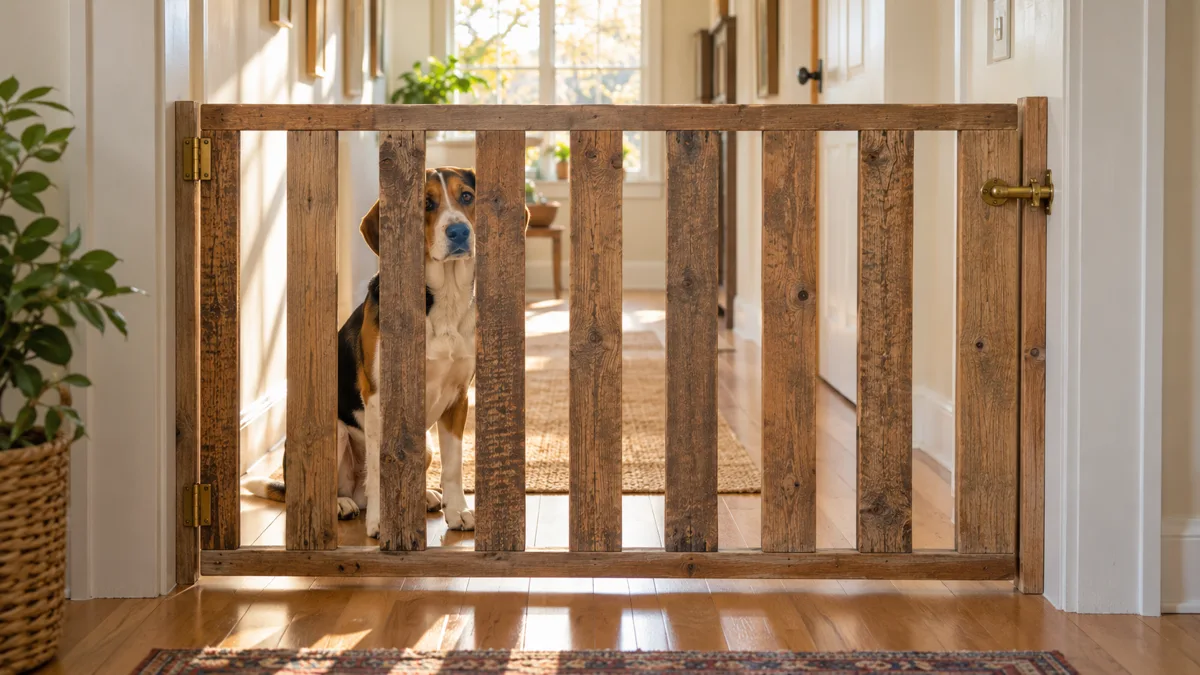
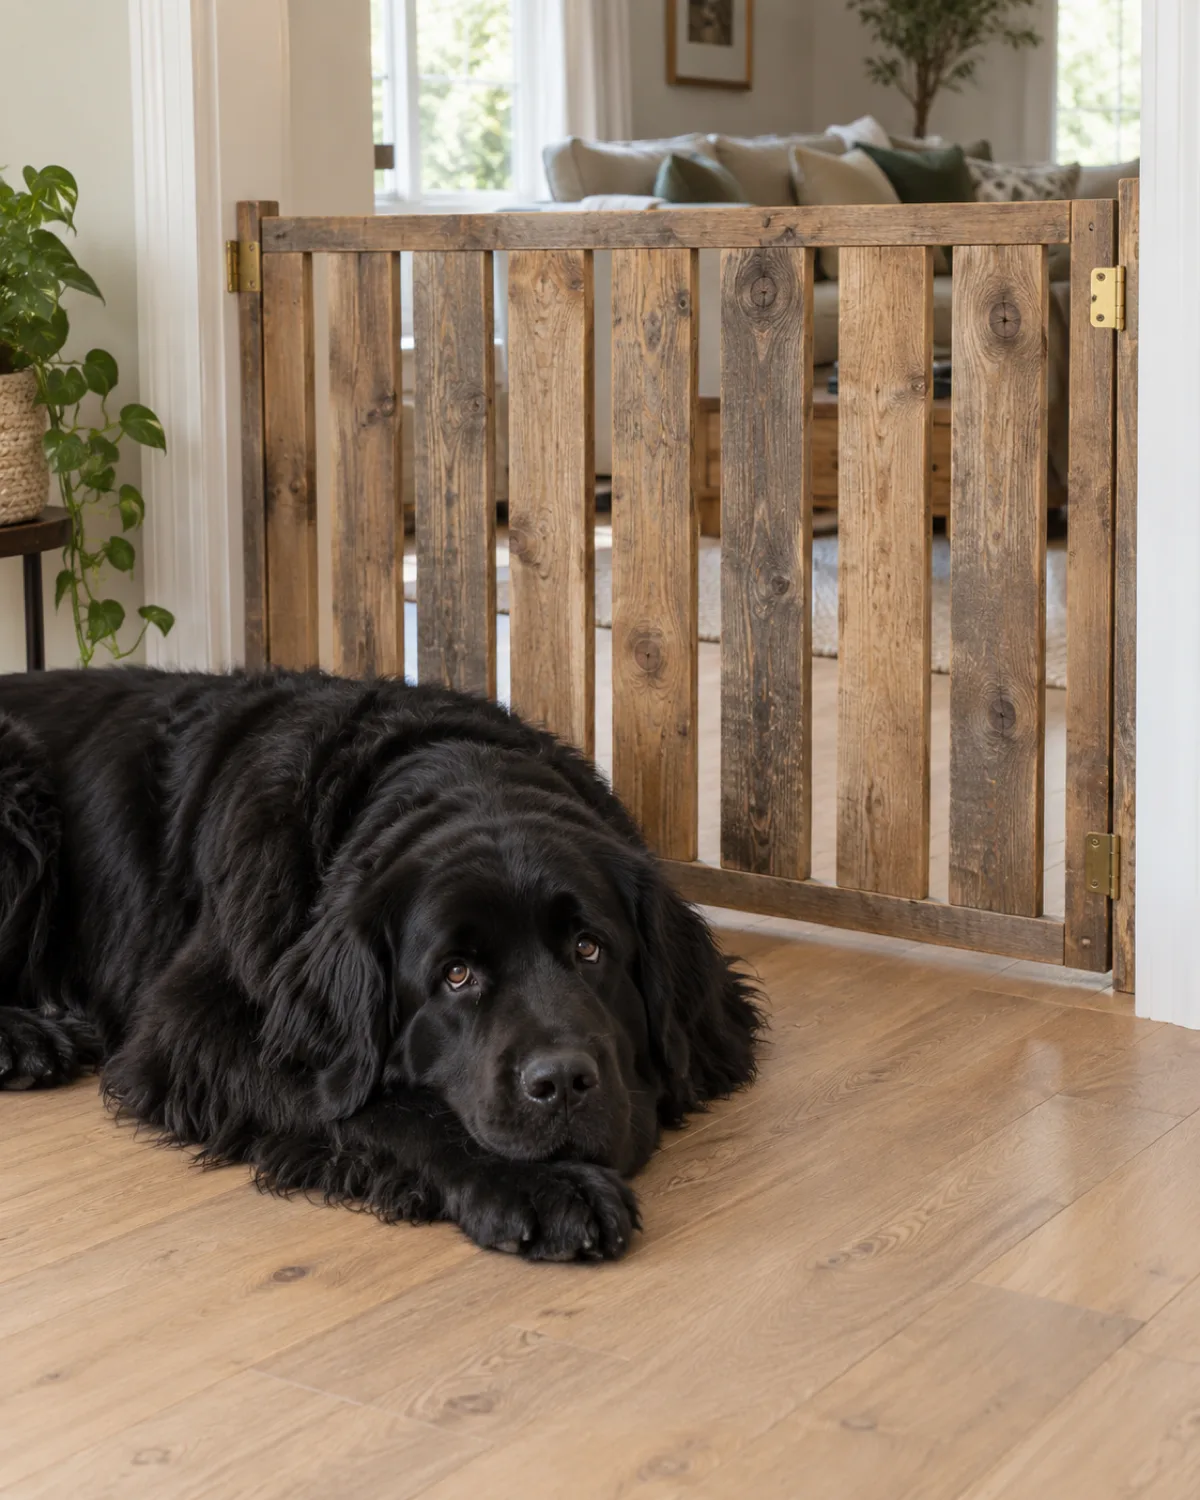
A free shipping pallet gives you enough wood for a gate that fits a standard 30- to 36-inch doorway. Pry the slats apart, sand them smooth on both sides, and cut them to the height you need — most medium dogs stay behind anything 30 inches or taller.
Nail or screw the slats vertically onto two horizontal cross-braces cut from the same pallet. Mount the frame in the doorway with two simple butt hinges and add a barrel bolt or hook latch on the opposite side.
Materials: one pallet, two butt hinges, one barrel bolt, sandpaper, wood screws
Time: about two hours including sanding
Best for: standard doorways, rustic or farmhouse decor, dogs that do not chew wood
Sand every edge that faces the dog until there are no splinters or rough spots. Pre-drill screw holes to avoid splitting the dry pallet wood, and keep all screw heads on the human side of the gate.
2. Tension Rod Fabric Panel Gate
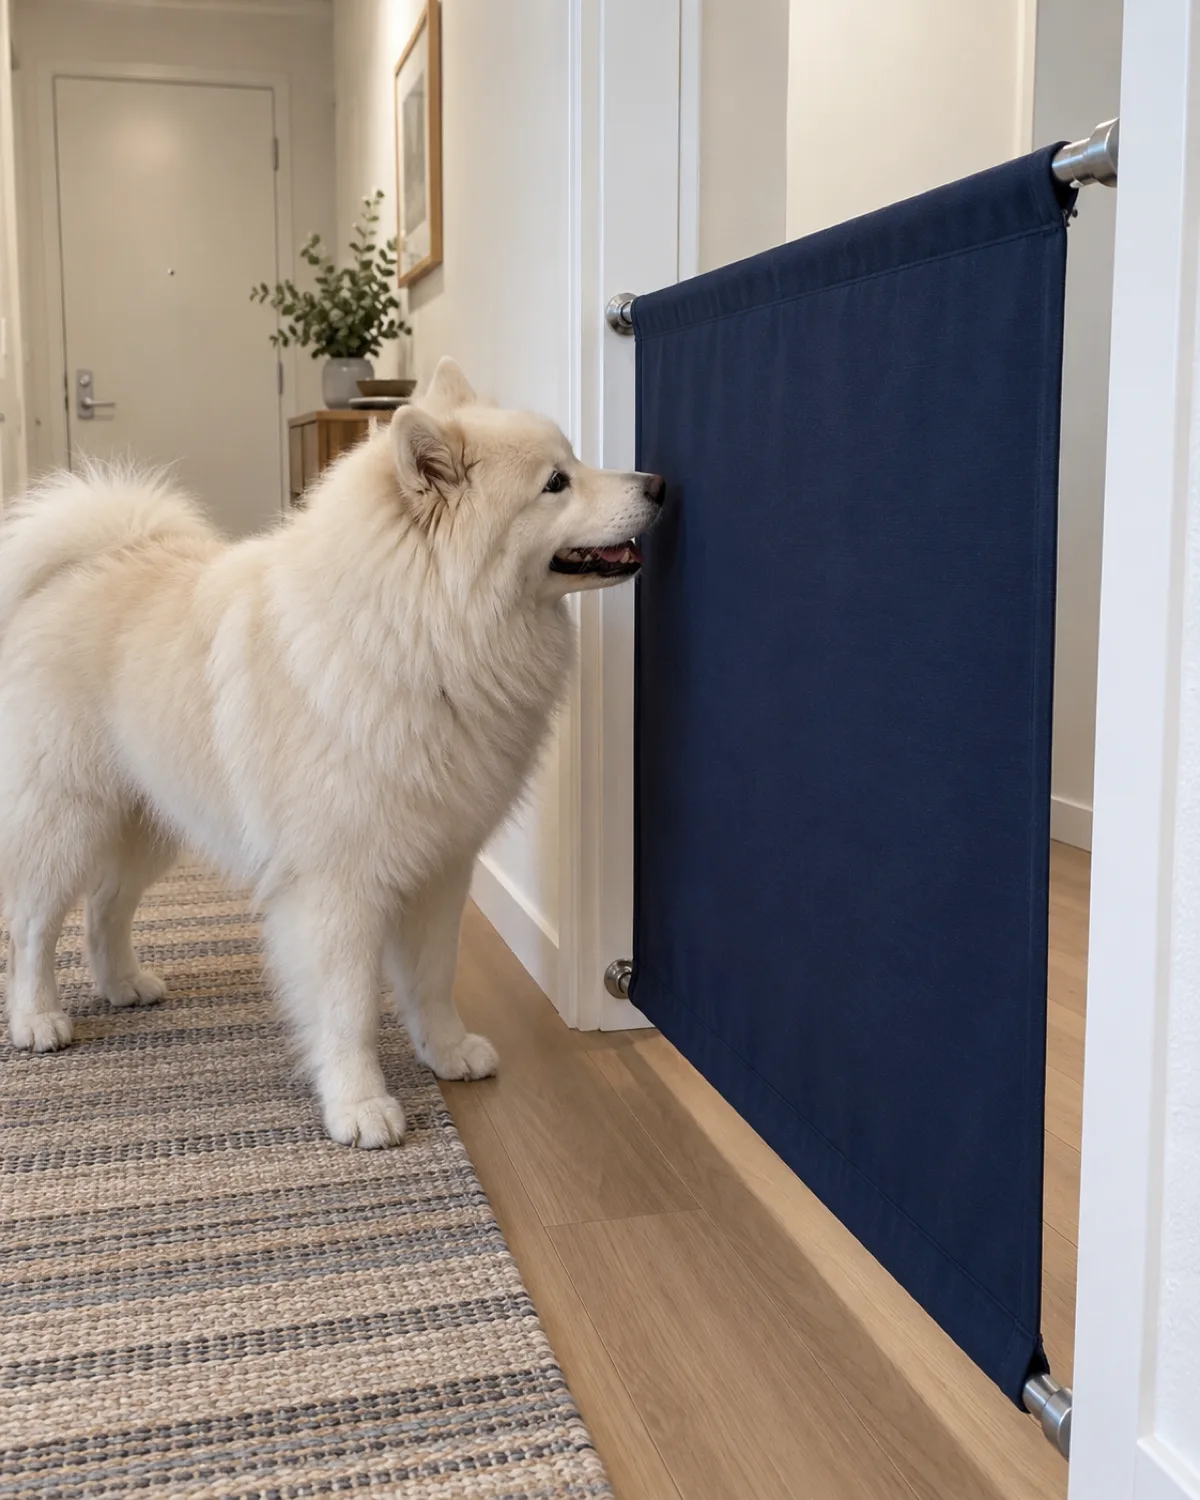
This one needs zero tools and leaves zero holes in the wall, which makes it the best option if you rent. Buy two heavy-duty tension rods rated for the width of your doorway and a piece of thick canvas or duck cloth cut to fit between them.
Sew a rod pocket at the top and bottom of the fabric — or fold the edges over and clip them with binder clips if you do not sew. Twist the rods into the door frame at the height you want and the panel hangs taut between them.
Materials: two tension rods, one yard of heavy canvas, sewing supplies or binder clips
Time: under one hour
Best for: renters, calm small-to-medium dogs, temporary barriers
This is not a gate for power chewers or dogs that body-check barriers. It works well for gentle dogs who just need a visual boundary and a little resistance. Wash the fabric whenever it gets dirty — just unclip, wash, and reclip.
Match the gate to your space
Where should you start?
You do not need all fifteen. Pick the situation that fits your home and start with one or two builds.
Top of stairs (safety-critical)Start with the banister-mount gate — it clamps to posts without drilling into the wall.
3. PVC Pipe Frame Gate
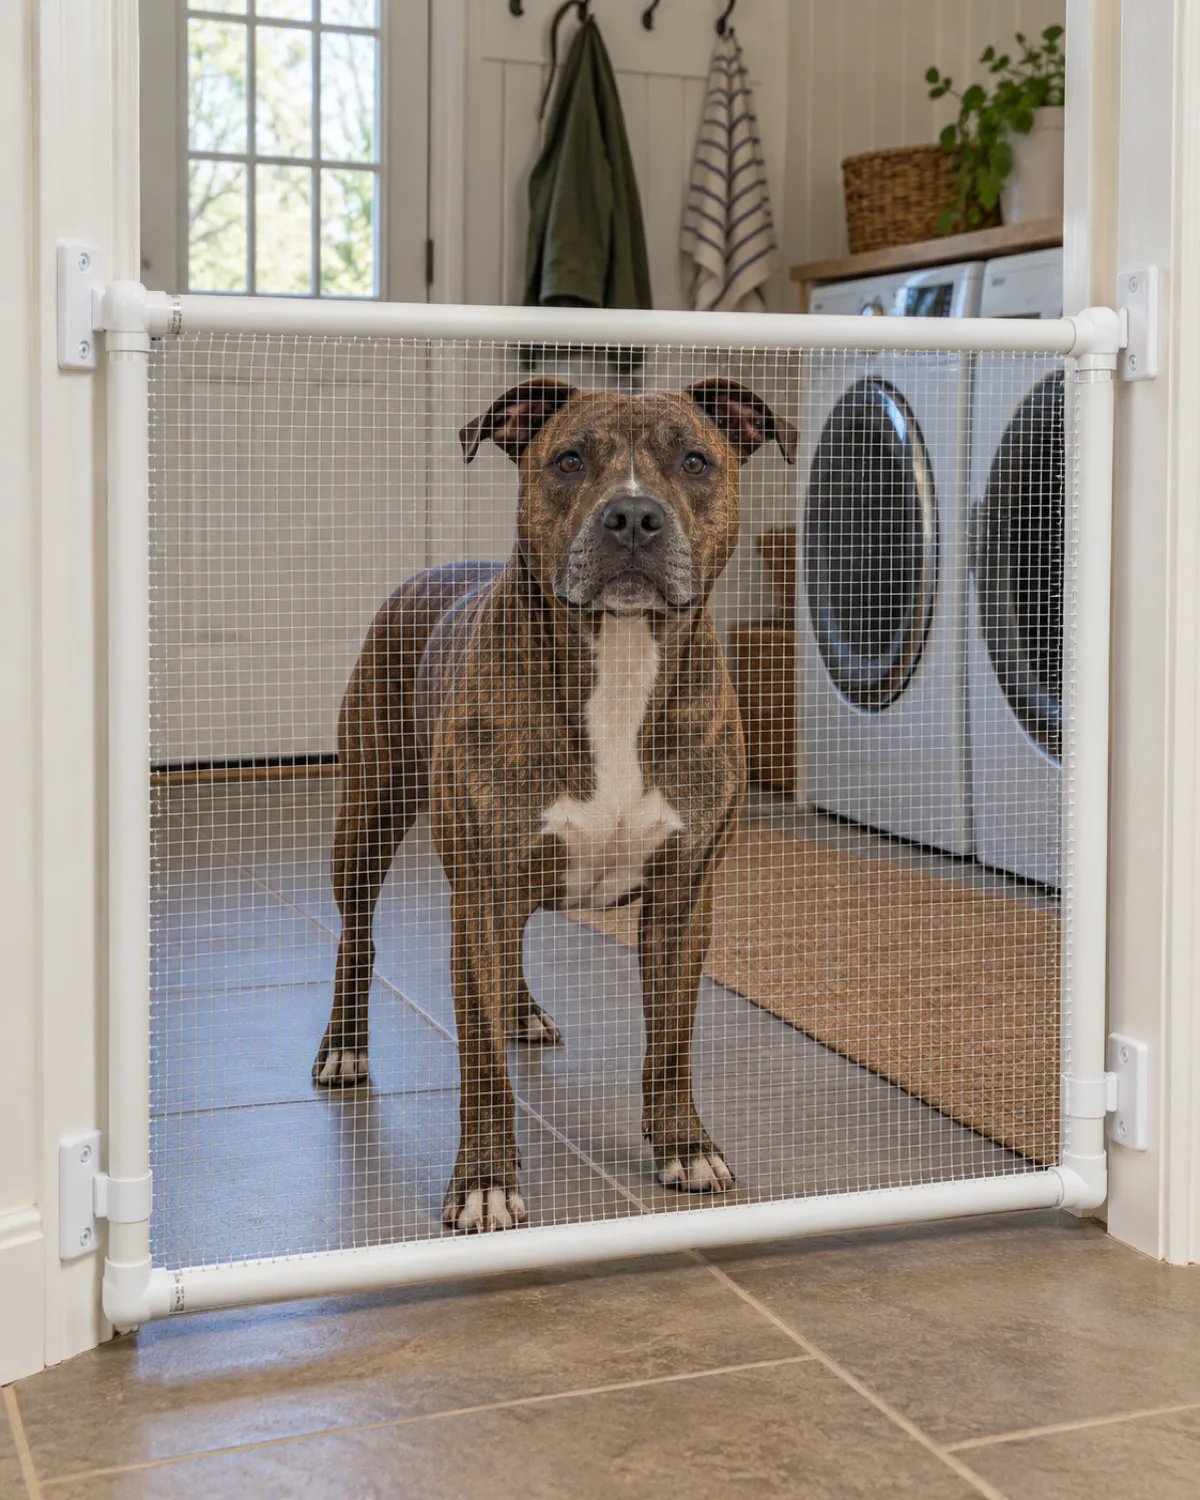
PVC pipe is light, cheap, and you can take the whole gate apart for cleaning or storage by pulling the joints. Build a rectangle from one-inch schedule-40 PVC using elbow and tee fittings, then zip-tie a piece of pet-safe nylon mesh or hardware cloth across the inside of the frame.
Measure your doorway width and subtract half an inch so the frame slides in with a snug friction fit. If the fit is loose, wrap a strip of adhesive-backed foam weatherstripping around each end.
Materials: about eight feet of 1-inch PVC pipe, four elbow fittings, mesh or hardware cloth, zip ties
Time: thirty minutes to one hour
Best for: mudrooms, laundry rooms, temporary indoor-outdoor barriers, easy disassembly
Do not glue the fittings if you want the gate to be portable. Friction-fit joints hold well enough for a barrier, and you can break it down flat for storage or travel.
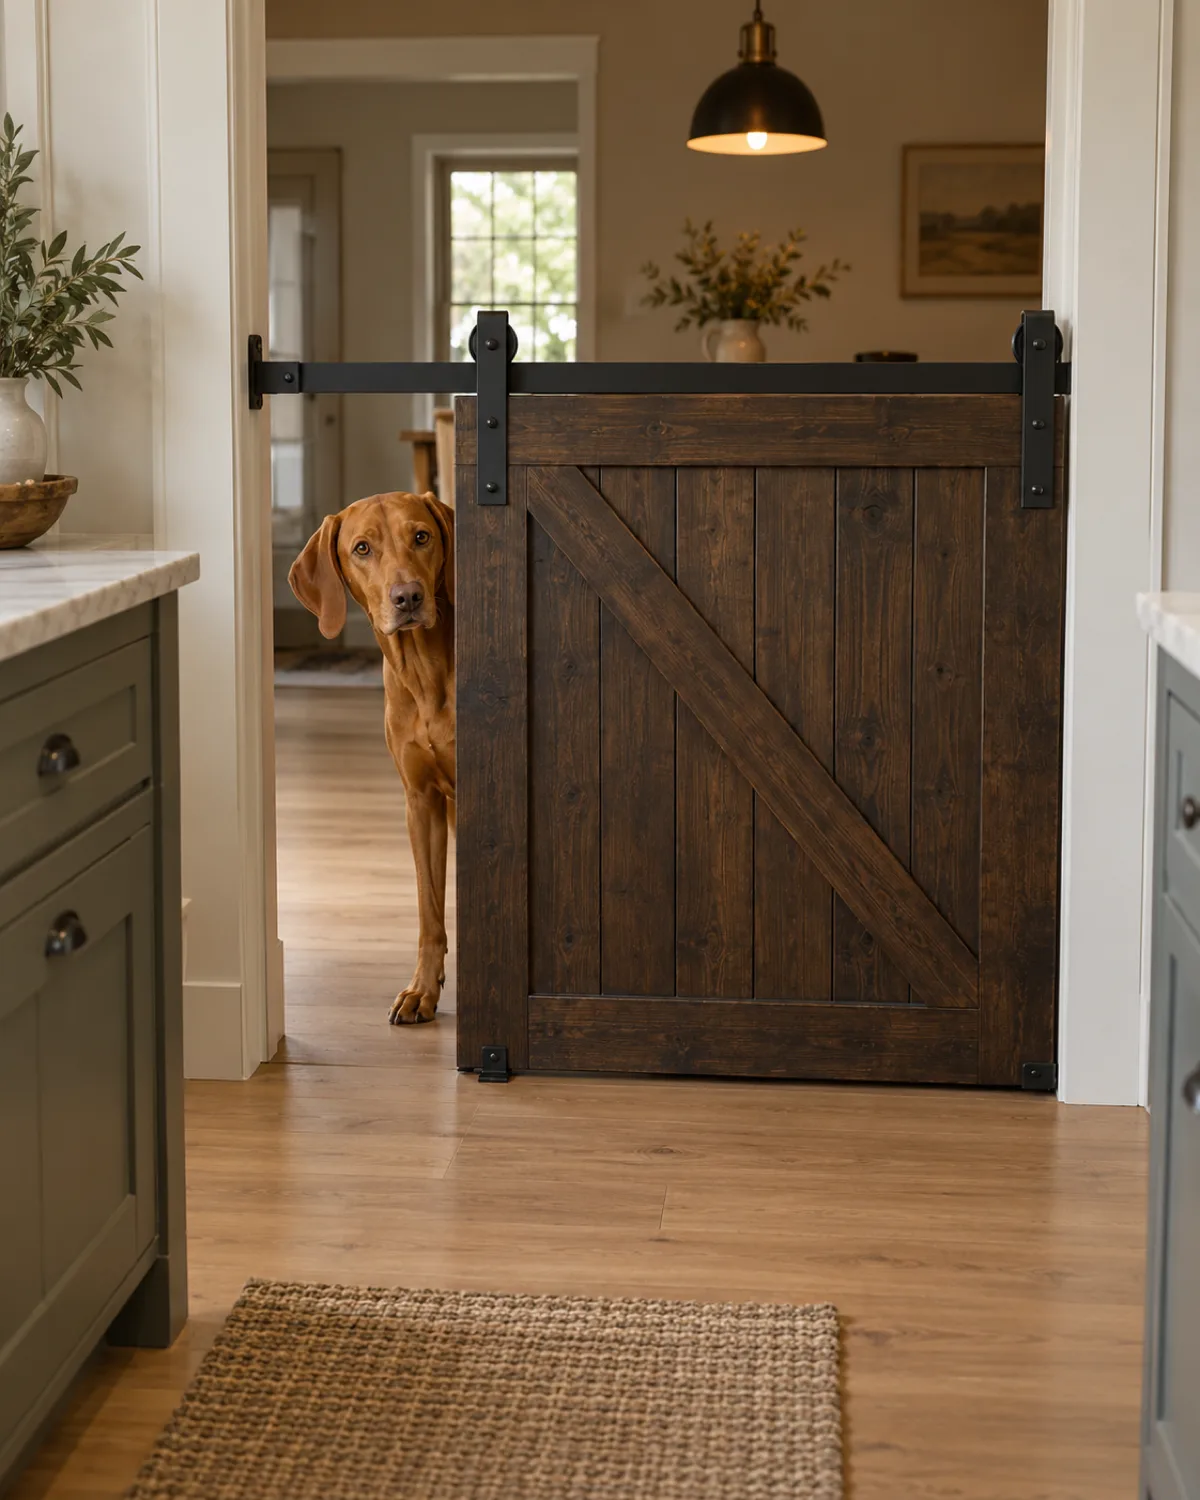
4. Barn Door Style Sliding Gate
A sliding gate solves the problem every swinging gate has in a tight hallway — it does not eat up floor space when it opens. Mount a flat-track barn door hardware kit above the doorway (these run about fifteen to twenty-five dollars online), hang a sheet of three-quarter-inch plywood or a reclaimed interior door from the rollers, and you have a gate that slides open with one hand.
Cut the panel to the height you need, sand it, and stain or paint it to match your trim. Screw a Z-brace pattern on the back for rigidity if you use plywood.
Materials: barn door hardware kit, one sheet of plywood or one old door, stain or paint, screws
Time: two to three hours
Best for: wide kitchen openings, hallways where a swing gate blocks traffic, dogs of any size
The track needs to be mounted into studs or blocking — toggle bolts alone will not hold the weight when the door slides back and forth. Check for studs with a stud finder before you drill.
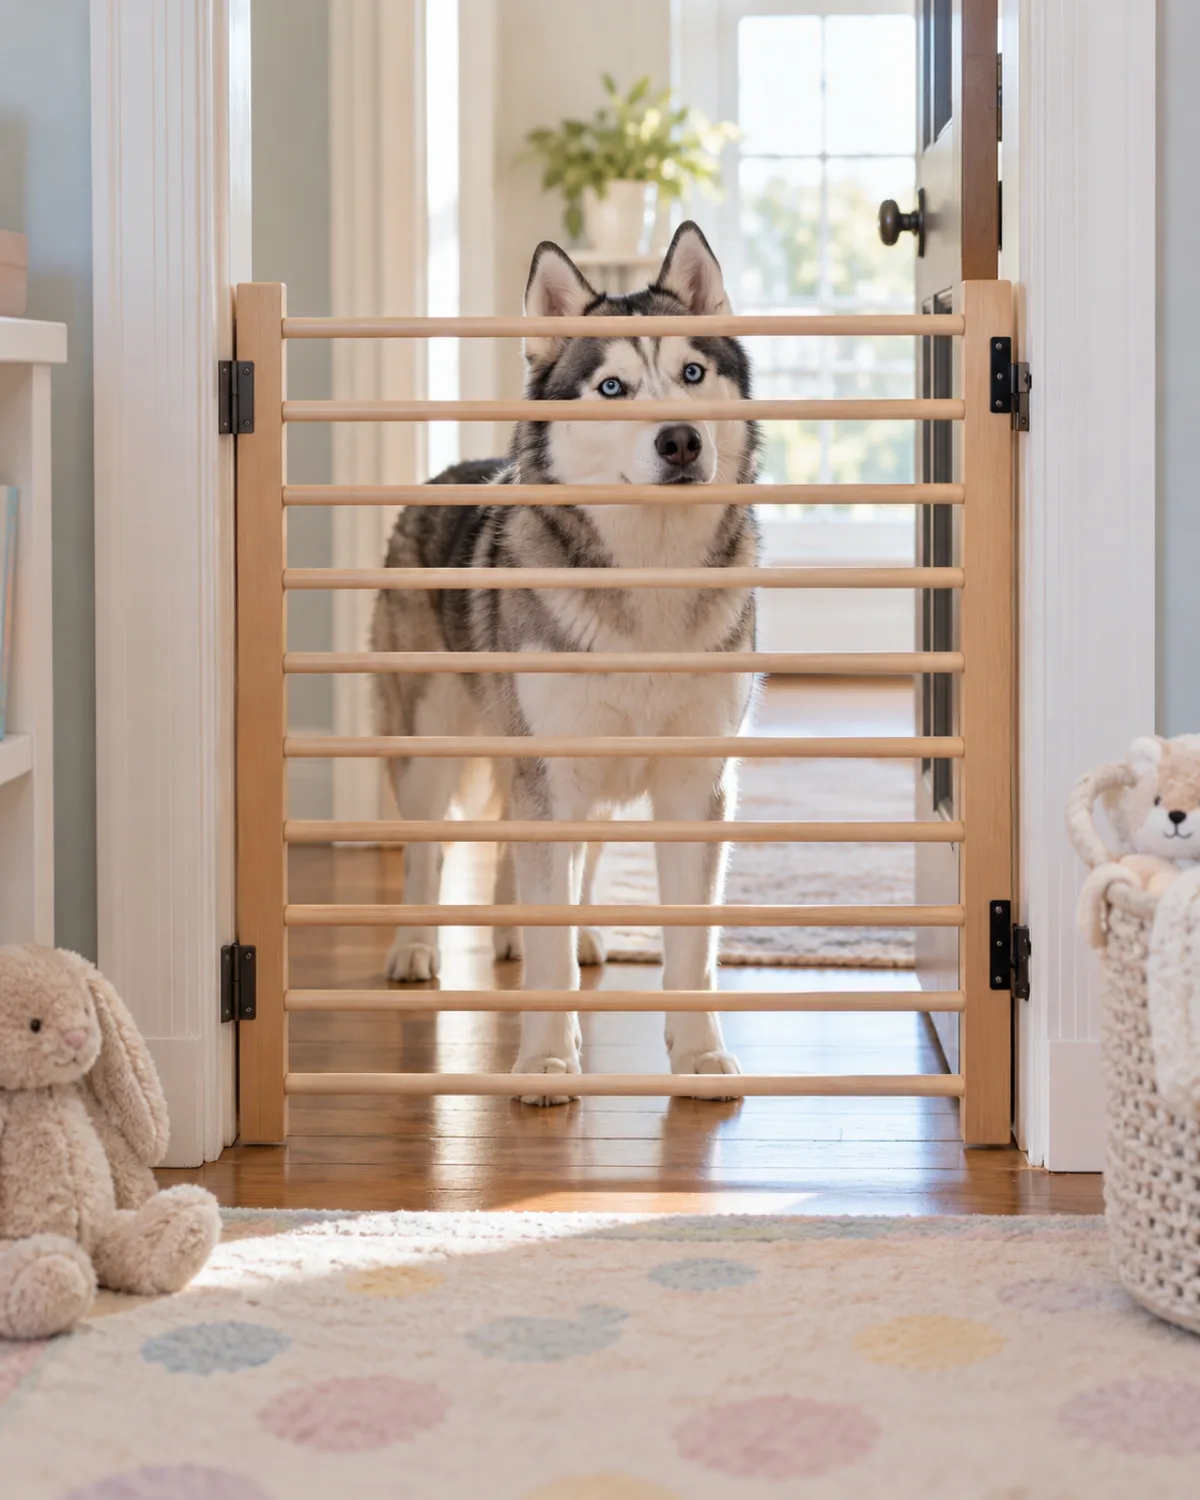
5. Stacked Dowel Rod Gate
Dowel rods stacked horizontally between two side rails look clean and modern, almost like a crib side panel. Buy half-inch or three-quarter-inch hardwood dowels from a craft store, cut them to the width of your doorway, and drill evenly spaced holes in two vertical side boards to hold them.
Space the dowels close enough that your dog cannot squeeze a paw or muzzle through — two inches apart works for most breeds. Glue the dowels into the holes with wood glue, clamp overnight, and mount the finished gate with hinges.
Materials: eight to twelve hardwood dowels, two boards for side rails, wood glue, hinges, a latch
Time: two to three hours plus overnight glue cure
Best for: nurseries, bedrooms, dogs that like to see through barriers
The visual transparency helps anxious dogs who panic behind solid gates. They can see you and the room beyond, which keeps them calmer than a solid panel.
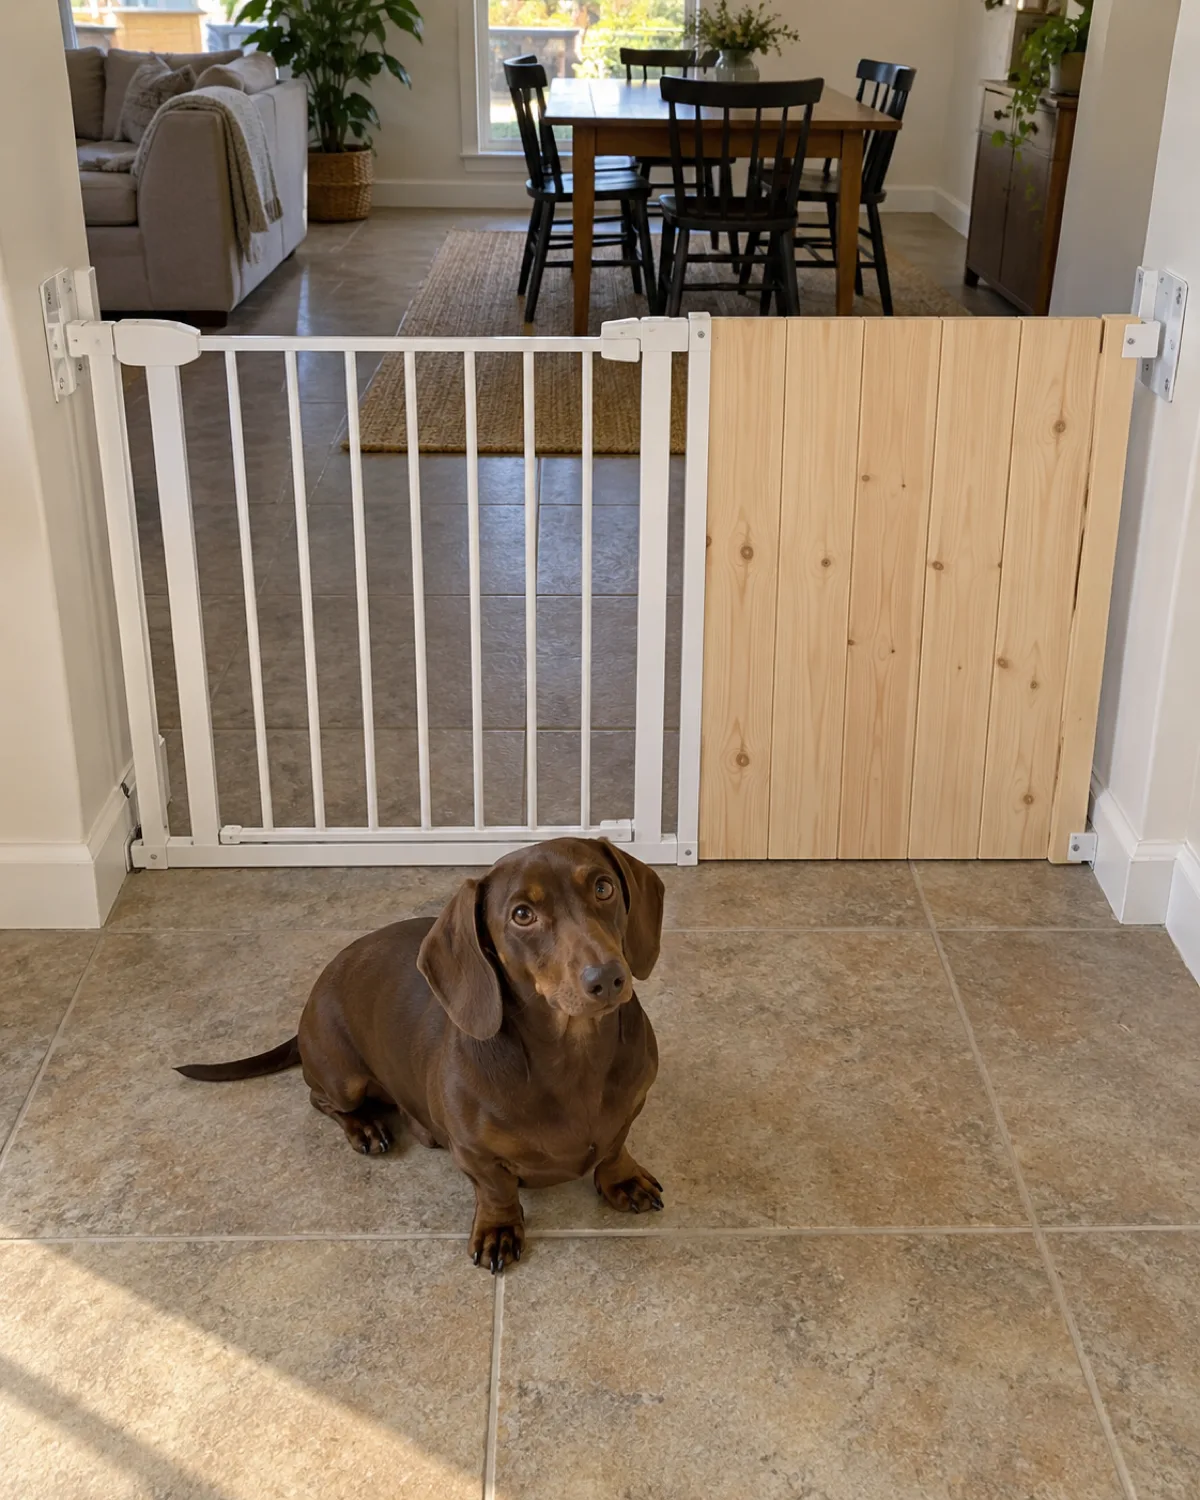
6. Repurposed Baby Gate Extension Hack
If you already own a standard baby gate that is too narrow for a wide opening, you do not need to buy a second gate. Cut a piece of plywood or a few boards to the missing width, drill bolt holes that line up with the gate frame, and bolt the extension panel flush to the end of the gate.
Use carriage bolts with the smooth dome head facing the dog side and the nut on the human side. Paint or stain the extension panel to match the gate so it looks intentional.
Materials: leftover baby gate, plywood or boards, carriage bolts, paint or stain
Time: about one hour
Best for: extra-wide doorways, open-plan living areas, reusing gear you already have
Measure twice before cutting the extension — the panel should overlap the gate frame by at least one inch on each bolt point for a solid connection. Wobble the finished gate hard before trusting it.
Before you build any of these
4 Rules for a Gate That Lasts
A gate that falls over or splinters is worse than no gate at all. Follow these every time.
Smooth the dog sideSand every surface that faces your dog until there are no splinters, rough edges, or exposed screw tips. Flip every screw head and bolt nut to the human side.
Measure the opening twiceA gate that is a quarter inch too wide jams. A gate that is a quarter inch too narrow wobbles. Measure at the top and bottom of the doorway — older frames are rarely perfectly square.
Match gate height to dog sizeThirty inches is the minimum for most medium dogs. Large dogs or jumpers need thirty-six inches or taller. A gate your dog can hop means you did the work for nothing.
Test before trustingLean on the finished gate with your full weight. Shake it side to side. If it moves, reinforce the mount points before your dog finds the weakness first.
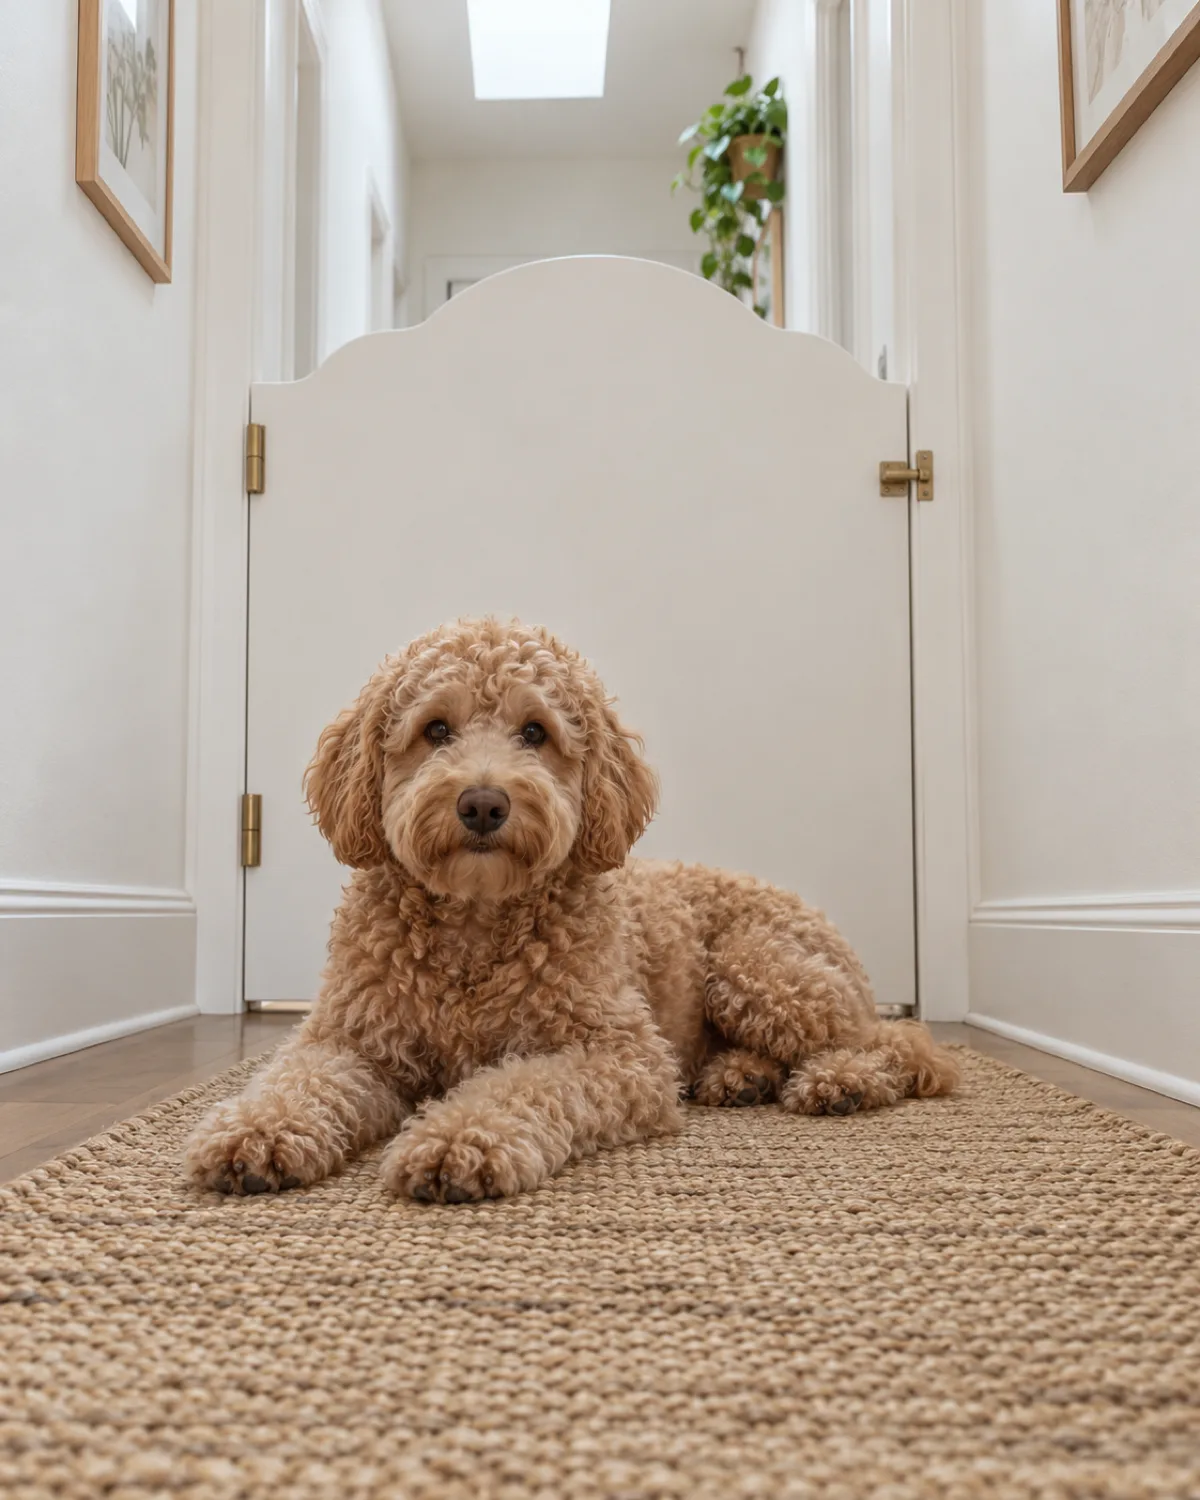
7. Plywood Cutout Gate
One sheet of half-inch plywood becomes a decorative gate when you cut a curve, arch, or wave pattern along the top edge with a jigsaw. The shaped silhouette turns a plain panel into something that looks custom.
Trace your design on the plywood with a pencil and cut it out, then sand the cut edge until it is completely smooth. Mount the panel in the doorway with hinges on one side and a hook-and-eye latch on the other.
Materials: one half-sheet of plywood, hinges, hook-and-eye latch, paint, sandpaper
Time: one to two hours
Best for: hallways, bedrooms, decorative barriers that double as a style statement
Paint both sides with a pet-safe latex paint — bare plywood splinters over time and absorbs moisture from wet paws. Two coats on the dog side is worth the extra thirty minutes.
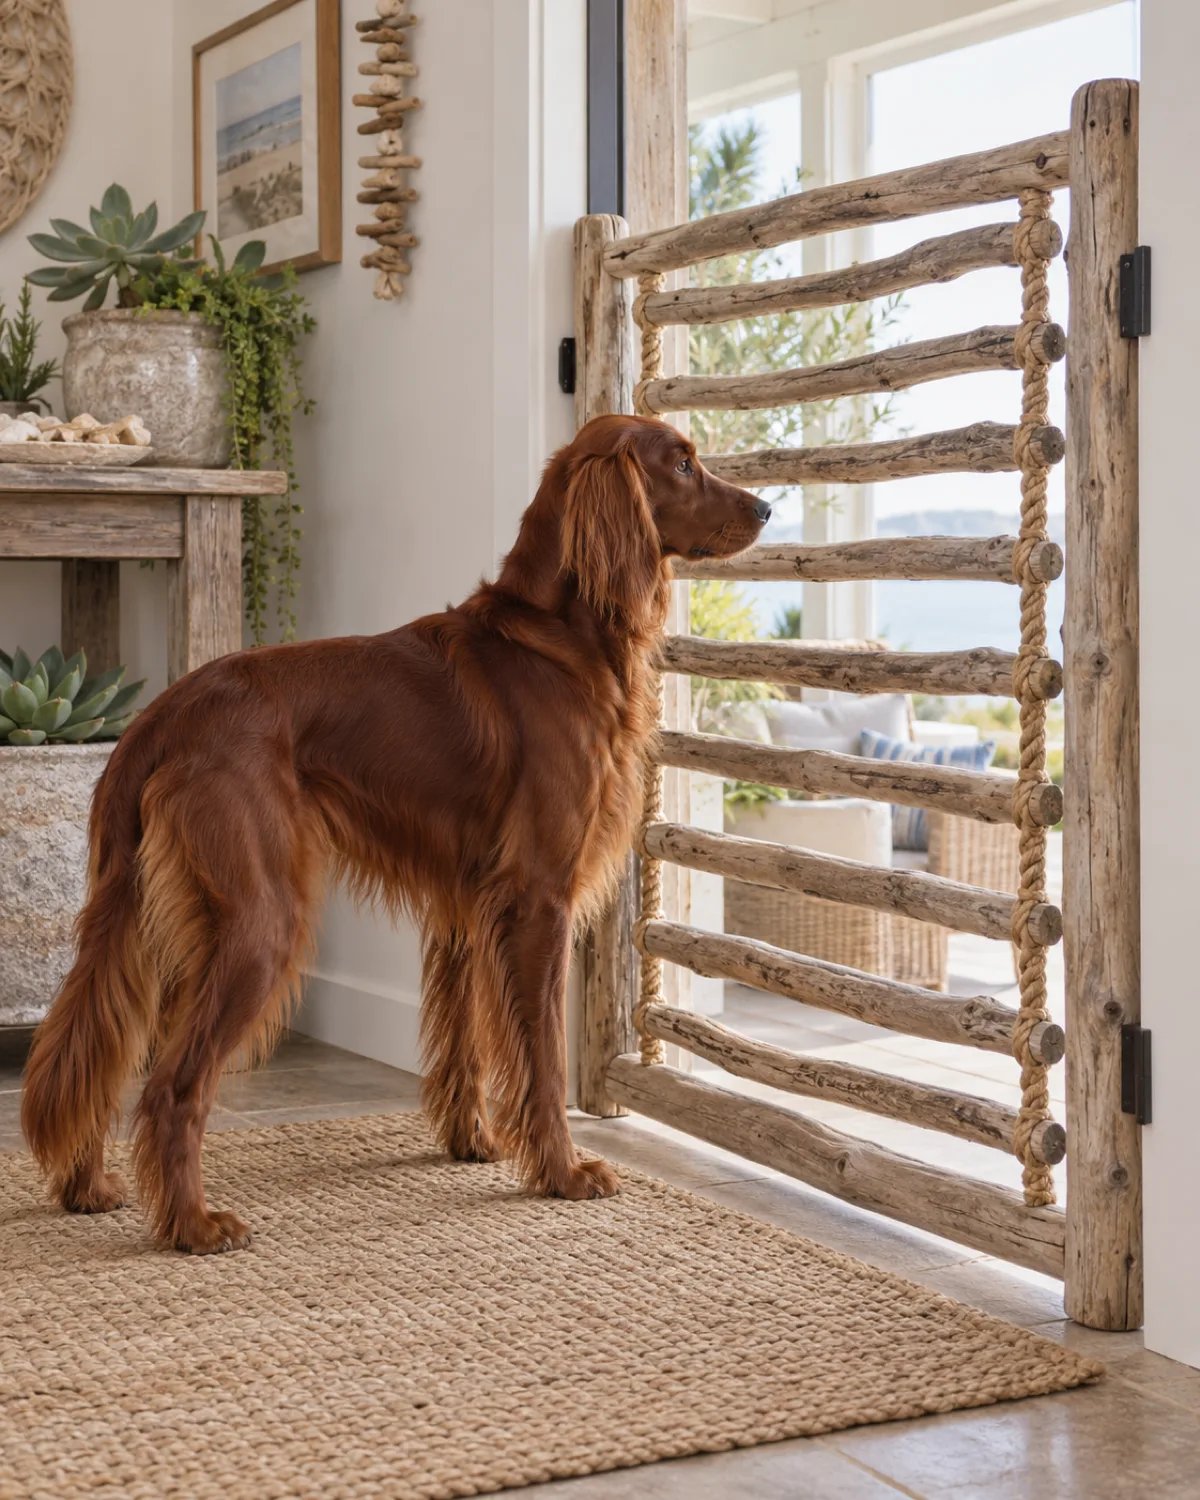
8. Rope and Driftwood Gate
This gate works as a barrier and a piece of wall art at the same time. Collect five to seven pieces of straight driftwood (or buy dowels and distress them with a wire brush) and connect them horizontally with thick natural jute or cotton rope tied in evenly spaced knots.
Hang the finished panel from two cup hooks screwed into the door frame at the top and add a matching hook-and-eye at the bottom to keep it taut.
Materials: five to seven driftwood pieces or dowels, heavy jute rope, cup hooks, hook-and-eye latch
Time: one to two hours
Best for: sunrooms, porch entries, coastal or bohemian decor, calm dogs
This is a visual barrier more than a physical one. A determined dog can push through the rope gaps. It works best for dogs who respect boundaries once they know the gate is there, not for puppies in the chewing stage.
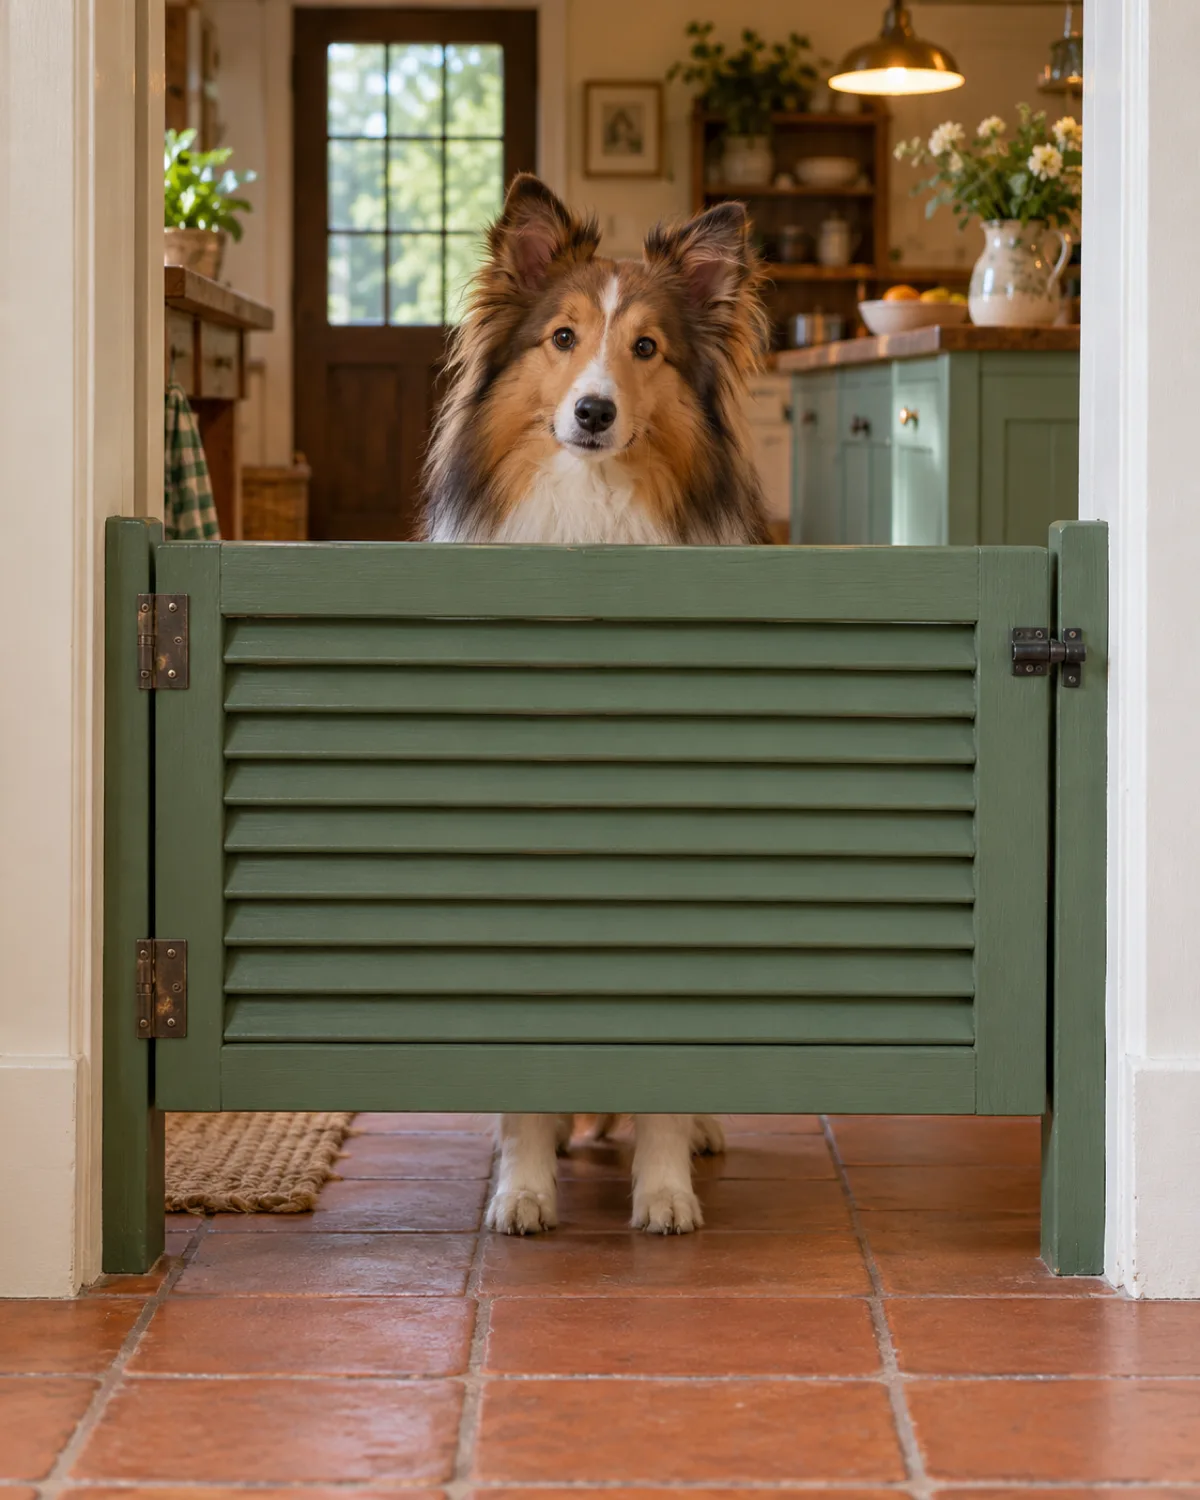
9. Old Door or Shutter Gate
Thrift stores and salvage yards sell old interior doors and window shutters for five to fifteen dollars. Cut one down to the height you need (knee-height for small dogs, waist-height for large), sand the cut edge, touch up the paint, and mount it with hinges.
A louvered shutter gives you airflow and visibility. A solid paneled door gives you a heavier, sturdier barrier. Either way you get a gate with more character than anything you can buy new.
Materials: one salvaged door or shutter, hinges, latch, touch-up paint
Time: one hour plus drying time for paint
Best for: cottage and vintage kitchens, dog owners who like upcycled decor
Check the old paint before sanding if the door is from a house built before 1978 — old lead paint is a health hazard for you and your dog. If you are not sure, use a lead test kit from the hardware store.
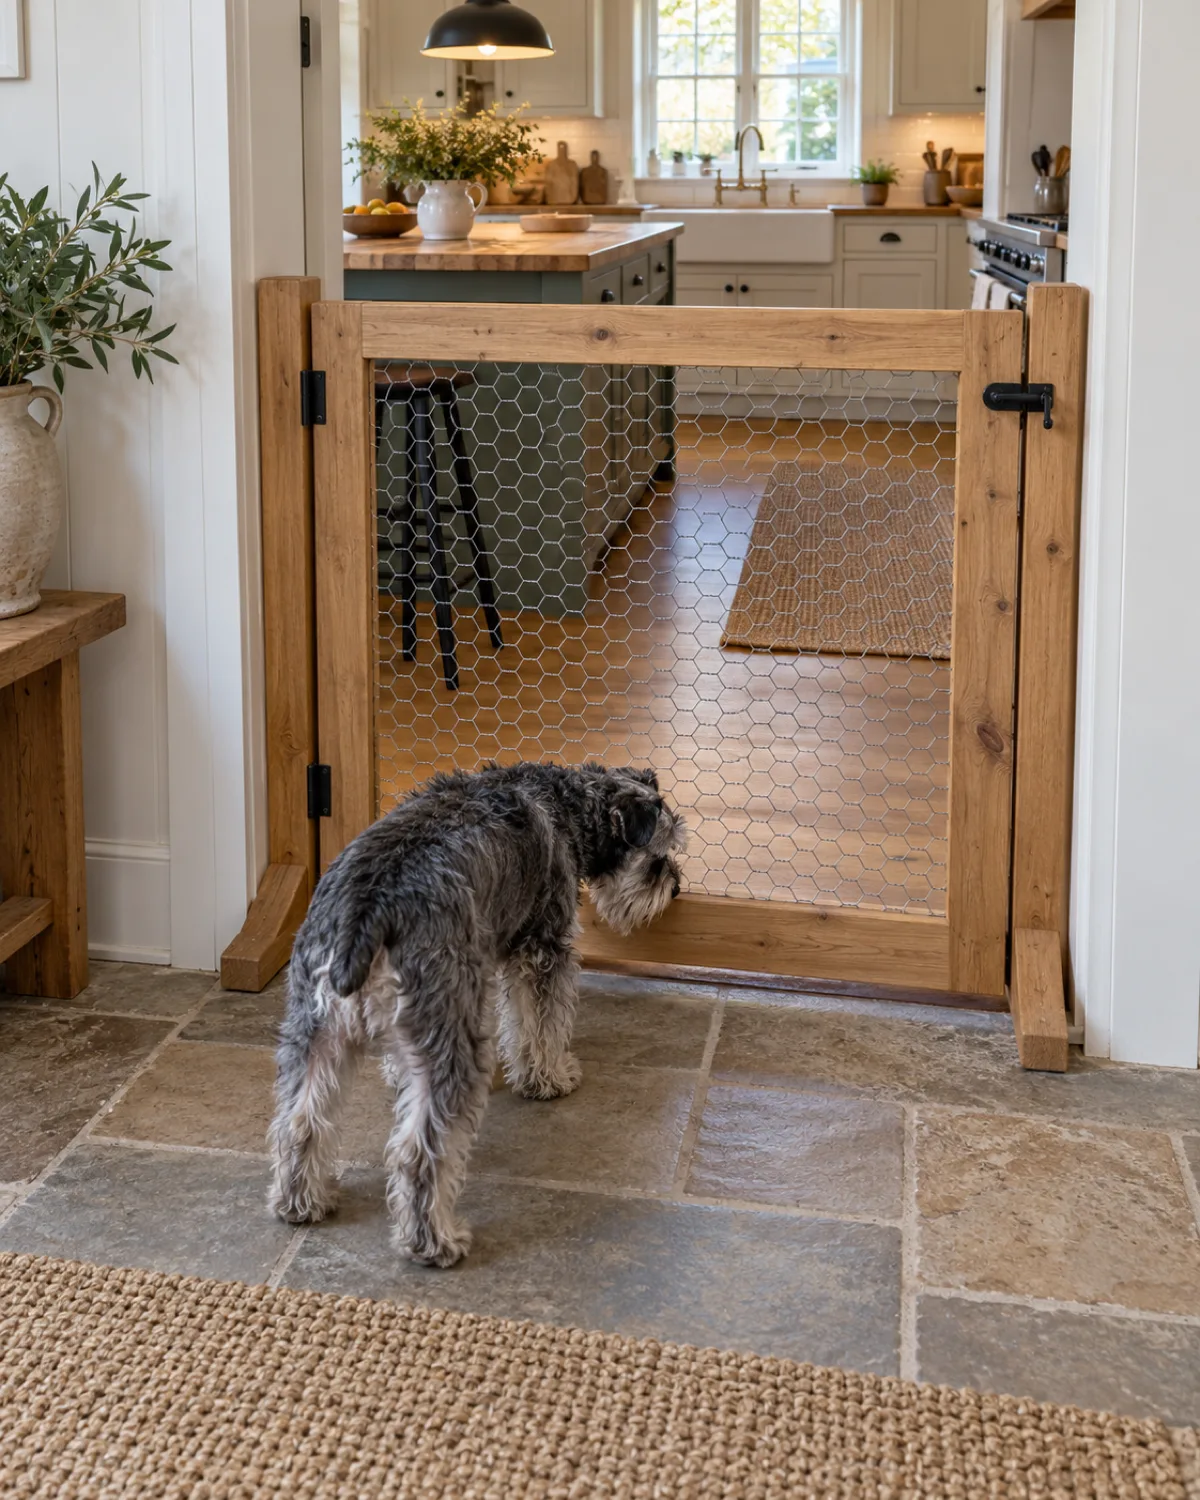
10. Chicken Wire and Frame Gate
A basic wood rectangle with chicken wire stapled across the inside is the simplest gate on this list. Cut four pieces of one-by-two lumber to form a frame, screw the corners together, staple a sheet of galvanized chicken wire to one side, and mount it in the doorway.
Fold the raw edges of the chicken wire inward and staple them flat so there are no sharp wire ends sticking out. This is especially important on the dog side — cut wire ends are like tiny needles.
Best for: farmhouse kitchens, garden-to-house transitions, dogs that need airflow and visibility
The chicken wire keeps dogs behind the gate but does not block light or air. It is not chew-proof, though — a serious chewer will bend or break the wire in a few days. For chewers, use hardware cloth (welded wire mesh) instead of chicken wire.
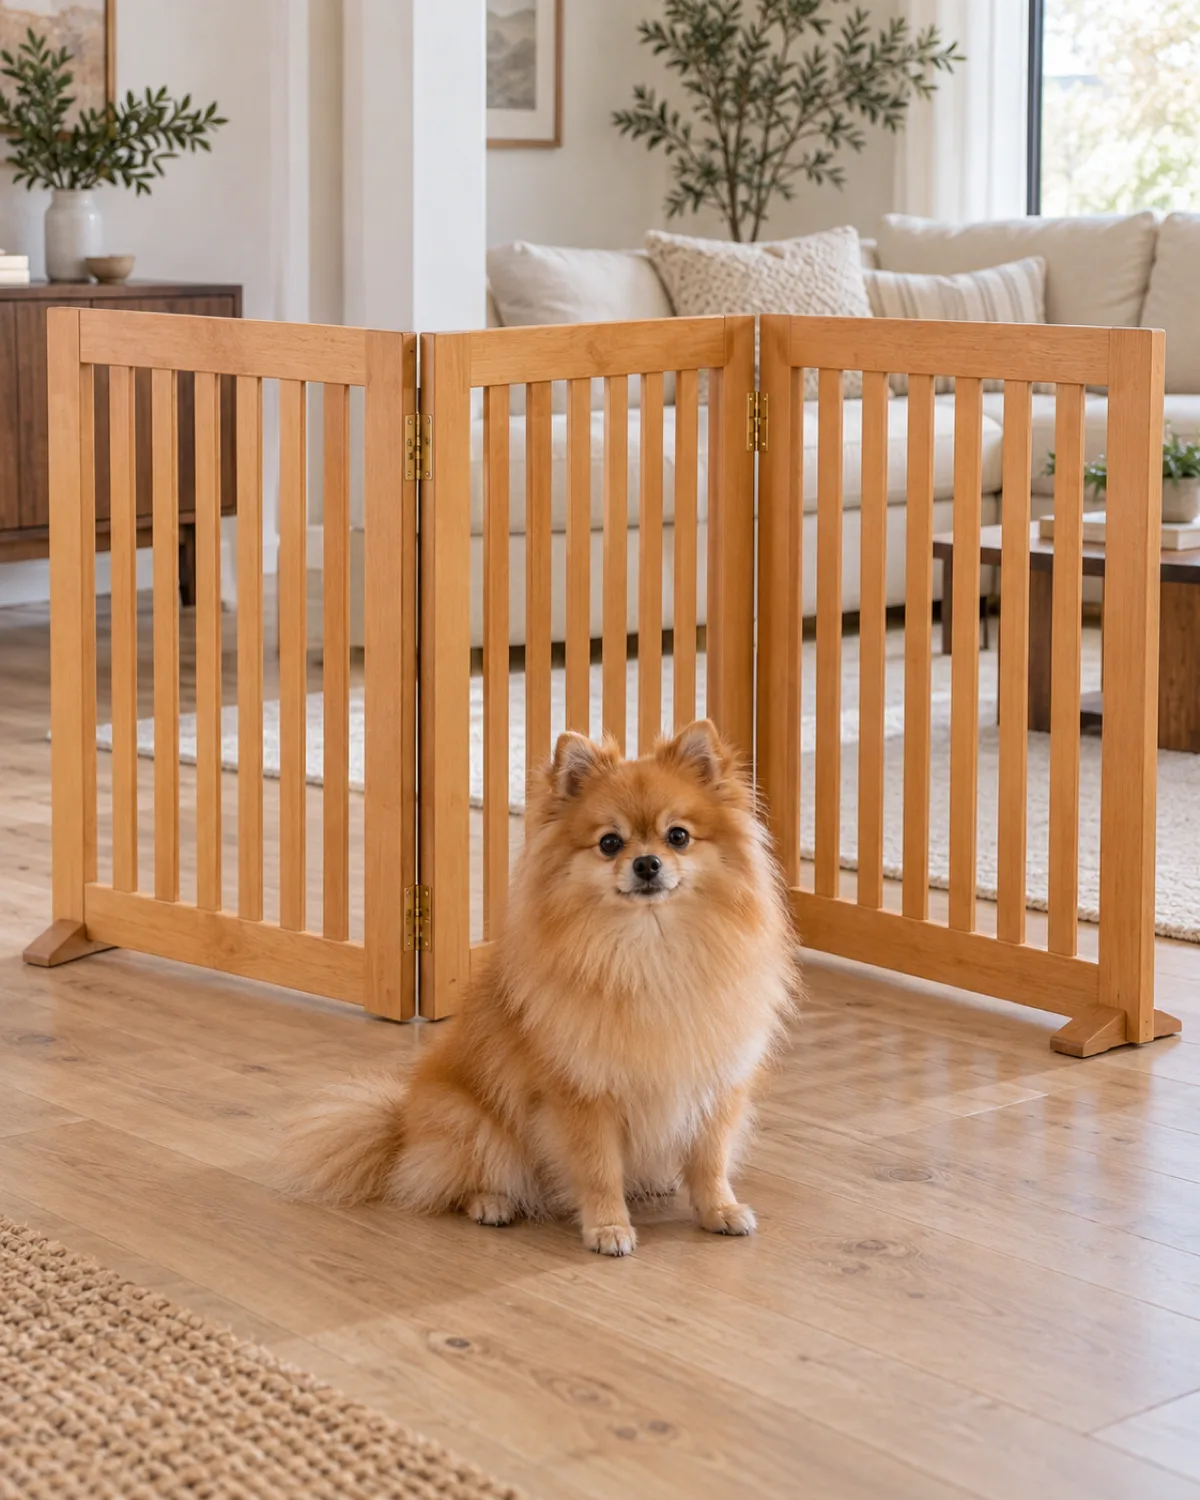
11. Accordion Fold Screen Gate
Three panels of thin plywood or MDF connected with piano hinges create a freestanding zigzag barrier that needs no mounting hardware at all. Stand it in the opening and the zigzag shape keeps it upright on its own.
Cut each panel to about twelve inches wide and your target height tall. Sand the edges, paint or stain all three panels, and connect them with two piano hinges so the screen folds in both directions. When you do not need it, fold it flat and lean it against a wall.
Materials: three pieces of half-inch plywood or MDF, two piano hinges, paint or stain
Time: one to two hours
Best for: open floor plans, moving the barrier between rooms, small-to-medium dogs
The screen only works if the opening is narrow enough that the zigzag creates enough friction to stay standing. In a very wide opening, the panels flatten out and topple. Add rubber feet to the bottom edges for grip on hard floors.
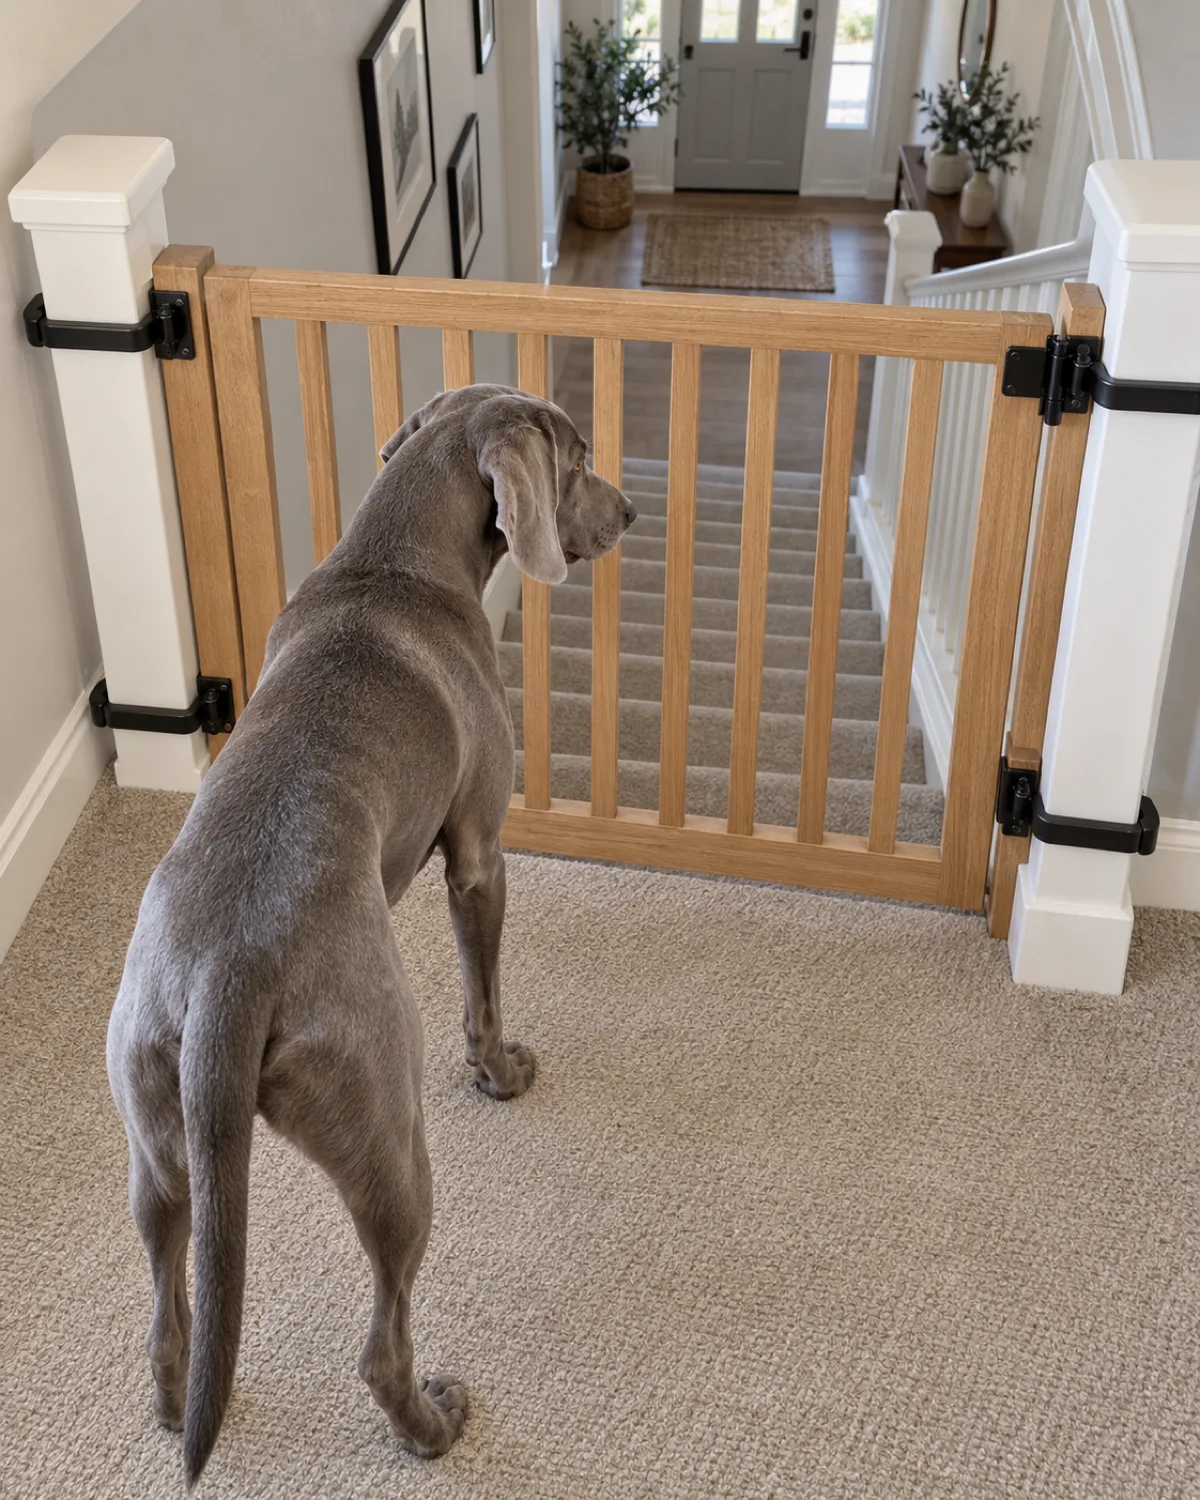
12. Staircase Banister-Mount Gate
Drilling into a staircase banister post can weaken it or void your lease. This gate clamps on instead. Build a simple wood-frame gate, then attach it to the banister posts with large pipe clamps or U-bolts that wrap around the post and tighten with a nut.
The clamps should sit against rubber or felt pads to protect the post finish. Tighten them firmly — the gate has to hold against a dog leaning on it from the top of the stairs.
Materials: lumber for the gate frame, pipe clamps or U-bolts, rubber or felt pads, a latch
Time: two hours
Best for: top-of-stairs barriers, renters who cannot drill into banisters, dogs of all sizes
A staircase gate is a safety gate. Test it by pushing hard from both sides. If the clamps slip at all, add a second set of clamps or switch to wider U-bolts that grip more surface area on the post.
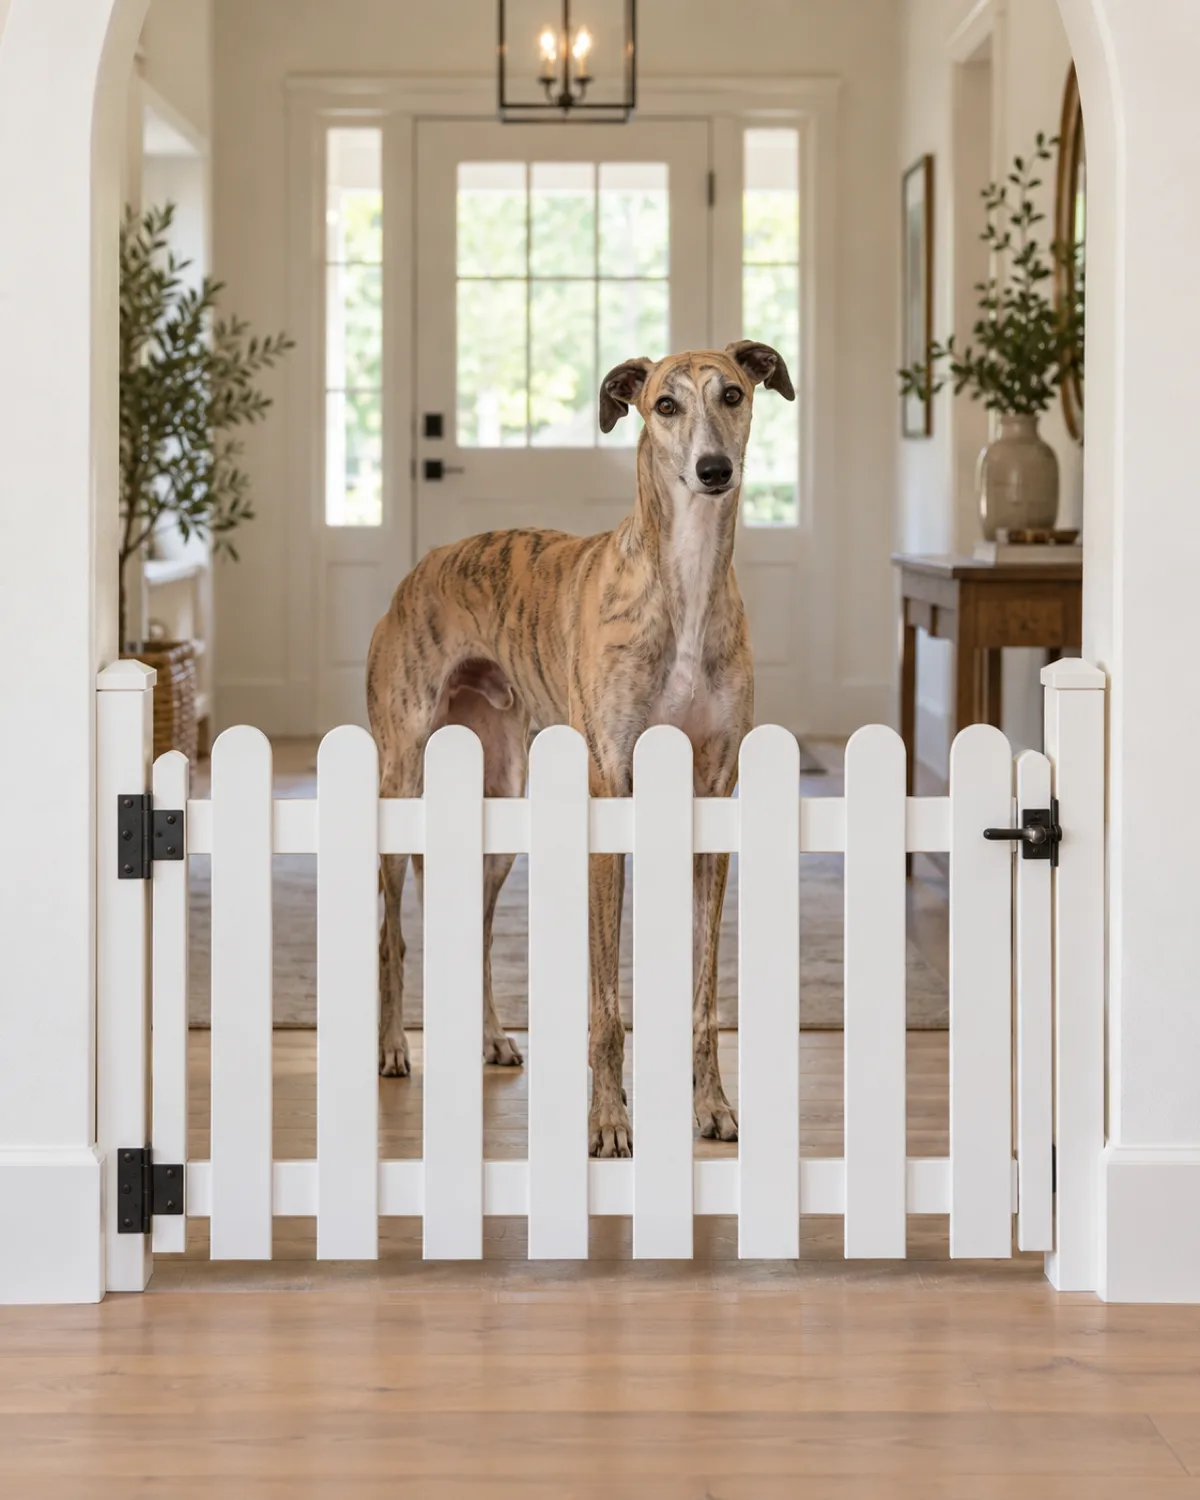
13. Indoor Picket Fence Gate
A knee-height picket fence gate looks charming in a wide archway or open floor plan. Cut pointed pickets from one-by-three boards, screw them to two horizontal rails, paint everything white, and mount the finished panel with hinges.
Keep the picket spacing under two inches so a small dog cannot squeeze through. Round the points of the pickets with sandpaper — decorative points should not actually be sharp.
Best for: wide archways, entryways, small-to-medium dogs, classic or cottage decor
This is a low gate by design. It stops small and medium dogs from crossing but a large dog can step over it. If you need to contain a big dog, build it taller or choose a different design from this list.
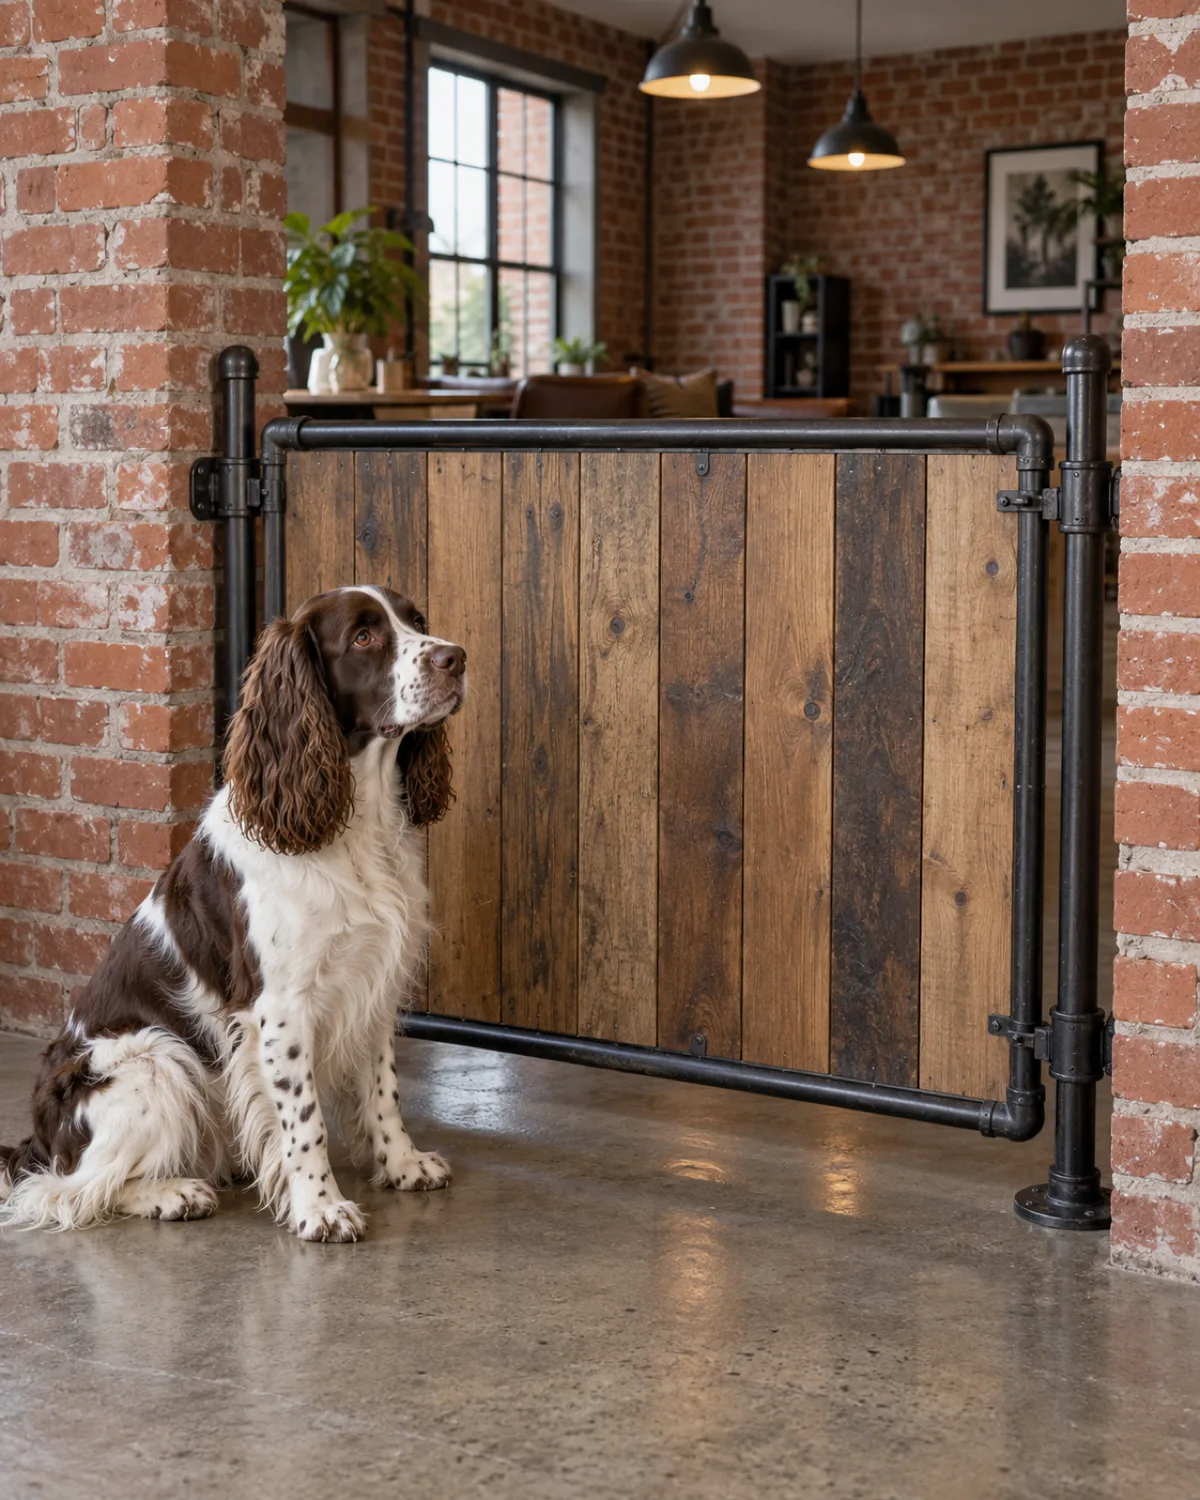
14. Pipe and Fitting Industrial Gate
Black iron pipe fittings from the plumbing aisle screw together into a sturdy gate frame without welding. Build a rectangle from three-quarter-inch pipe and fittings, bolt floor flanges to the floor or wall on one side for the hinge point, and fill the frame with a piece of reclaimed wood.
The pipe frame is heavy and strong — this is one of the few DIY gates that can stand up to a large, determined dog. The industrial look fits loft apartments, basements, and modern farmhouse spaces.
Materials: three-quarter-inch black iron pipe and fittings, floor flanges, reclaimed wood or plywood, bolts
Time: two to three hours
Best for: loft apartments, basements, large or strong dogs, industrial decor
Thread sealant tape on the joints keeps them from loosening over time. Wipe the pipe with mineral spirits before assembly to remove the oily coating, then spray with clear matte lacquer to prevent rust marks on your floor.
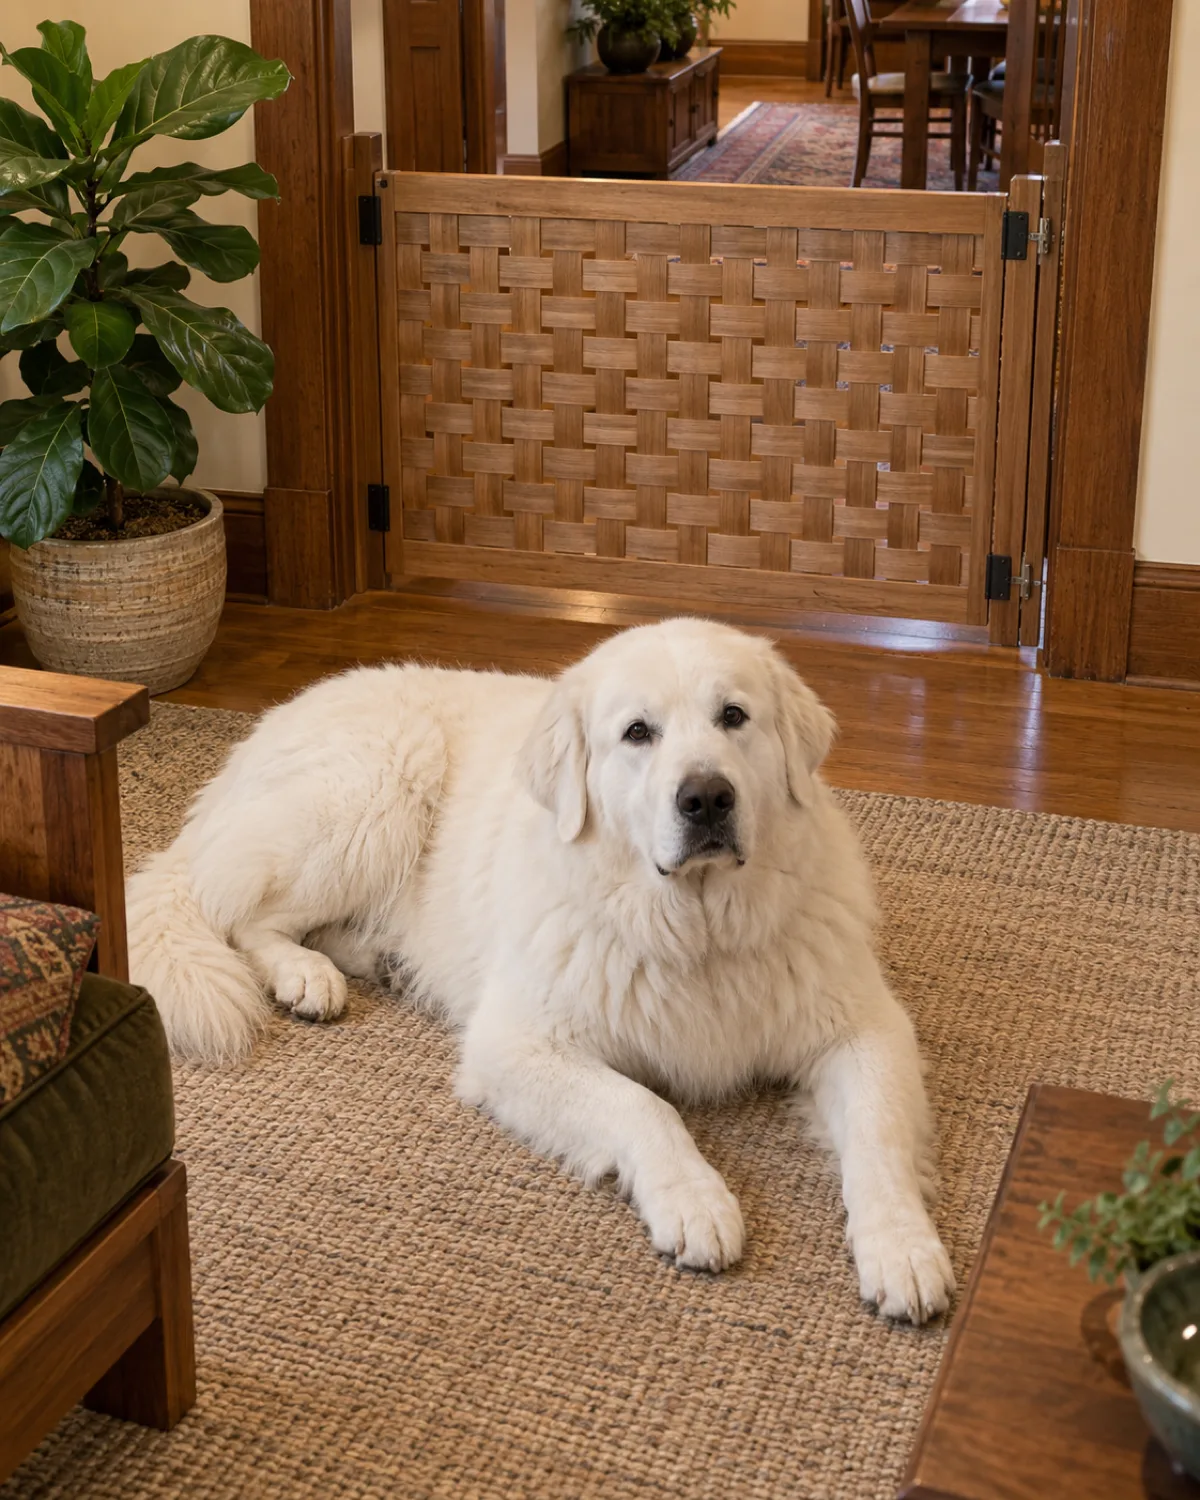
15. Woven Basket Weave Panel Gate
Thin wood strips woven over and under each other in a basket pattern create a panel with a handmade texture that looks expensive. Build a simple rectangular frame from one-by-two lumber, then weave quarter-inch-thick wood strips (lath strips or ripped-down plywood) through vertical slats set into the frame.
The weaving takes patience but no special tools — just a staple gun to tack each strip in place at the ends. Mount the finished panel with hinges and add a latch.
Materials: one-by-two lumber for the frame, quarter-inch wood strips or lath, staple gun, hinges, latch
Time: three to four hours
Best for: craftsman or mid-century interiors, wide doorways, dogs who do not chew
The basket weave panel is surprisingly rigid once all the strips are woven and stapled. Finish it with a coat of clear polyurethane or tung oil to protect the wood and bring out the grain pattern.
If you want to block off a room without building anything, a crate gives your dog a safe contained space while you are away. And once the gate is up and the dog is settled, a few brain games on the other side of it keep them entertained.
Save this for later
15 DIY Dog Gate Ideas
1Pallet Wood Slat GateFree pallet, brass hinges, one afternoon — rustic and sturdy.
2Tension Rod Fabric PanelNo tools, no holes, renter-friendly canvas barrier.
3PVC Pipe Frame GateLightweight, disassembles for storage, under an hour.
4Barn Door SliderSlides open without eating floor space in tight hallways.
5Stacked Dowel Rod GateClean modern look with see-through horizontal rods.
6Baby Gate Extension HackBolt a wood panel to your existing gate for wide openings.
7Plywood Cutout GateJigsaw an arch or wave top for a decorative silhouette.
8Driftwood and Rope GateCoastal wall art that doubles as a visual barrier.
9Old Shutter GateSalvage-yard shutter cut to height, vintage charm for five dollars.
10Chicken Wire Frame GateSimplest build on the list — lumber frame plus stapled wire.
11Accordion Fold ScreenFreestanding zigzag, no mounting, folds flat when not needed.
12Banister-Mount GateClamps to stair posts without drilling — safe for stairs and leases.
13Indoor Picket Fence GateCharming knee-height barrier for archways and small dogs.
14Industrial Pipe GateBlack iron pipe frame — heavy, strong, loft-ready.
15Woven Panel GateBasket-weave wood strips for a handmade craftsman look.
pawliqa.com
P
About the author
Jess Calloway
Jess Calloway edits Pawliqa, where she shares dog care, grooming, training, and new-owner tips — plus DIY and pet-friendly home ideas — for anyone who wants a happy, well-cared-for dog. As a dog mom to three very different dogs, she writes the honest, tested version of what actually works. Every guide is image-led and reviewed for clarity, usefulness, image accuracy, and Pinterest-to-page alignment before it goes live. Visit the About page.
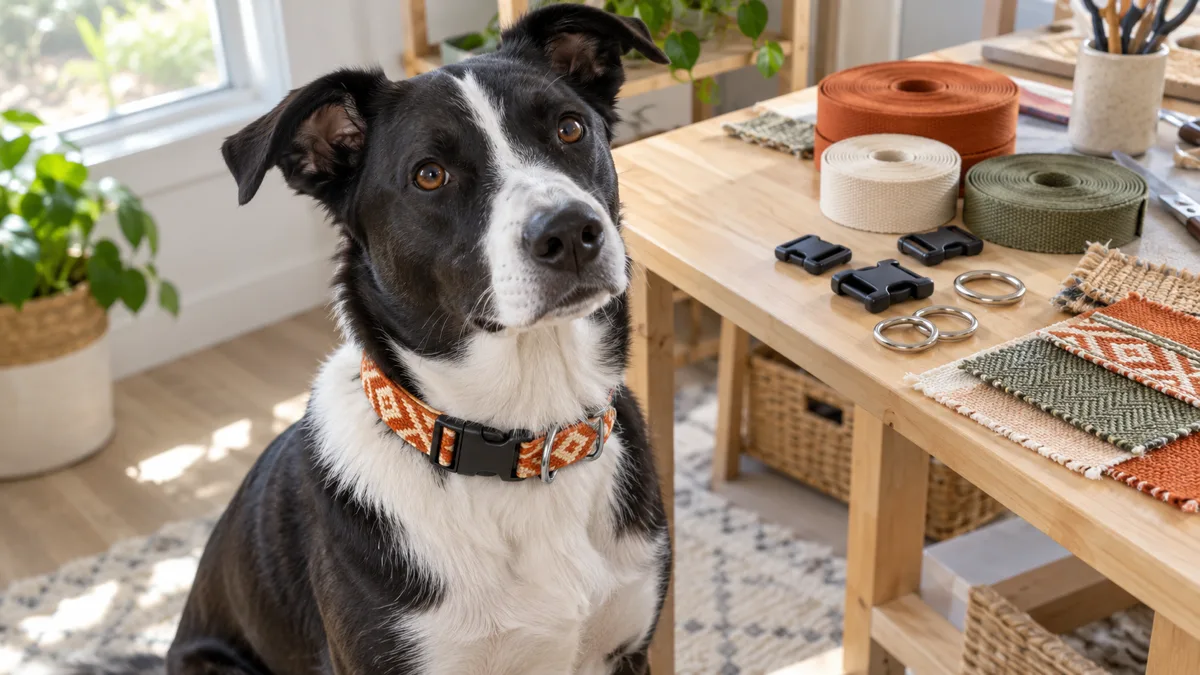
Making a dog collar at home gives you full control over fit, material, and style. This guide walks through picking the right webbing, threading hardware, hand-sewing a box stitch that holds, and running the safety checks that matter before your dog wears it out the door.