A store-bought dog bed costs forty to a hundred dollars and lasts a year or two before it goes flat. A homemade one costs half as much, fits the exact corner you need it for, and gives you something to do with that pile of old t-shirts.
These eleven projects range from a no-sew fleece blanket you can finish during one movie to a foam-and-canvas bolster that rivals anything on a pet store shelf. If you want ready-made bed ideas instead, start there.
Jump to a project
11 DIY dog bed ideas
From a tied-fringe fleece blanket that needs zero stitching to a foam-and-canvas bolster that looks like it came from a boutique. Pick the project that matches your skill level and your dog.
1. No-Sew Fleece Blanket Bed
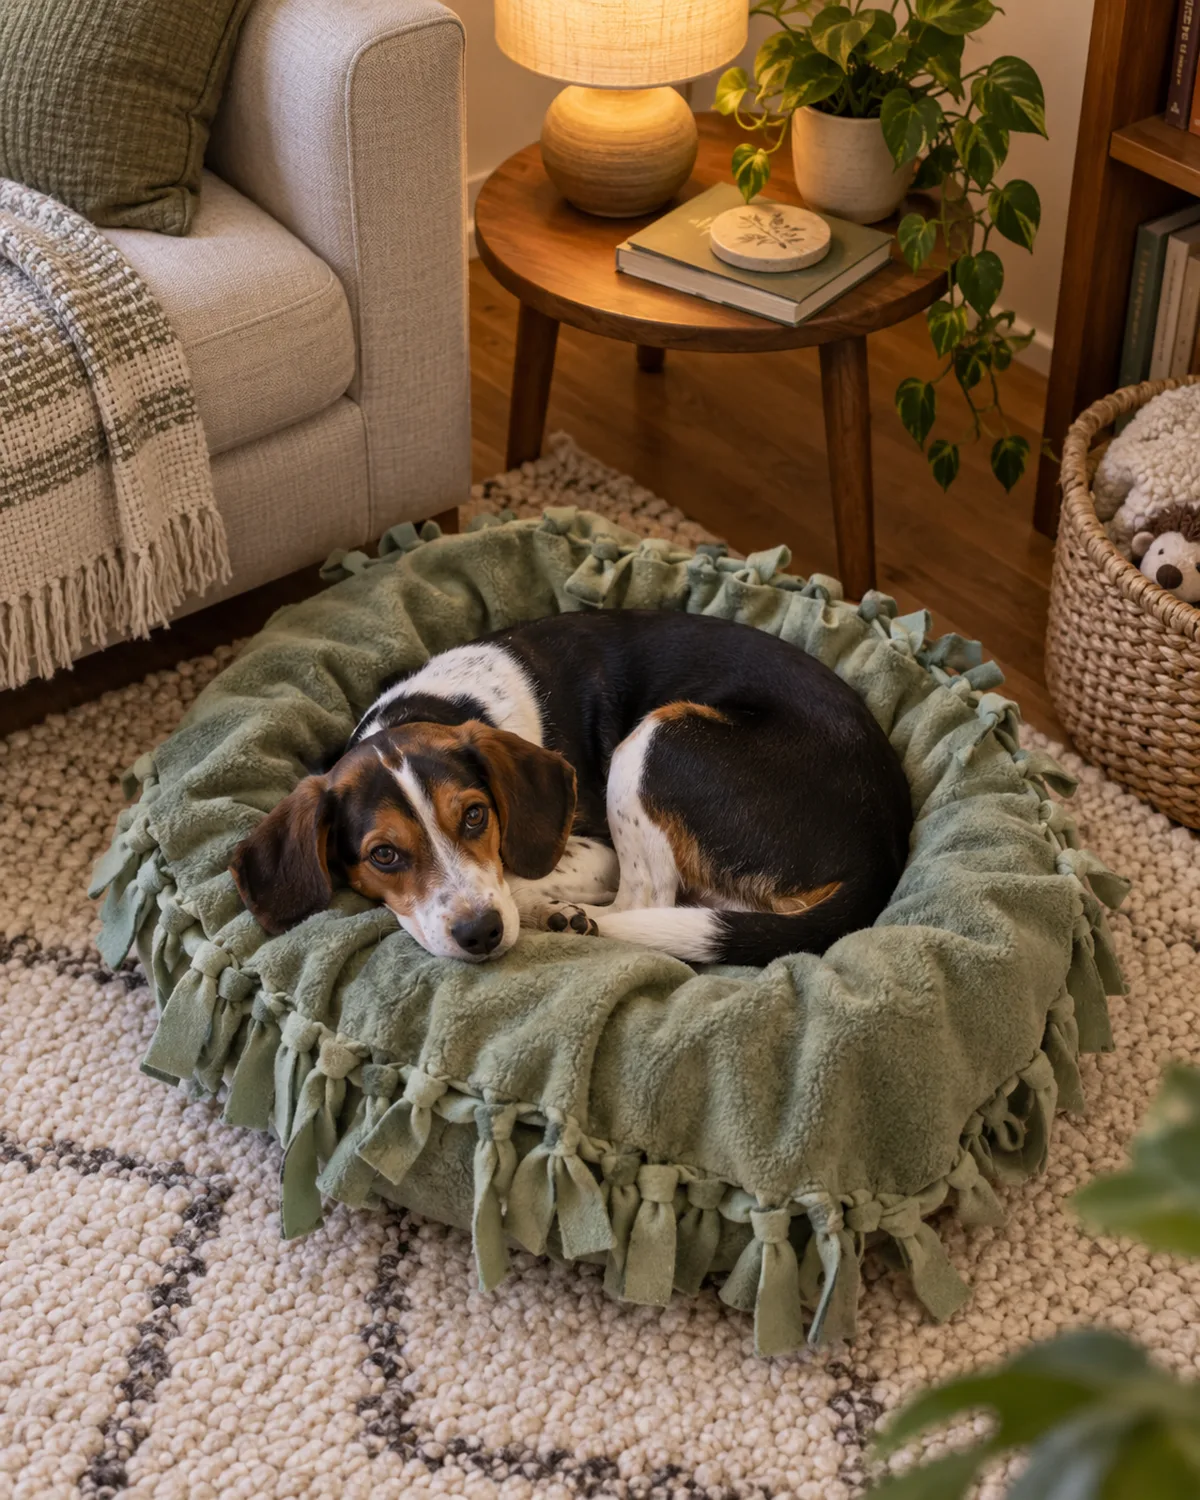
Two fleece blankets, a bag of polyester stuffing, and a pair of scissors are all you need. Cut matching rectangles from both blankets, stack them with stuffing in between, then snip three-inch fringe strips around all four edges and tie each pair into a knot.
The tied fringe locks the stuffing inside without a single stitch. The whole project takes about forty-five minutes, and you can throw the finished bed in the washing machine on cold whenever it starts to smell.
- Skill level: Absolute beginner
- Cost: Under fifteen dollars if you buy fleece on sale
- Best for: Dogs under forty pounds who like to nest in soft fabric
Pick a fleece pattern that matches your living room instead of the neon paw prints from the pet store. A solid olive or charcoal reads more like a throw blanket than a dog accessory.
Match the project to your situation
Where should you start?
You do not need to build all eleven. Pick the situation below that fits your dog and your toolkit, then start with those two or three projects.
2. Upcycled Suitcase Bed
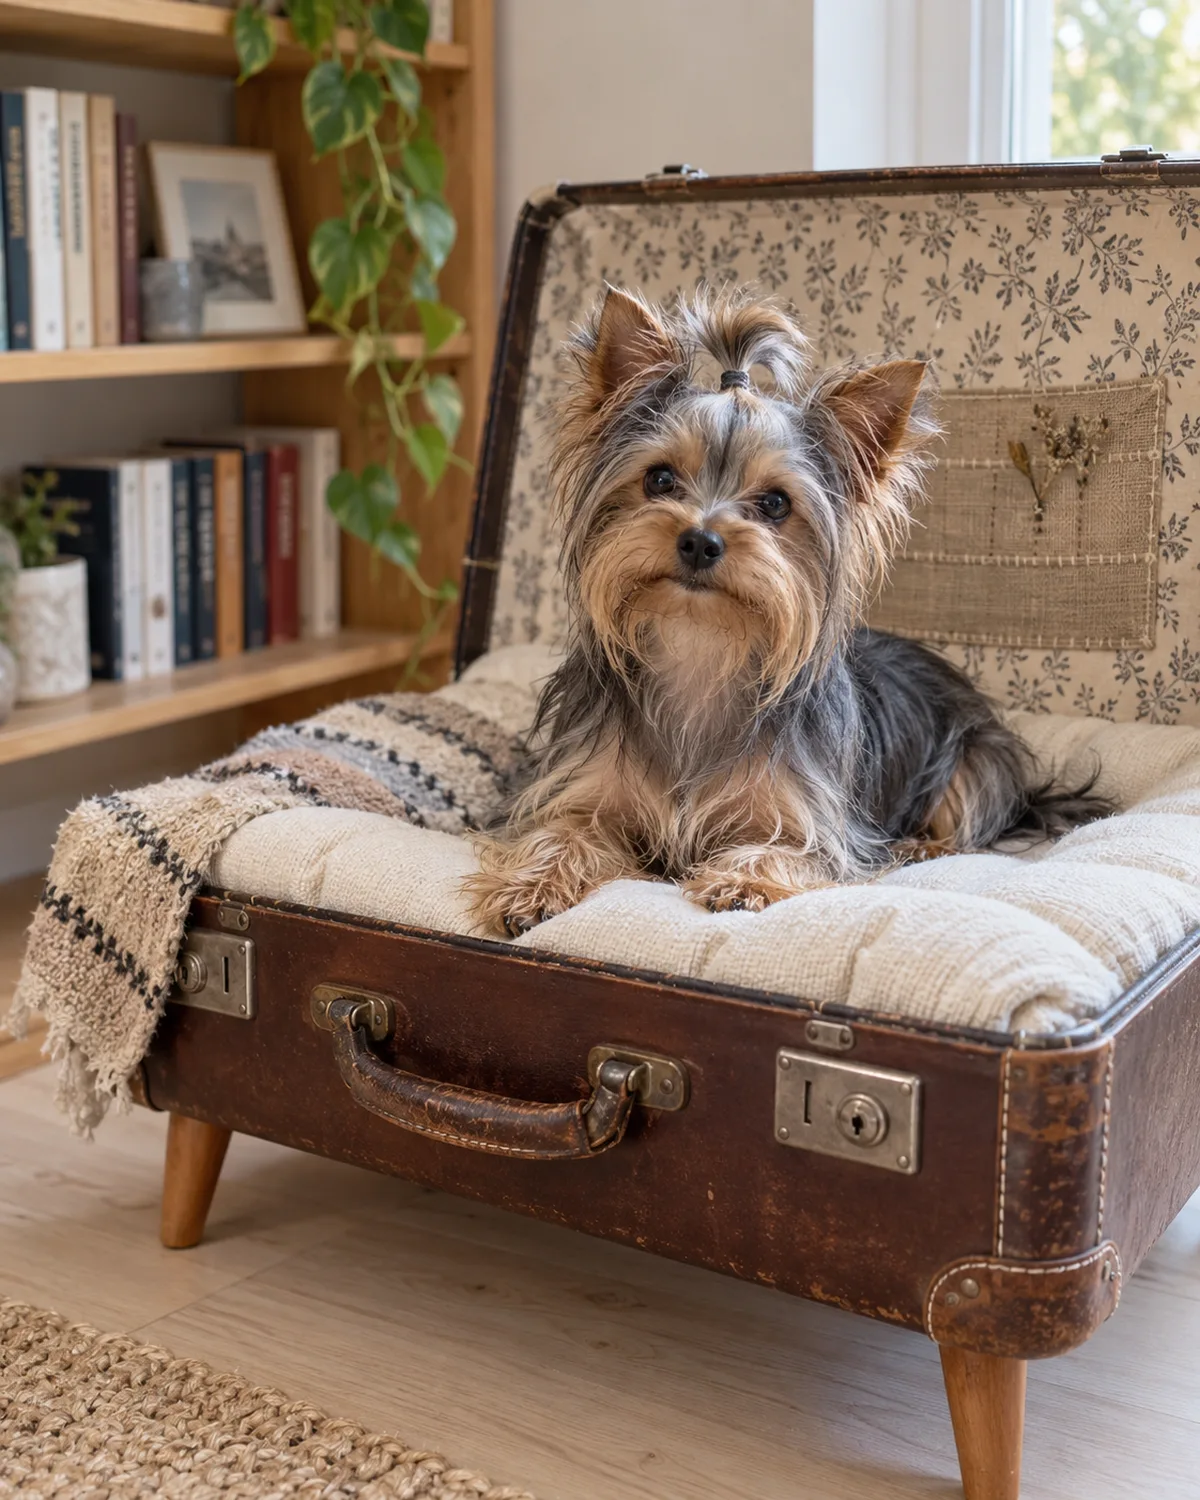
Find a hardshell suitcase at a thrift store for five to ten dollars. Remove the lid completely or prop it open at ninety degrees with a small chain. Screw four short furniture legs into the bottom for stability and drop a cushion cut to fit inside.
The rigid walls give small dogs the enclosed feeling they gravitate toward, and the raised sides block floor drafts in drafty older homes.
- Skill level: Beginner (a screwdriver and four leg brackets)
- Cost: Ten to twenty dollars including the suitcase
- Best for: Small dogs under twenty-five pounds who curl up to sleep
Sand any rough edges on the hinge side where the lid was removed. A strip of adhesive felt along that edge keeps your dog from catching a nail.
3. Wooden Pallet Frame Bed
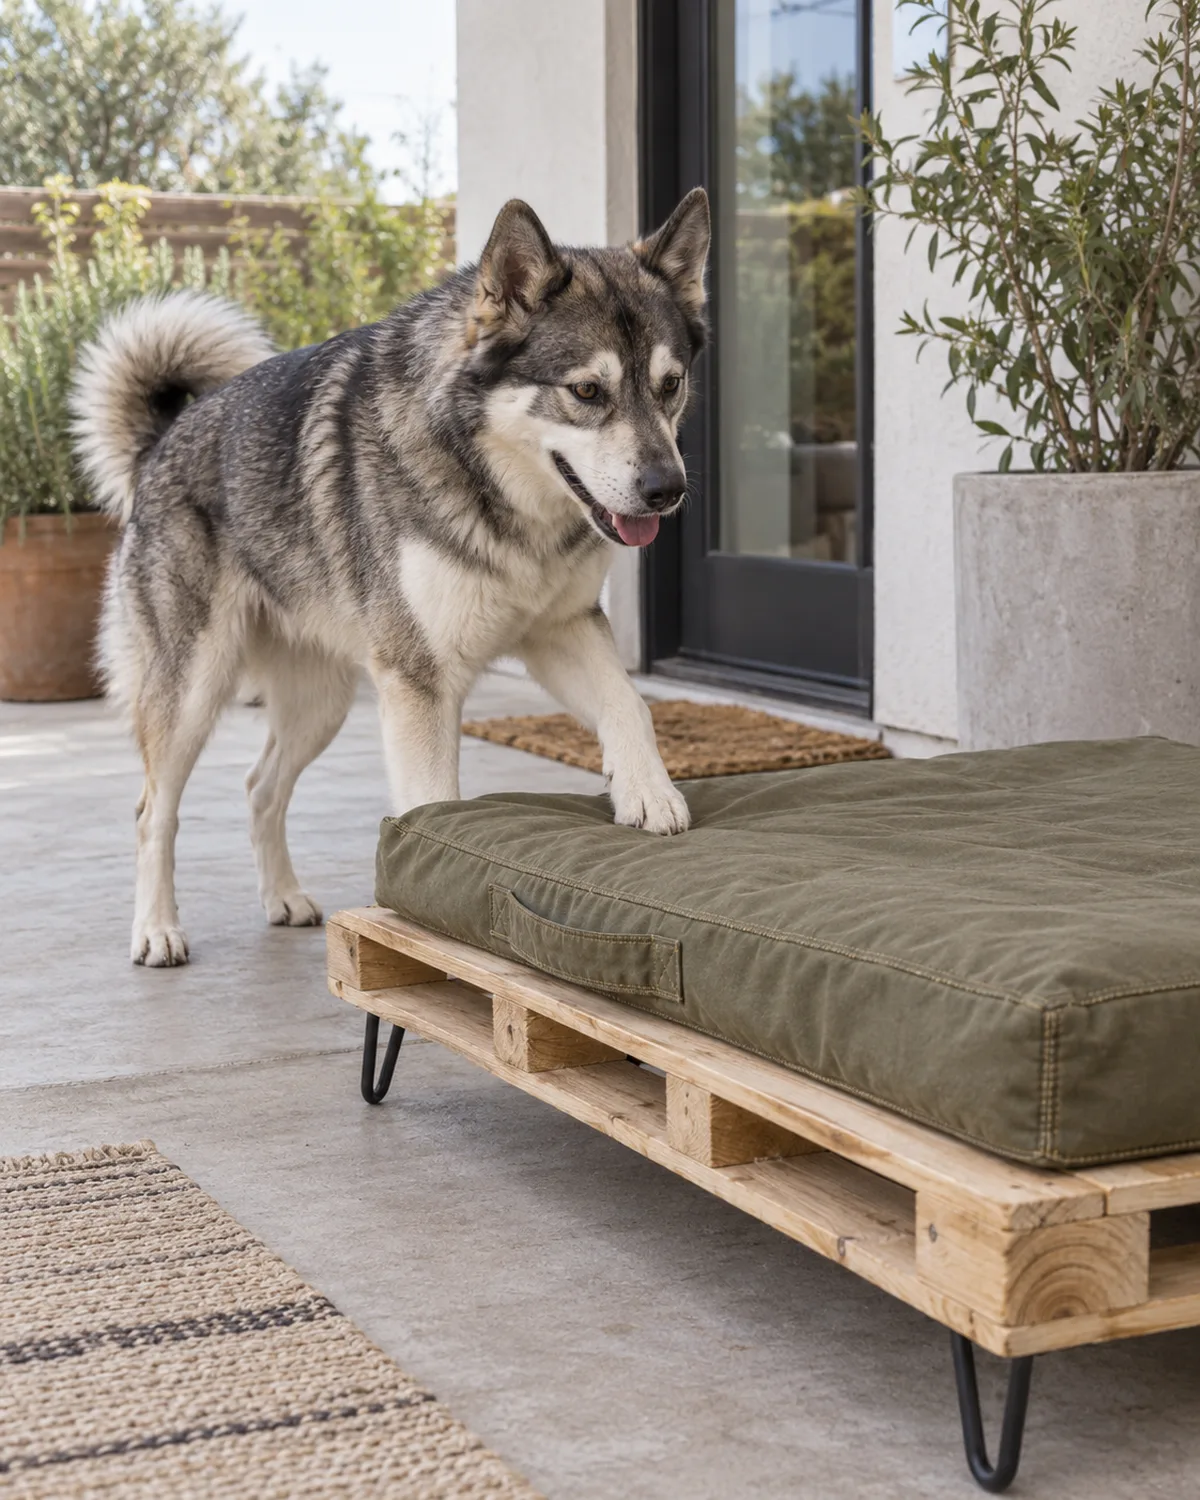
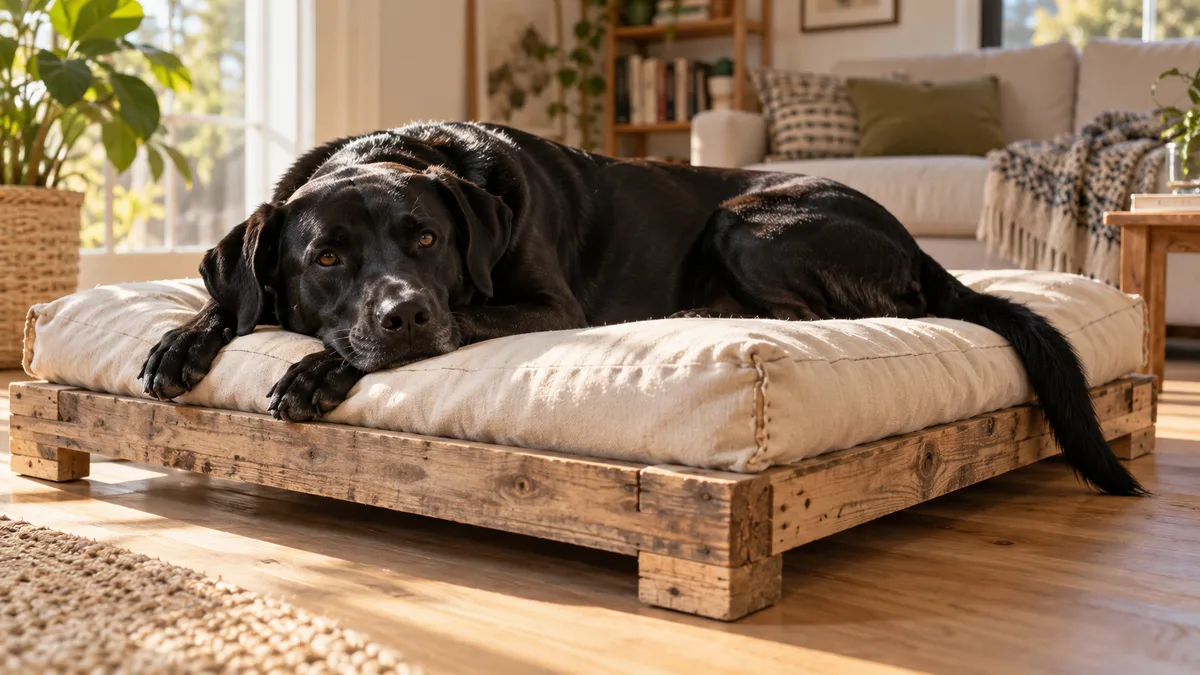
A single shipping pallet makes a sturdy elevated base. Sand the entire surface until smooth, seal with a pet-safe water-based polyurethane, and attach four hairpin legs from a hardware store. Lay a waterproof mattress pad on top.
The slatted design lets air circulate underneath, which keeps your dog cooler in summer and prevents moisture buildup on concrete or tile floors.
- Skill level: Intermediate (sanding, sealing, attaching legs)
- Cost: Free pallet plus fifteen to twenty dollars for legs and sealant
- Best for: Medium to large dogs who overheat on solid surfaces
Check the pallet stamp before you start. Look for the HT mark, which means heat-treated rather than chemically treated. Avoid any pallet stamped MB.
How to check a pallet
Look at the end block for a branded stamp. HT inside a wheat sheaf symbol is safe. If there is no stamp at all, pass on that pallet and grab another one.
4. Old Sweater Pillow Bed
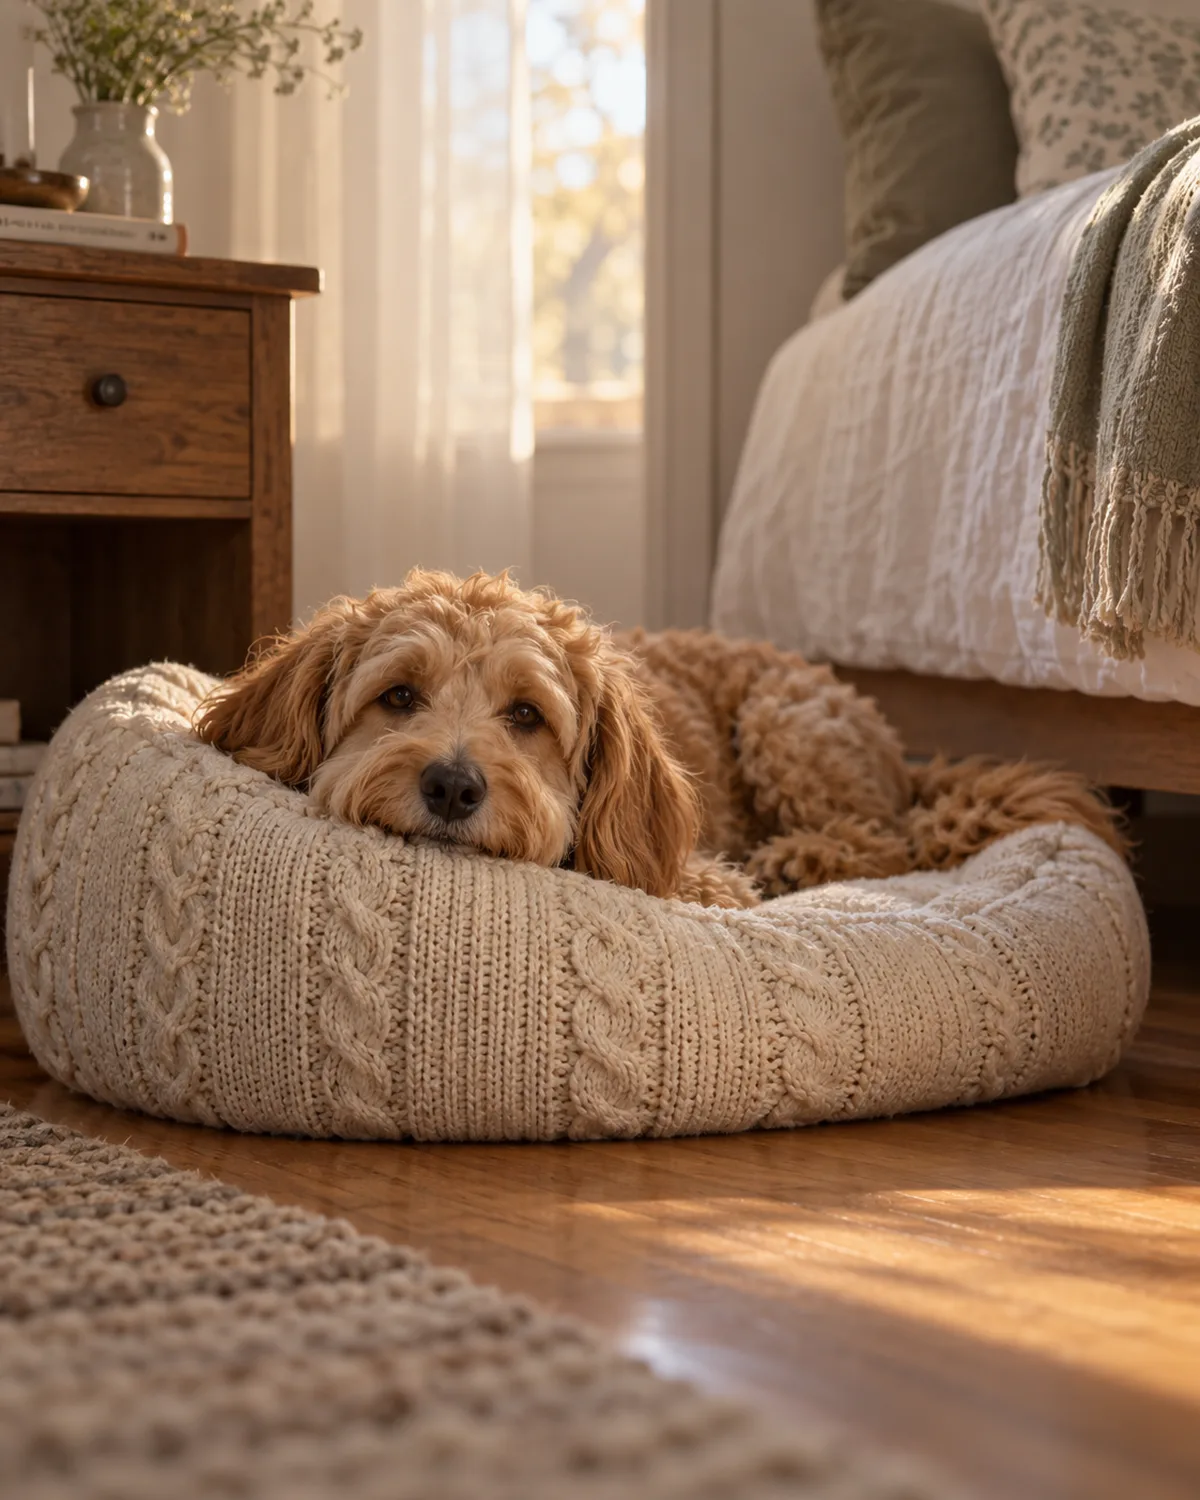
Pull a large crew-neck sweater from the donation pile. Stuff the body with polyester fill, stitch the bottom hem closed, then tuck each sleeve across the chest of the sweater and sew them down to form a bolster rim.
The bolster gives your dog a natural chin rest, and the knit fabric already has the stretch to hold its shape around the fill.
- Skill level: Beginner (basic hand-stitching only)
- Cost: Under five dollars if you already have the sweater
- Best for: Dogs who like to rest their head on an edge while sleeping
Use a cable-knit or thick wool sweater rather than a thin cotton one. Thin cotton stretches out within a week and loses its shape under the weight of the fill.
5. PVC Pipe Elevated Cot
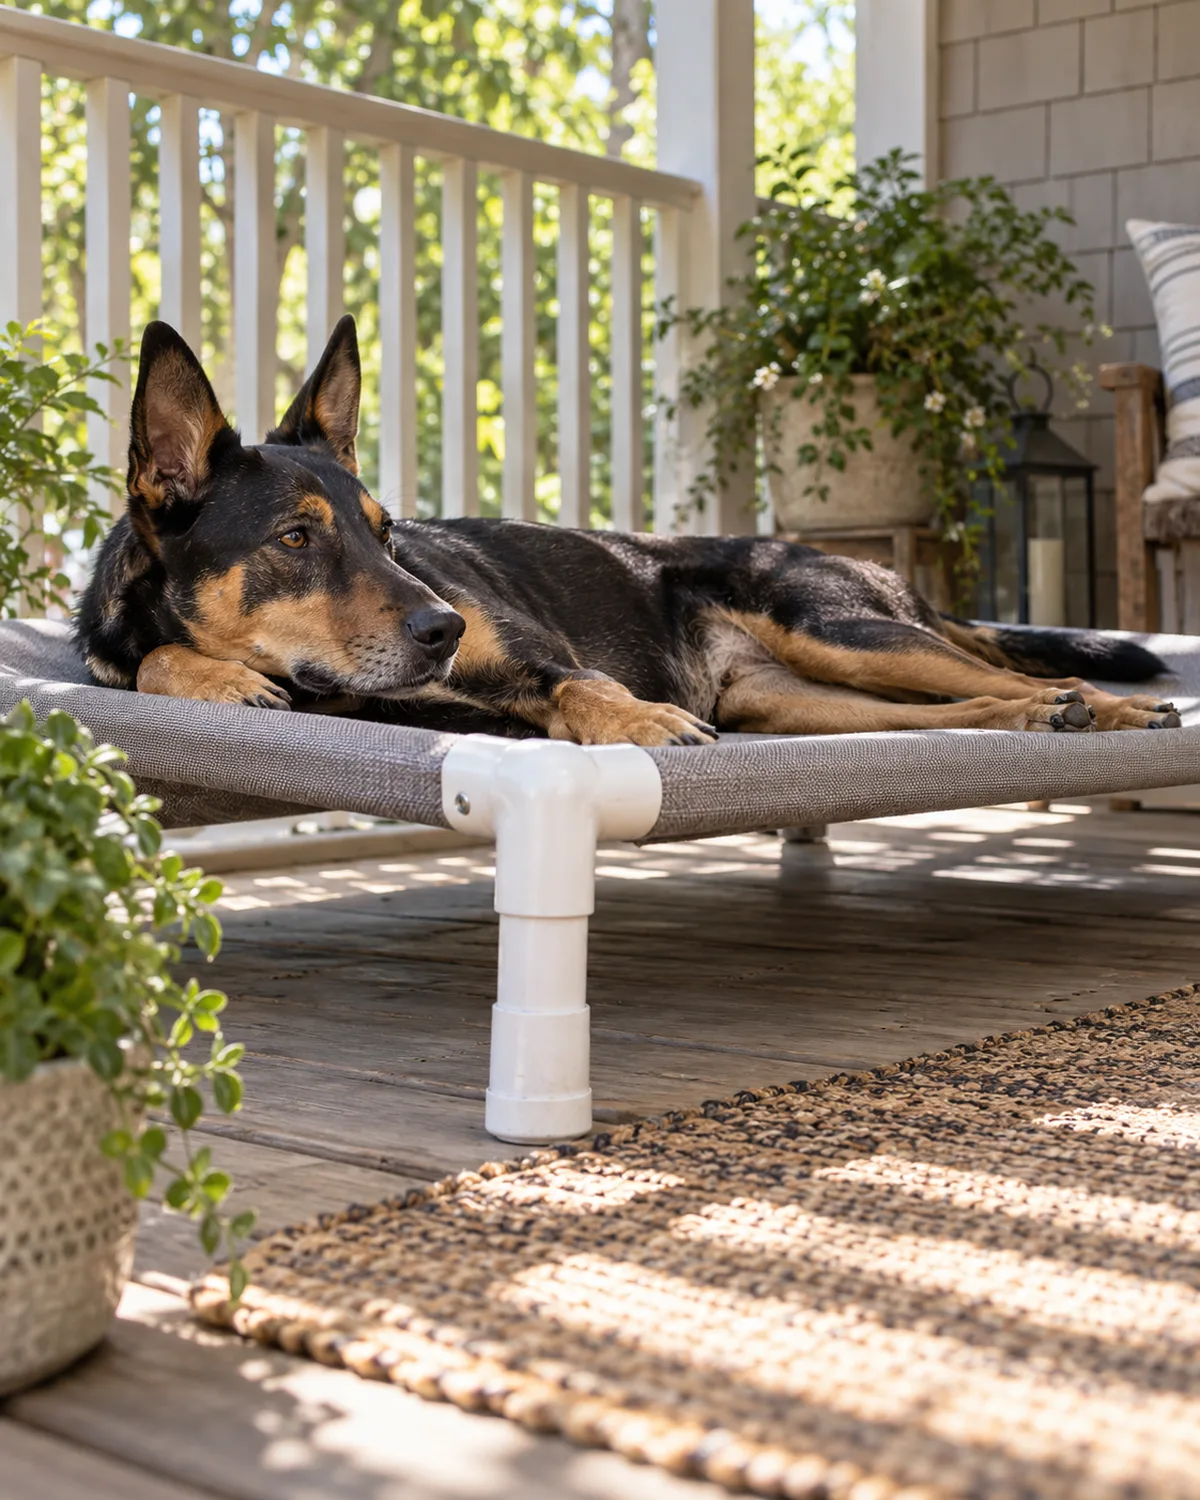
Cut PVC pipes into two long and two short pieces to form a rectangle. Connect the corners with elbow joints. Wrap outdoor fabric over the frame and staple or sew it taut underneath.
The elevated surface keeps your dog off cold basement floors in winter and hot patio surfaces in summer. The entire cot disassembles in seconds for travel or storage.
- Skill level: Beginner (a saw and a staple gun)
- Cost: Twenty to thirty dollars for PVC and fabric
- Best for: Large dogs, senior dogs with joint stiffness, or dogs who sleep on a porch
Use schedule-40 PVC for dogs over fifty pounds. The thinner schedule-20 flexes under weight and sags in the middle within a few weeks.
What separates a bed that lasts from one that falls apart
Three rules for every DIY dog bed
These apply whether you are sewing fleece or sawing pallets. Skip any one and the bed ends up in the trash within a month.
Use washable materialsA bed that cannot be washed will smell within two weeks and get tossed within two months. Fleece, canvas, and cotton jersey all survive the machine. Avoid hot glue as the primary closure — it peels apart in warm water.
Size for your dog, not for the materialsA bed that is too small gets ignored. Measure your dog from nose to base of tail while they sleep stretched out, then add six inches in each direction. That is your minimum interior dimension.
Keep all fasteners hiddenStaples, screws, and wire ties must be completely covered or recessed. A dog who chews will find any exposed metal and either break a tooth or swallow a piece. Countersink every screw head and cover staple rows with fabric strips.
6. Tire Bolster Bed
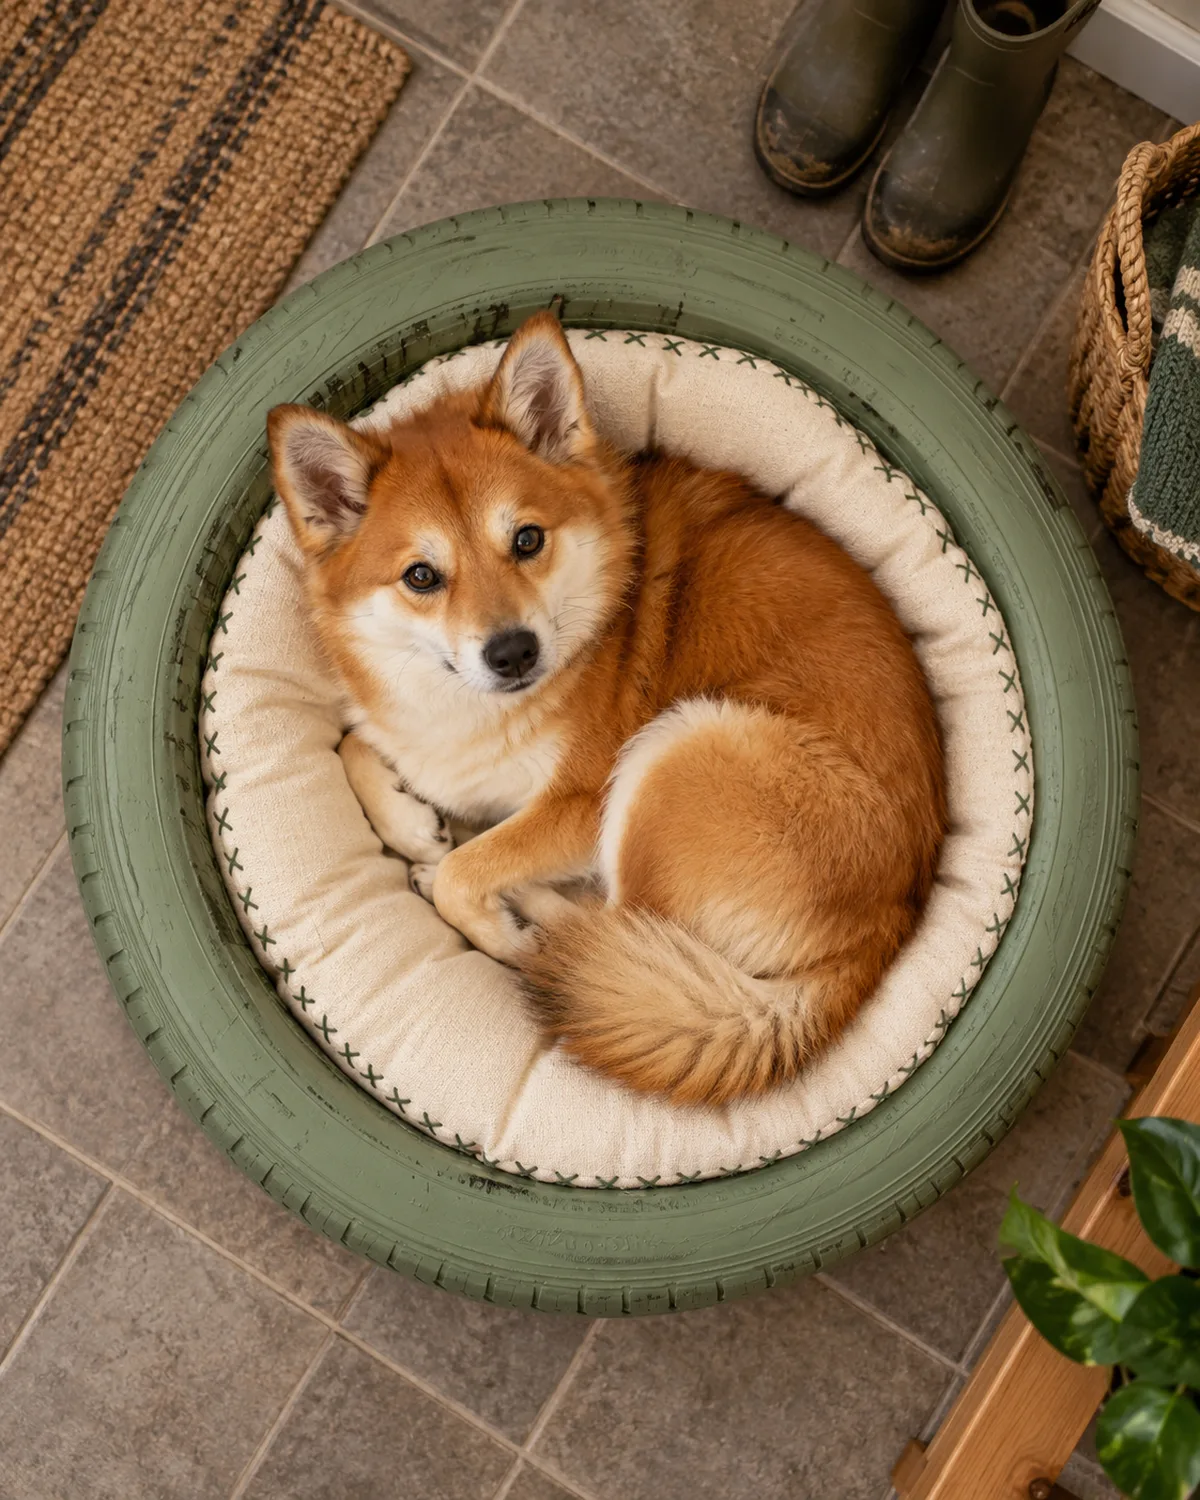
A used car tire from any tire shop is free. Scrub it clean with dish soap, let it dry fully, then spray-paint the exterior with a non-toxic, low-VOC paint in whatever color fits your mudroom or patio.
Cut a round cushion to fit snugly inside the opening. The thick rubber walls create a deep bowl shape that dogs who curl up tightly prefer over flat surfaces.
- Skill level: Beginner (cleaning and spray-painting)
- Cost: Under ten dollars for paint and a cushion cover
- Best for: Dogs who like to nest and lean against a wall while sleeping
Set the tire on a piece of plywood cut to the same diameter. This closes the bottom, keeps the cushion from sagging through, and protects your floor from the rubber tread.
7. Dresser Drawer Nook Bed
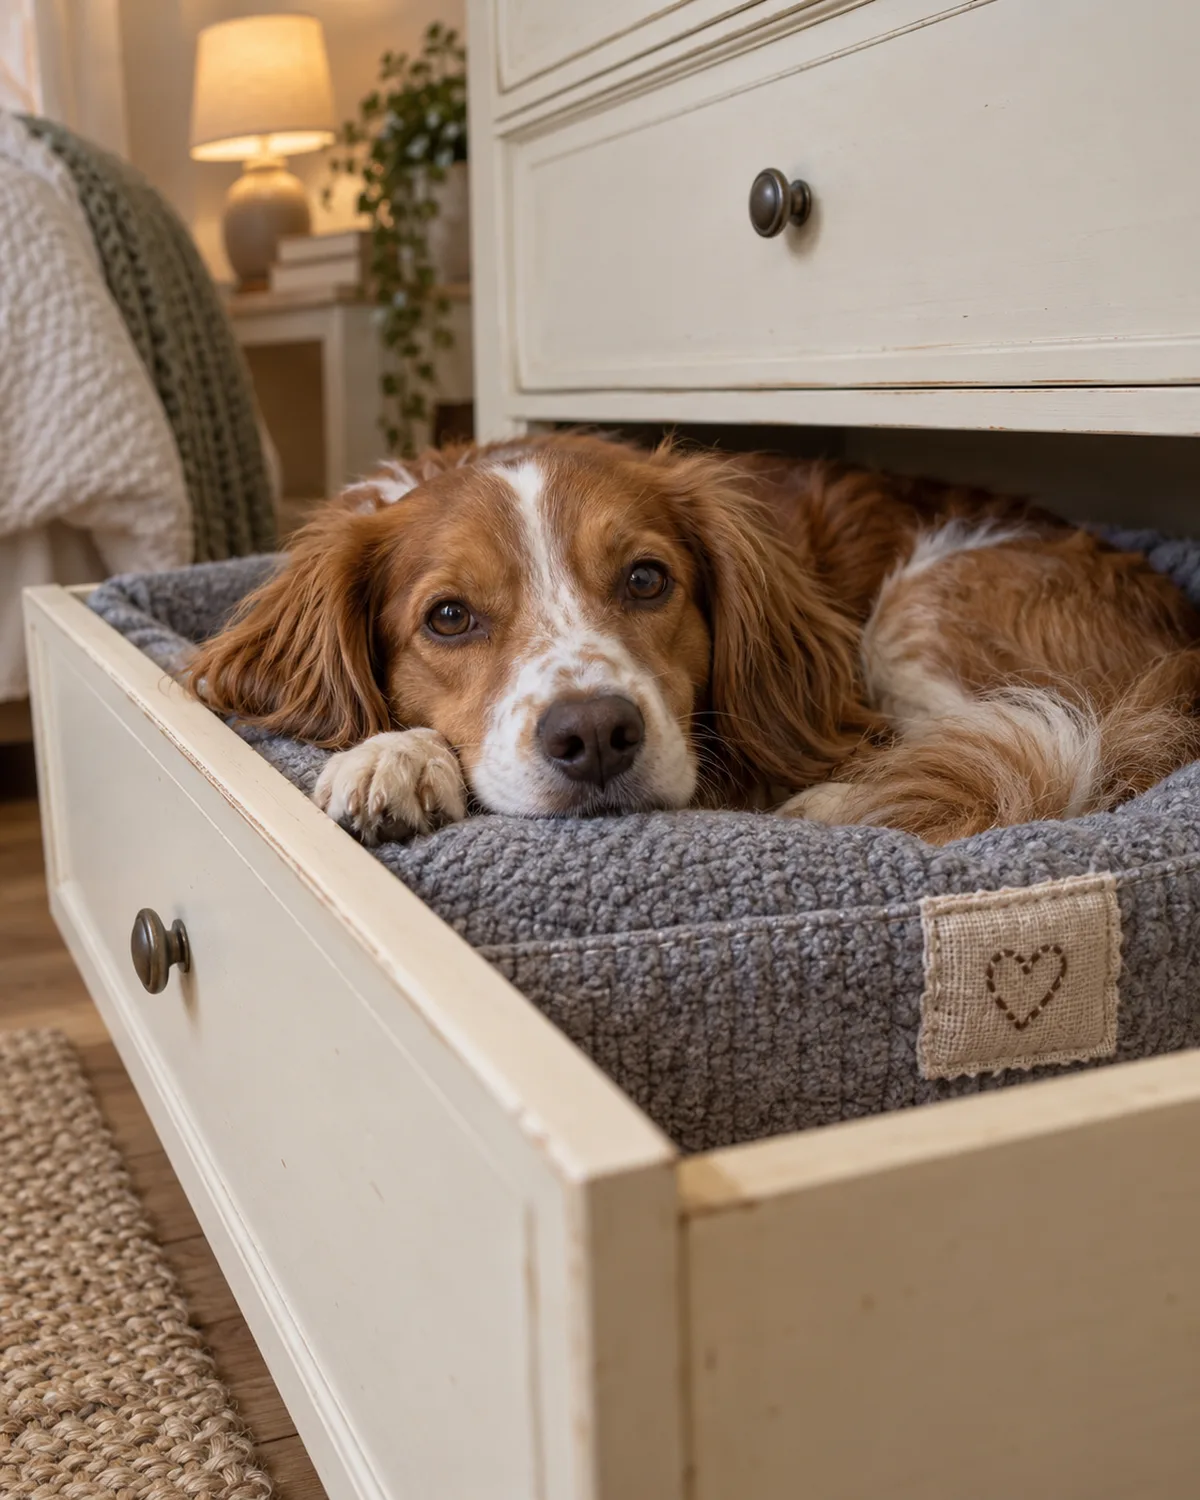
Remove the bottom drawer from an old dresser. Sand any rough or splintered edges smooth, then line the inside with a washable pad or folded blanket.
The surrounding dresser frame creates a three-sided enclosure that mimics a den. Dogs who feel anxious during thunderstorms or when left alone often settle faster in an enclosed space than on an open bed. If you are working on crate training, a dresser nook serves as a secondary calm-down spot outside the crate.
- Skill level: Beginner (sanding only)
- Cost: Free if you already have the dresser, or five to ten dollars at a thrift store
- Best for: Anxious dogs or dogs who already sleep under furniture
Leave the dresser against the wall so it cannot tip forward. If the dresser is top-heavy without the bottom drawer, secure it to the wall with a furniture anchor strap.
8. Braided T-Shirt Rope Bed
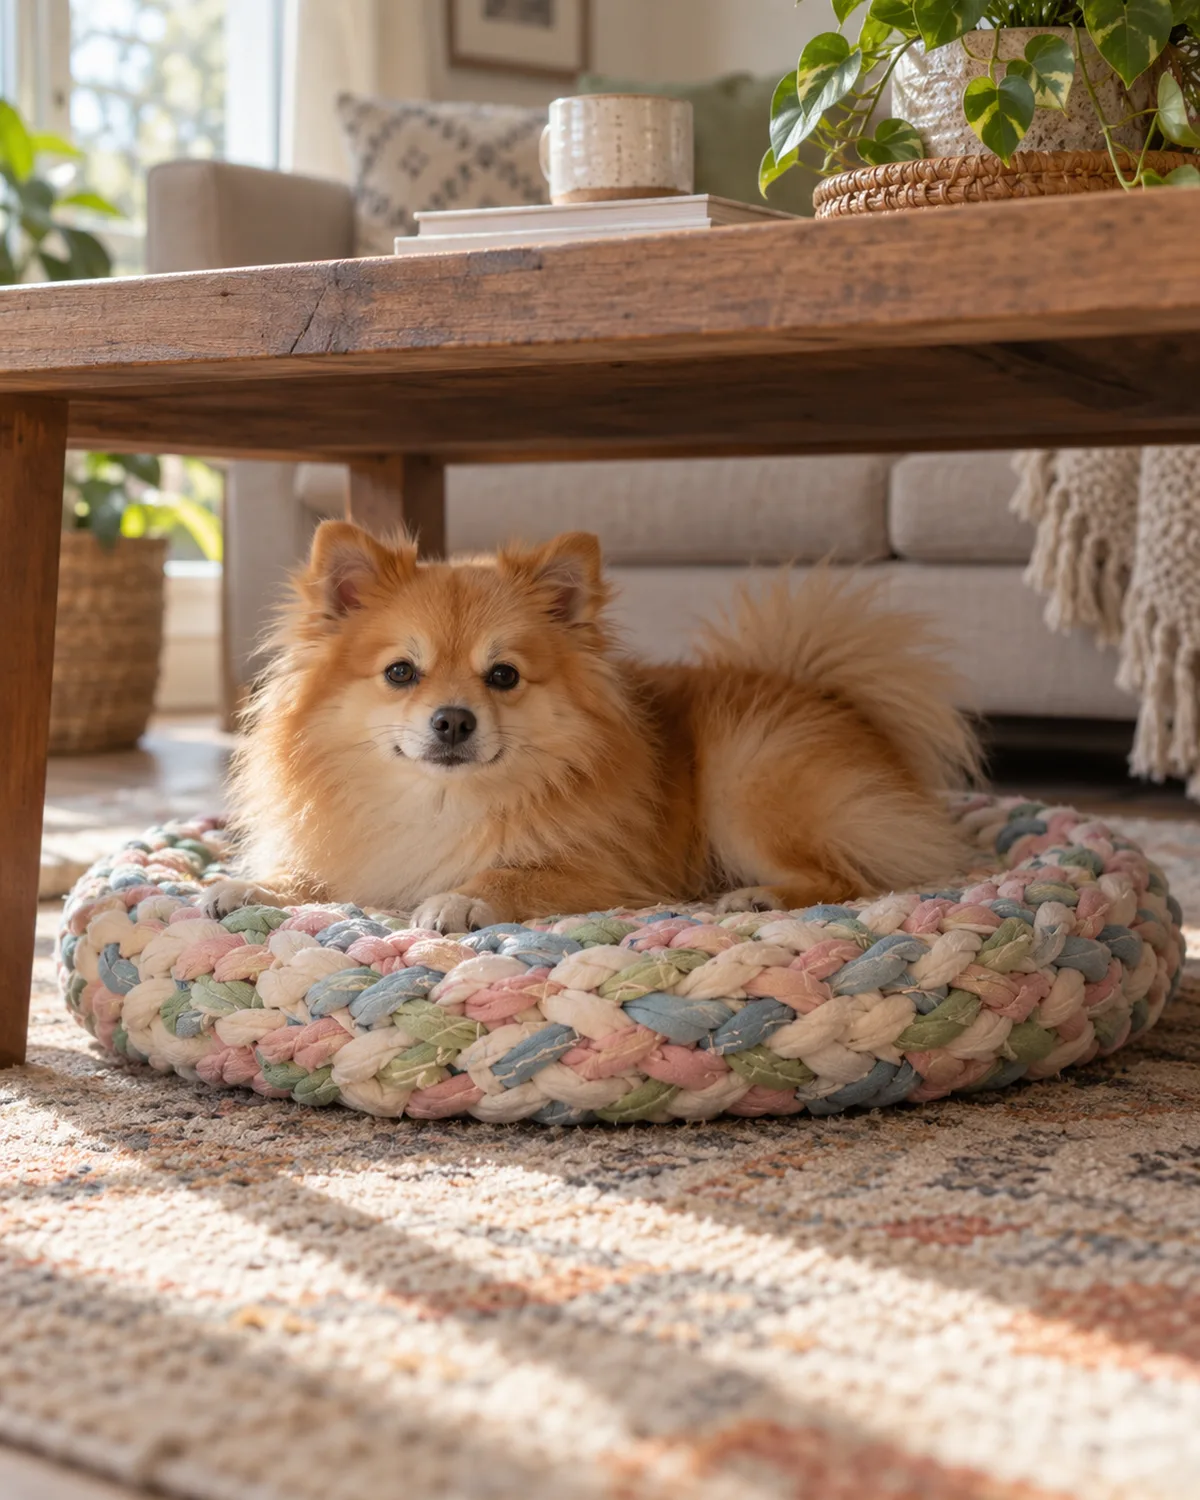
Cut six to eight old t-shirts into strips about two inches wide. Braid three strips together into thick ropes, then coil each rope into a flat spiral and hand-stitch the coils to each other as you go.
The finished bed sits flat like a rug. The cotton absorbs body heat gradually, so it stays warm without trapping excess heat the way synthetic fleece can.
- Skill level: Beginner (braiding and basic hand-stitching)
- Cost: Free if you have old t-shirts
- Best for: Small dogs who sleep on hard floors or under low furniture
Mix shirt colors intentionally. Three shades from the same color family — a dusty rose, a blush, and a cream — produce a bed that looks planned rather than scrappy. This is the same approach that works for DIY dog toys made from scrap fabric.
9. Wine Crate End-Table Bed
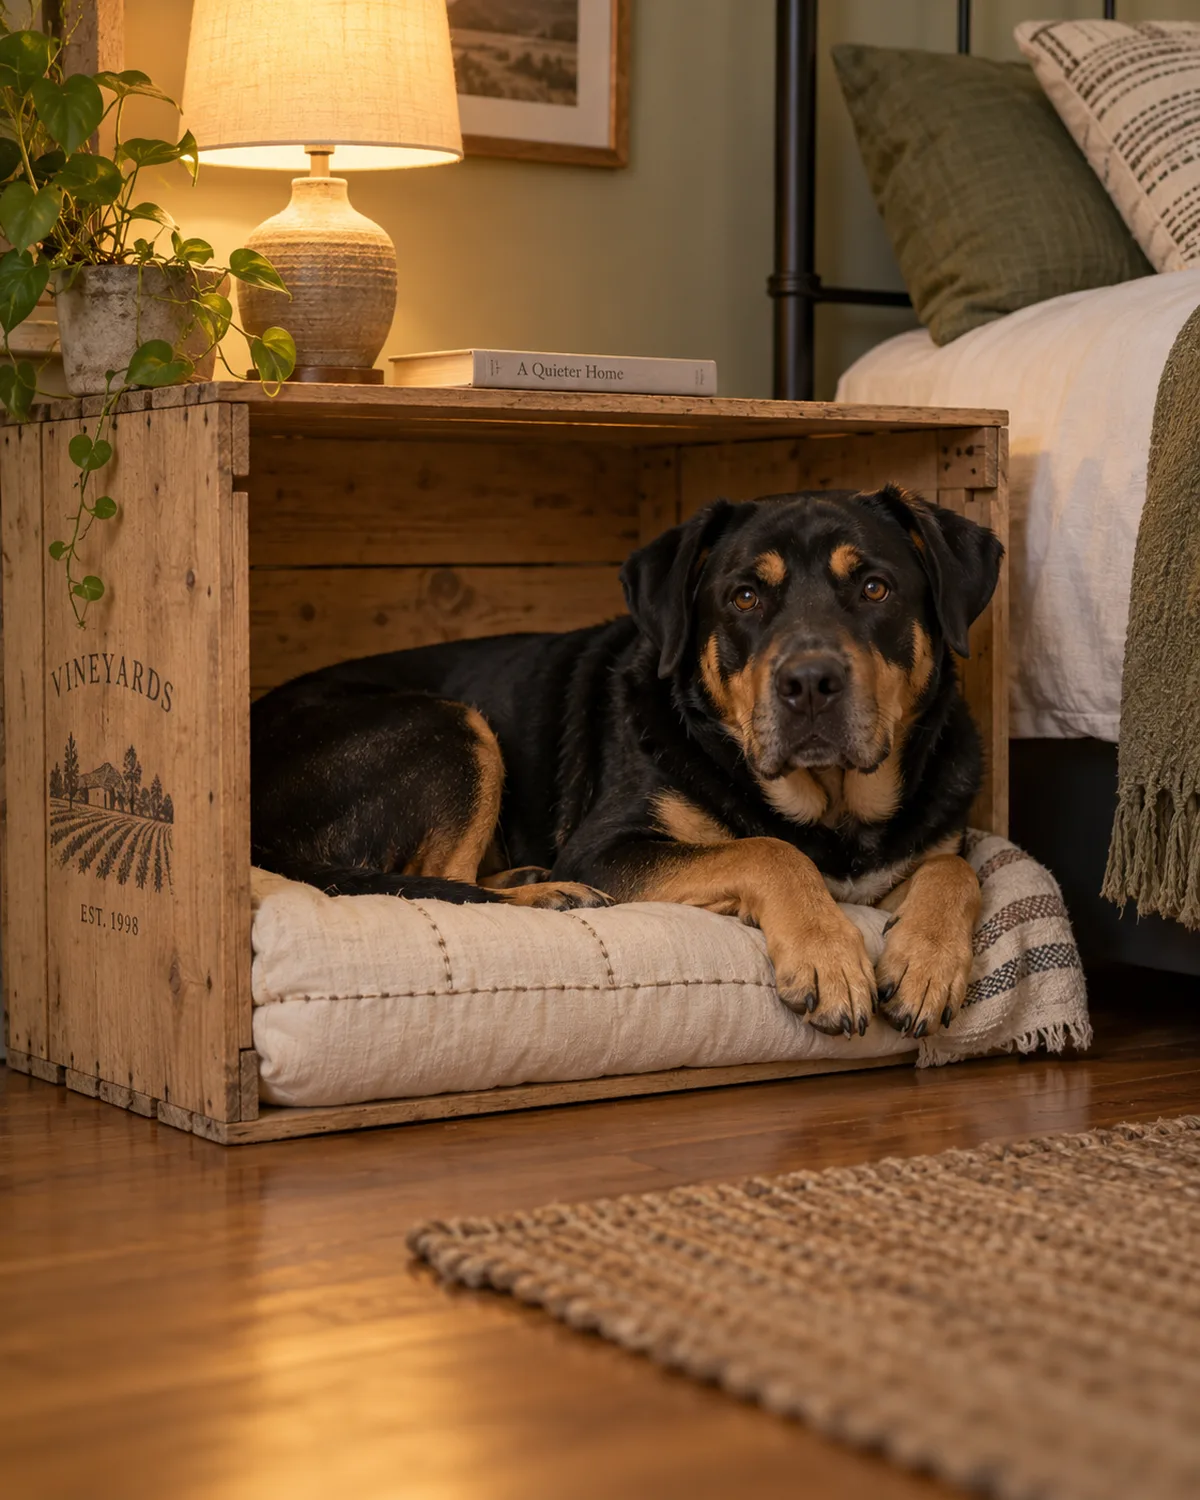
Stand a wooden wine crate on its side so the opening faces your dog. Sand the interior edges, lay a cushion inside, and set a small lamp or a book on top.
The crate doubles as a nightstand in a bedroom or a side table in a living room. Your dog gets a cozy enclosed spot at floor level, and you get a functional piece of furniture that does not scream pet accessory.
- Skill level: Beginner (sanding only)
- Cost: Free to fifteen dollars depending on where you find the crate
- Best for: Dogs who like to sleep beside their owner and lean against a wall
Secure the crate to the wall or the bed frame with a single L-bracket so it cannot slide when your dog pushes off the back wall to stand up. If you are building a full dog room, a row of three crates makes a modular sleeping station.
10. Foam and Fabric Bolster Bed
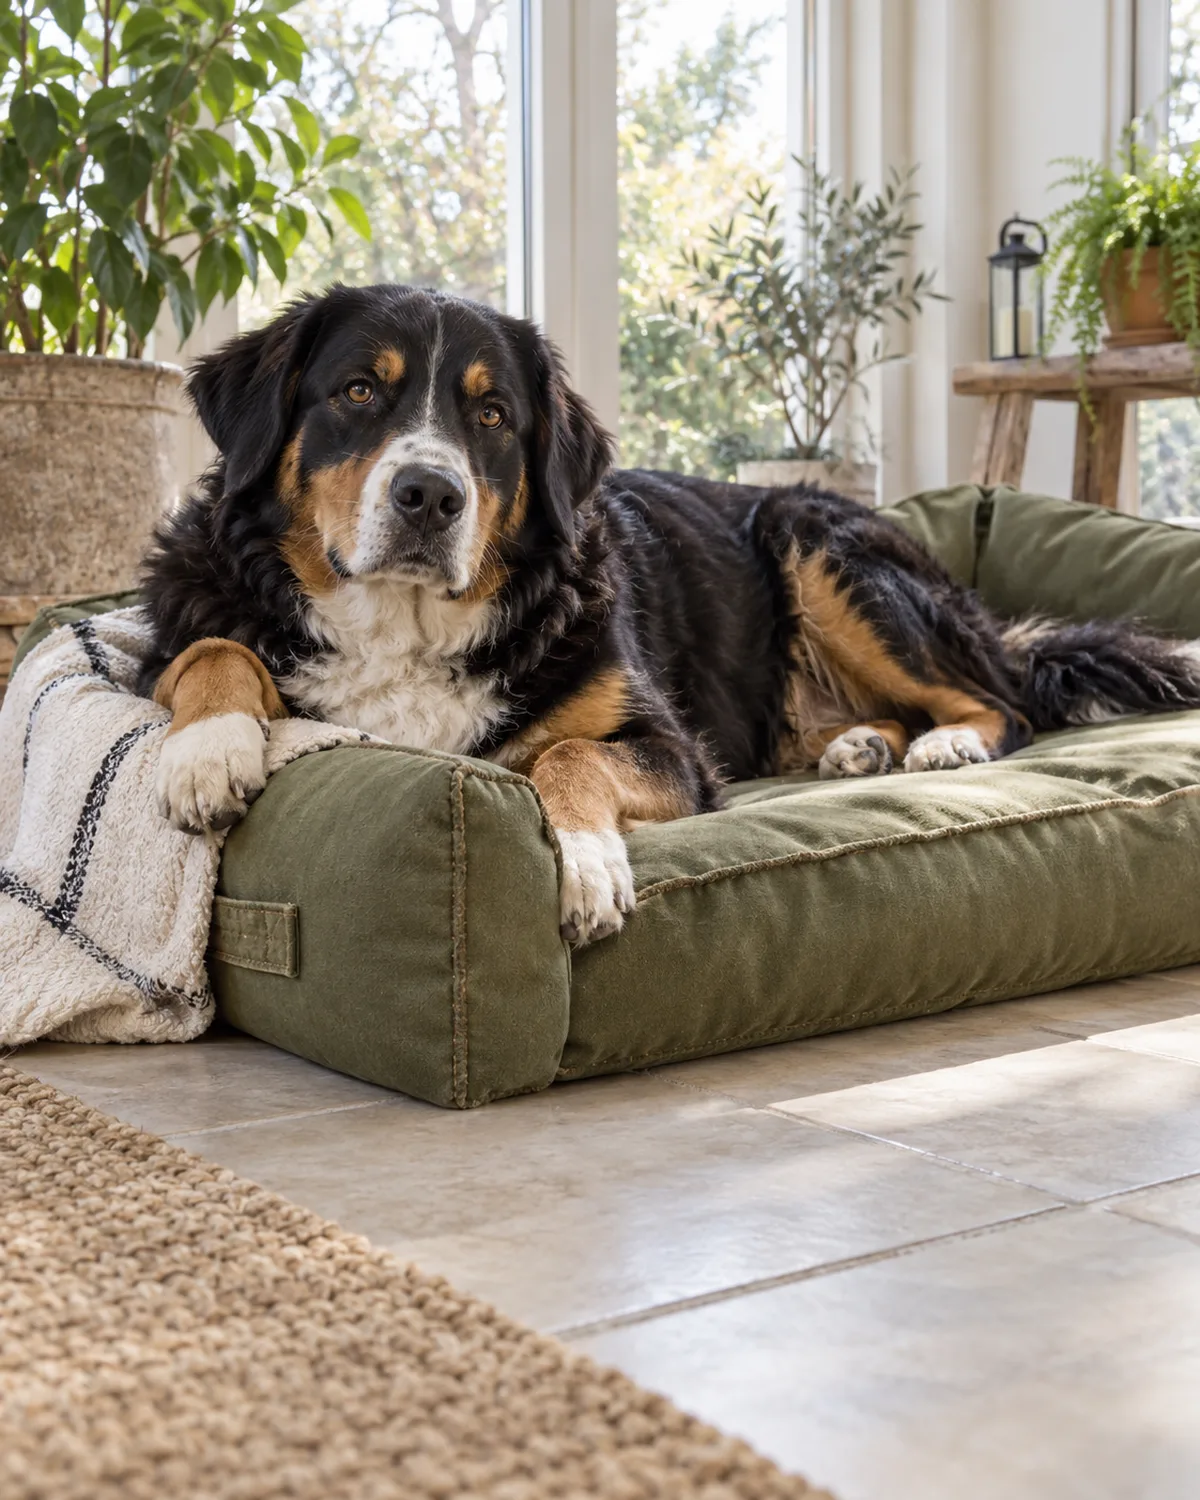
Cut high-density foam into a rectangular base and four side strips. Wrap each piece individually in durable canvas or duck cloth, then zip-tie the sides to the base through pre-punched holes.
This modular design means you can replace a single side panel when it wears out instead of throwing away the entire bed. Sew a zippered cover that slips over the whole assembly for easy washing.
- Skill level: Intermediate (cutting foam, sewing a fitted cover)
- Cost: Thirty to forty-five dollars for foam and fabric
- Best for: Large dogs or senior dogs who need consistent joint support
Buy two-inch-thick high-density foam, not the soft cushion foam sold at craft stores. Soft foam compresses under a fifty-pound dog within a month and stops providing any support.
Where to buy high-density foam
Check upholstery supply stores or online foam retailers. Ask for foam rated at 1.8 pounds per cubic foot or higher. Anything below that density will bottom out under a large dog.
11. Repurposed Crib Mattress Bed
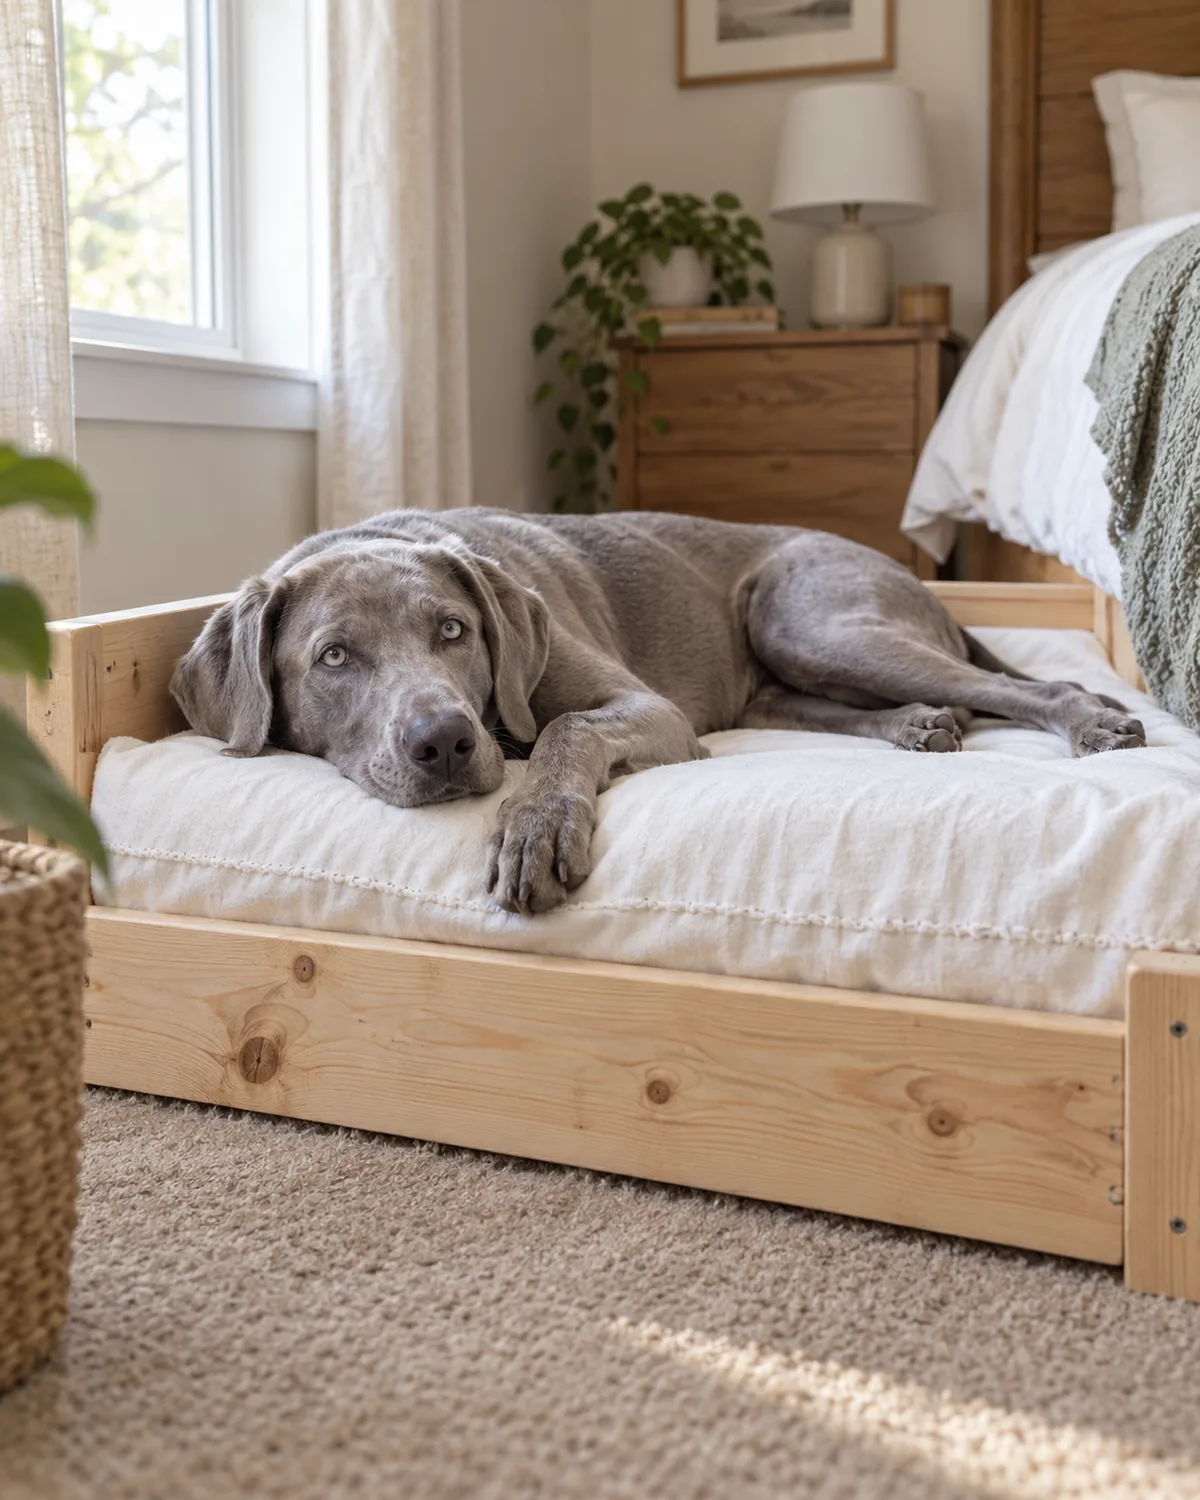
A standard crib mattress is already the right thickness and density for a medium to large dog. Build a low three-sided frame from pine boards, slide the mattress inside, and fit a jersey crib sheet over the top as a washable cover.
The open fourth side lets your dog walk on and off without stepping over a high rail, and the frame keeps the mattress from sliding across the floor.
- Skill level: Intermediate (basic woodworking)
- Cost: Free if you have a leftover crib mattress, or ten to twenty dollars at a consignment store
- Best for: Medium to large dogs who need a flat, supportive surface
Use a waterproof crib mattress or add a waterproof liner beneath the jersey sheet. Dogs drool in their sleep, and moisture will break down a non-waterproof mattress from the inside within a few months.
Save this for later
11 DIY Dog Bed Ideas
- 1No-Sew Fleece BedTie knotted fringe around two fleece blankets with stuffing between them.
- 2Upcycled Suitcase BedRemove the lid, add legs and a cushion for a vintage elevated bed.
- 3Pallet Frame BedSand and seal a pallet, add hairpin legs and a waterproof pad.
- 4Sweater Pillow BedStuff a crew-neck sweater and sew the sleeves into a bolster rim.
- 5PVC Pipe CotBuild a rectangular frame and stretch outdoor fabric across it.
- 6Tire Bolster BedPaint a used tire and drop a round cushion inside for a deep nest.
- 7Dresser Drawer NookPull the bottom drawer, sand it smooth, and line it with a washable pad.
- 8Braided T-Shirt BedBraid old t-shirt strips and coil them into a flat spiral mat.
- 9Wine Crate End TableFlip a crate on its side for a bed and nightstand in one.
- 10Foam Bolster BedWrap foam pieces in canvas and zip-tie into a modular bolster.
- 11Crib Mattress BedFrame a crib mattress with pine boards and add a jersey cover.
Frequently Asked Questions
How thick should a DIY dog bed be?
Two inches of high-density foam is the minimum for dogs over thirty pounds. Dogs under twenty pounds do fine with one inch of firm foam or several layers of polyester fill inside a fabric shell. If your dog has joint issues or is a senior, go with three inches.
What filling is safest for a homemade dog bed?
Polyester fiberfill is the most common and safest option. It is non-toxic, hypoallergenic, and machine-washable. Avoid loose bean bag beads — dogs who chew through fabric will swallow them, and they can cause intestinal blockage. Shredded memory foam works for enclosed beds but creates a mess if the cover tears.
How do you wash a DIY dog bed?
Remove the cover and machine-wash it on cold with a mild detergent. For beds without a removable cover, like the fleece blanket bed, wash the whole thing on a gentle cycle and tumble dry on low. Air out foam pieces outside once a month since they cannot go in the machine.
Can you make a chew-proof dog bed at home?
Not entirely, but you can make one that resists casual chewing. Use heavy-duty canvas or duck cloth instead of cotton or fleece. Reinforce seams with double-stitching and hide all edges. A determined chewer will still get through any fabric, so address the chewing behavior itself rather than building a stronger bed.
What size should a DIY dog bed be for a large dog?
Measure your dog from nose to base of tail while they sleep stretched out, then add six to eight inches in both length and width. For a seventy-pound dog, that usually comes out to about thirty-six by forty-two inches. Build the frame first without the cushion, let your dog lie on it, and adjust before adding the fabric.
P
About the author
Jess Calloway
Jess Calloway edits Pawliqa, where she shares dog care, grooming, training, and new-owner tips — plus DIY and pet-friendly home ideas — for anyone who wants a happy, well-cared-for dog. As a dog mom to three very different dogs, she writes the honest, tested version of what actually works. Every guide is image-led and reviewed for clarity, usefulness, image accuracy, and Pinterest-to-page alignment before it goes live. Visit the About page.