A DIY dog agility course turns a quiet backyard into the best part of your dog's day, and you can build one for the price of a hardware store run.
Professional agility equipment costs hundreds per obstacle. The homemade versions here use PVC pipe, pool noodles, and cardboard boxes, and they work just as well for backyard training.
These eleven obstacles go from beginner weave poles to a teeter-totter that builds balance and noise confidence. If you already have some DIY toys, you know how much dogs love homemade gear.
Jump to an obstacle
11 DIY dog agility course ideas
From PVC weave poles to a homemade teeter-totter, these eleven obstacles turn a backyard into a training playground. Jump to the build that interests you most.
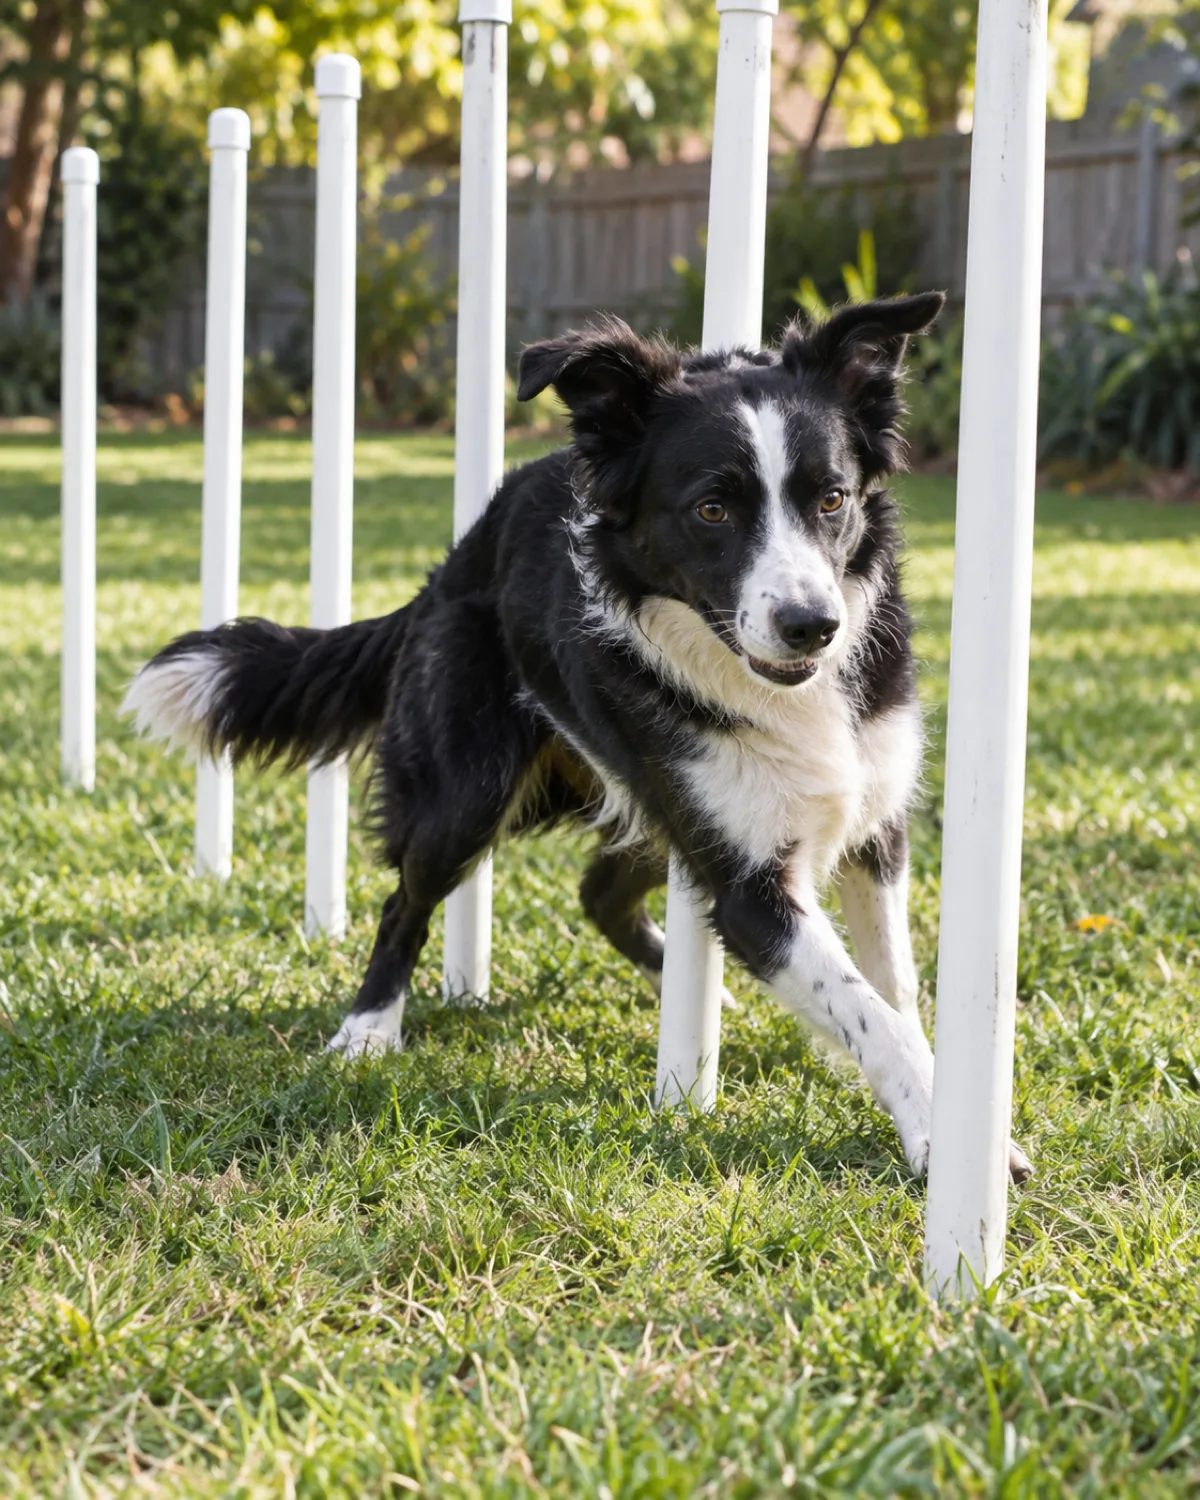
Weave poles are the signature agility obstacle, and the PVC version costs under ten dollars for a full set of six.
Cut one-inch PVC pipe into three-foot lengths and push each stake straight into your lawn at twenty-four-inch intervals. The pipe grips the soil well enough to stay upright through a fast weave, and you can pull the poles out in seconds for mowing.
Materials: 6 pieces of 1-inch PVC pipe, each cut to 36 inches
Spacing: 24 inches apart for adult dogs, 18 inches for puppies
Adjustment: swap in shorter pipes for low-confidence dogs or taller ones for experienced weavers
Start by luring your dog through with a treat held at nose height. Most dogs pick up the weaving pattern within three to five sessions if you keep each run short and reward generously. Pairing this with clicker training speeds things up because the click marks the exact moment the dog threads between the correct poles.
The poles flex on contact, which matters because a rigid pole can jab a dog mid-turn and create a lasting avoidance. PVC gives just enough that a shoulder brush bends the pole rather than punishing the dog.
2. Pool Noodle Bar Jumps
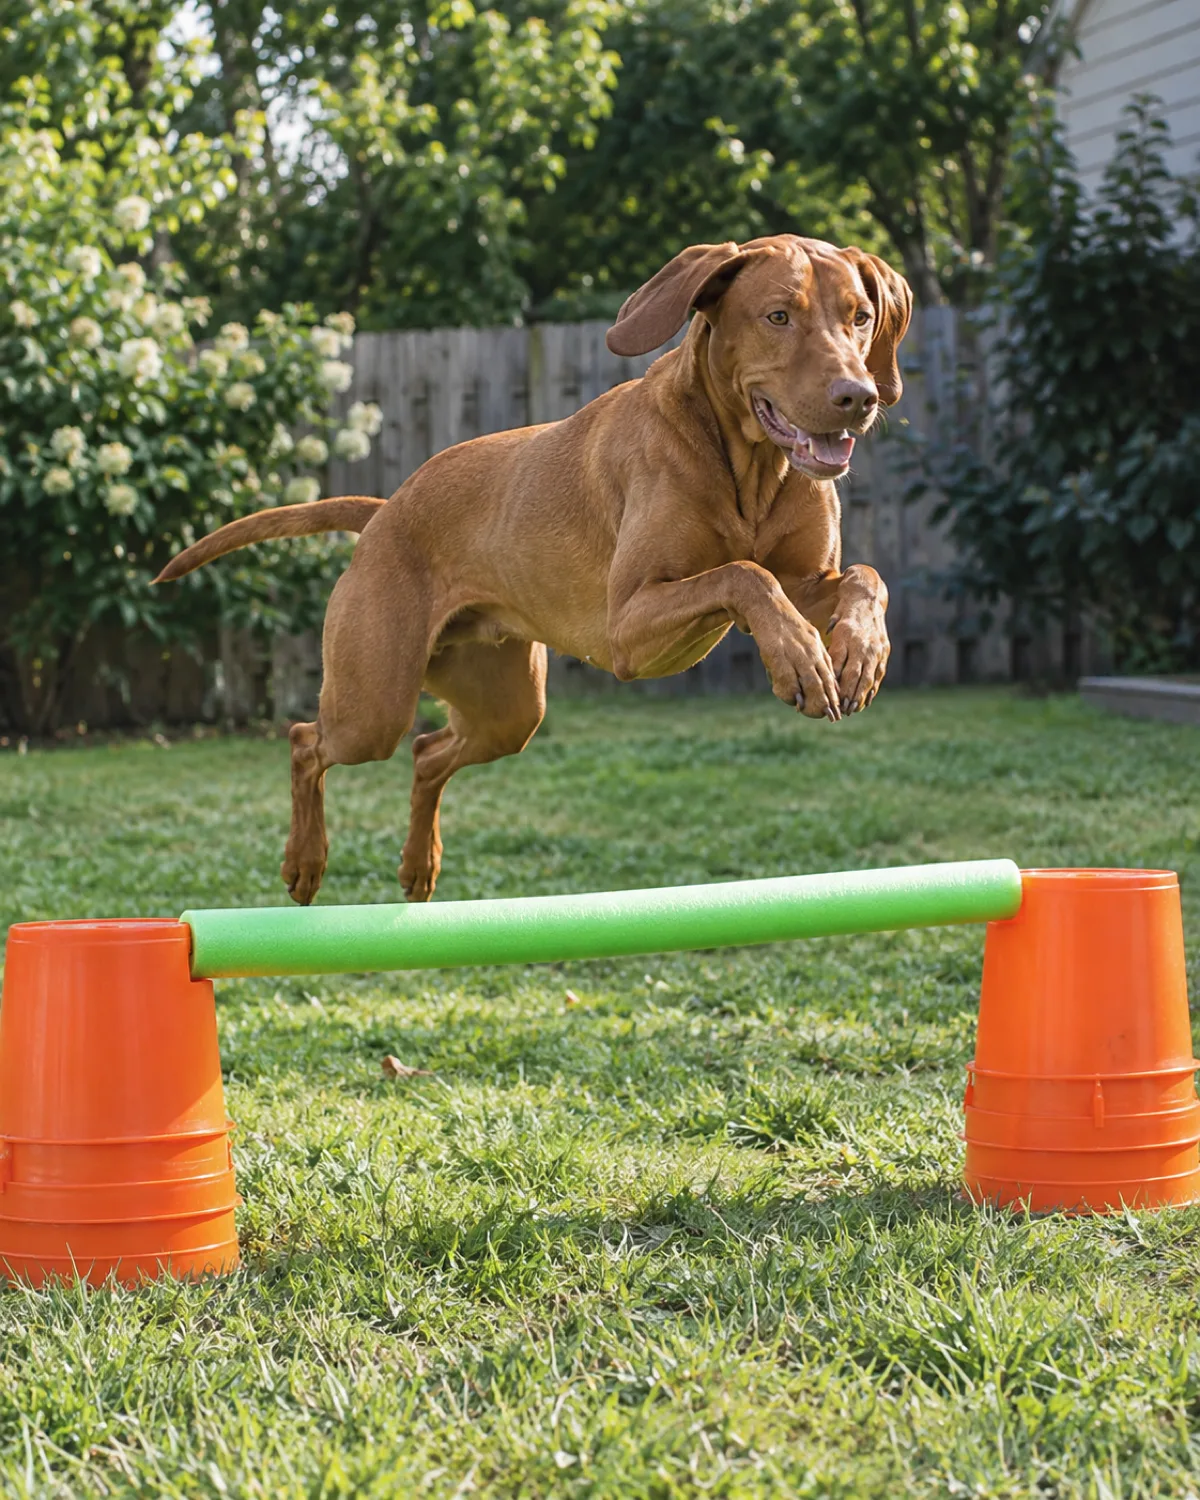
A pool noodle across two bucket stacks is the safest jump you can build because the noodle rolls off on contact instead of clipping your dog's legs.
Stack two or three five-gallon buckets on each side and rest a pool noodle across the top. The noodle sits in the bucket rims without any fastening, so it falls the instant a paw catches it.
Materials: 1 pool noodle, 4–6 five-gallon buckets
Height: add or remove buckets in roughly six-inch increments
Safety: the noodle weighs almost nothing, so even a chest-level hit is painless
Height adjustment is the real advantage here. Puppies and short-legged dogs start with a single bucket per side. Athletic jumpers stack three. You never need to rebuild, just add a bucket.
Set the bar low enough that your dog clears it without even thinking about it, then raise one bucket at a time over several sessions. Rushing the height teaches the dog to crash through the bar instead of jumping over it.
3. Cardboard Box Tunnel
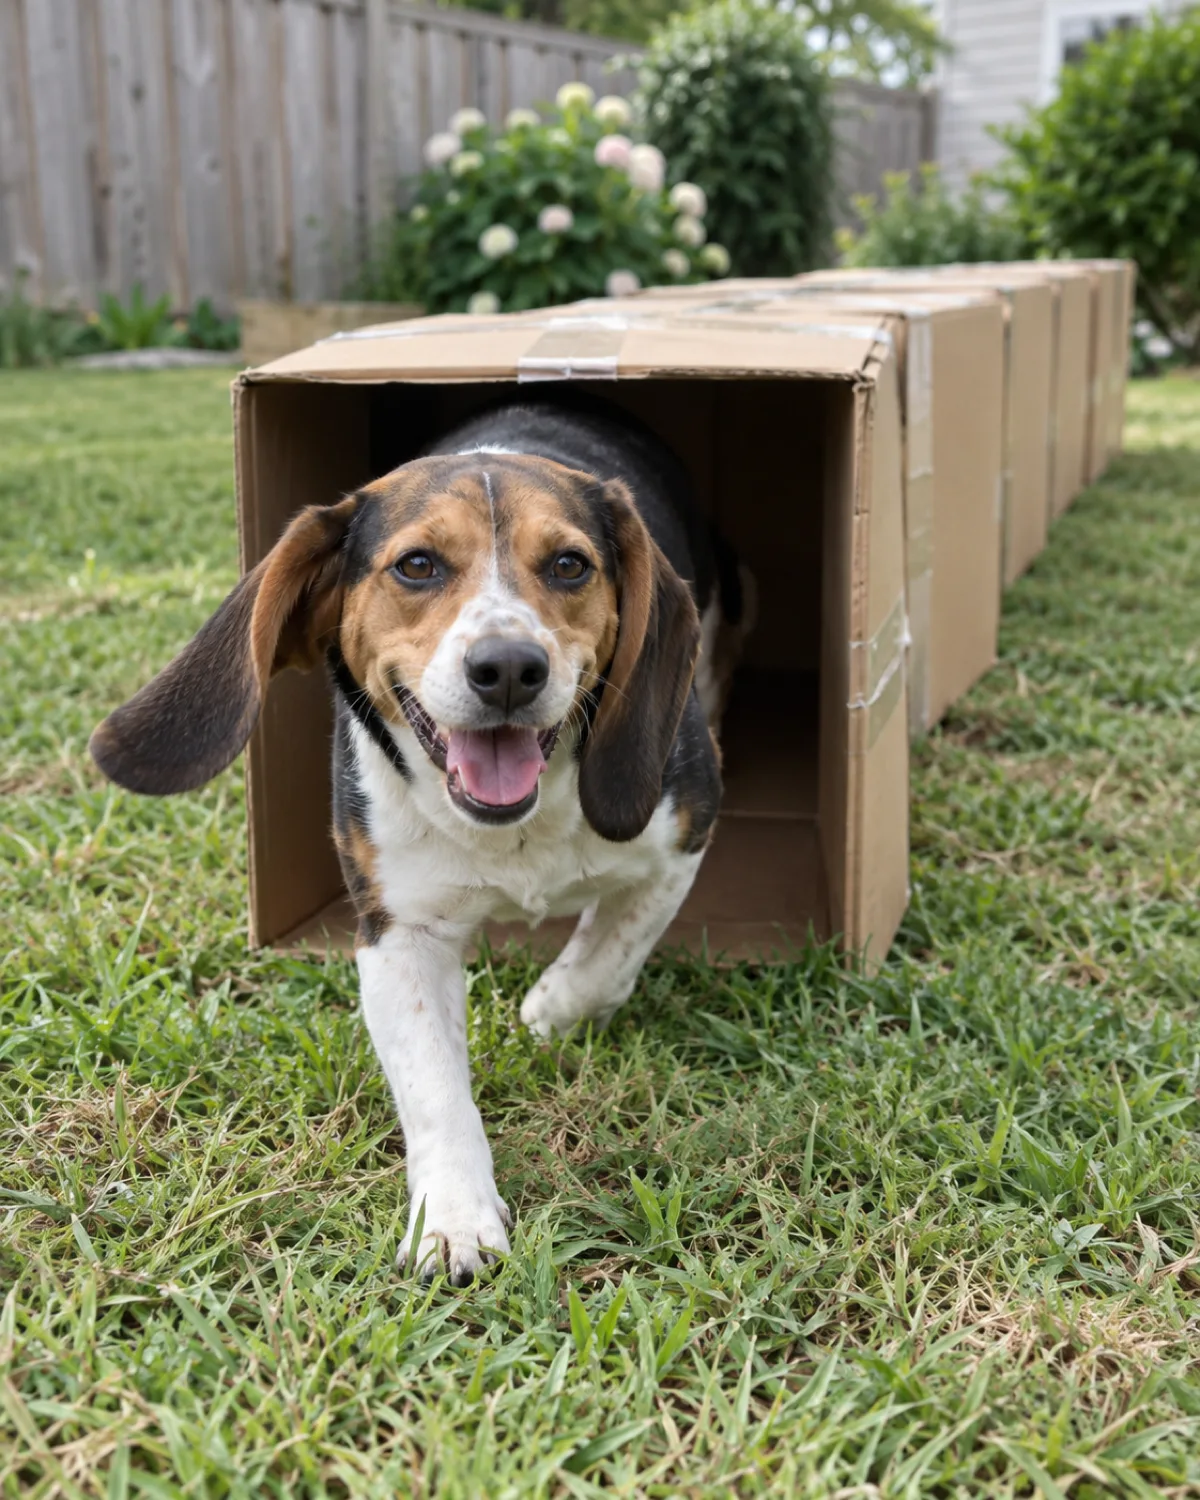
Large moving boxes taped end to end make a surprisingly sturdy tunnel, and the cost is zero if you have a recent delivery pile.
Cut the bottom flaps off each box and tape three to five boxes together in a straight line on the grass. The boxes hold their shape well enough for a medium dog, and you can curve the line slightly for an advanced challenge.
Materials: 3–5 large moving boxes, packing tape
Length: each box adds about two feet, so five boxes gives a ten-foot tunnel
Durability: a taped tunnel lasts two to three weeks of regular use before the cardboard softens from dew
Most dogs hesitate at first because they cannot see through the tunnel. Kneel at the exit end and toss a treat inside so the dog follows the scent through. Once the dog runs through confidently, you can extend the tunnel or add a gentle curve by angling the middle box.
This is one of the best beginner obstacles because it teaches the dog to commit to an obstacle they cannot see the end of, which is the core skill for all tunnel and chute work in real agility.
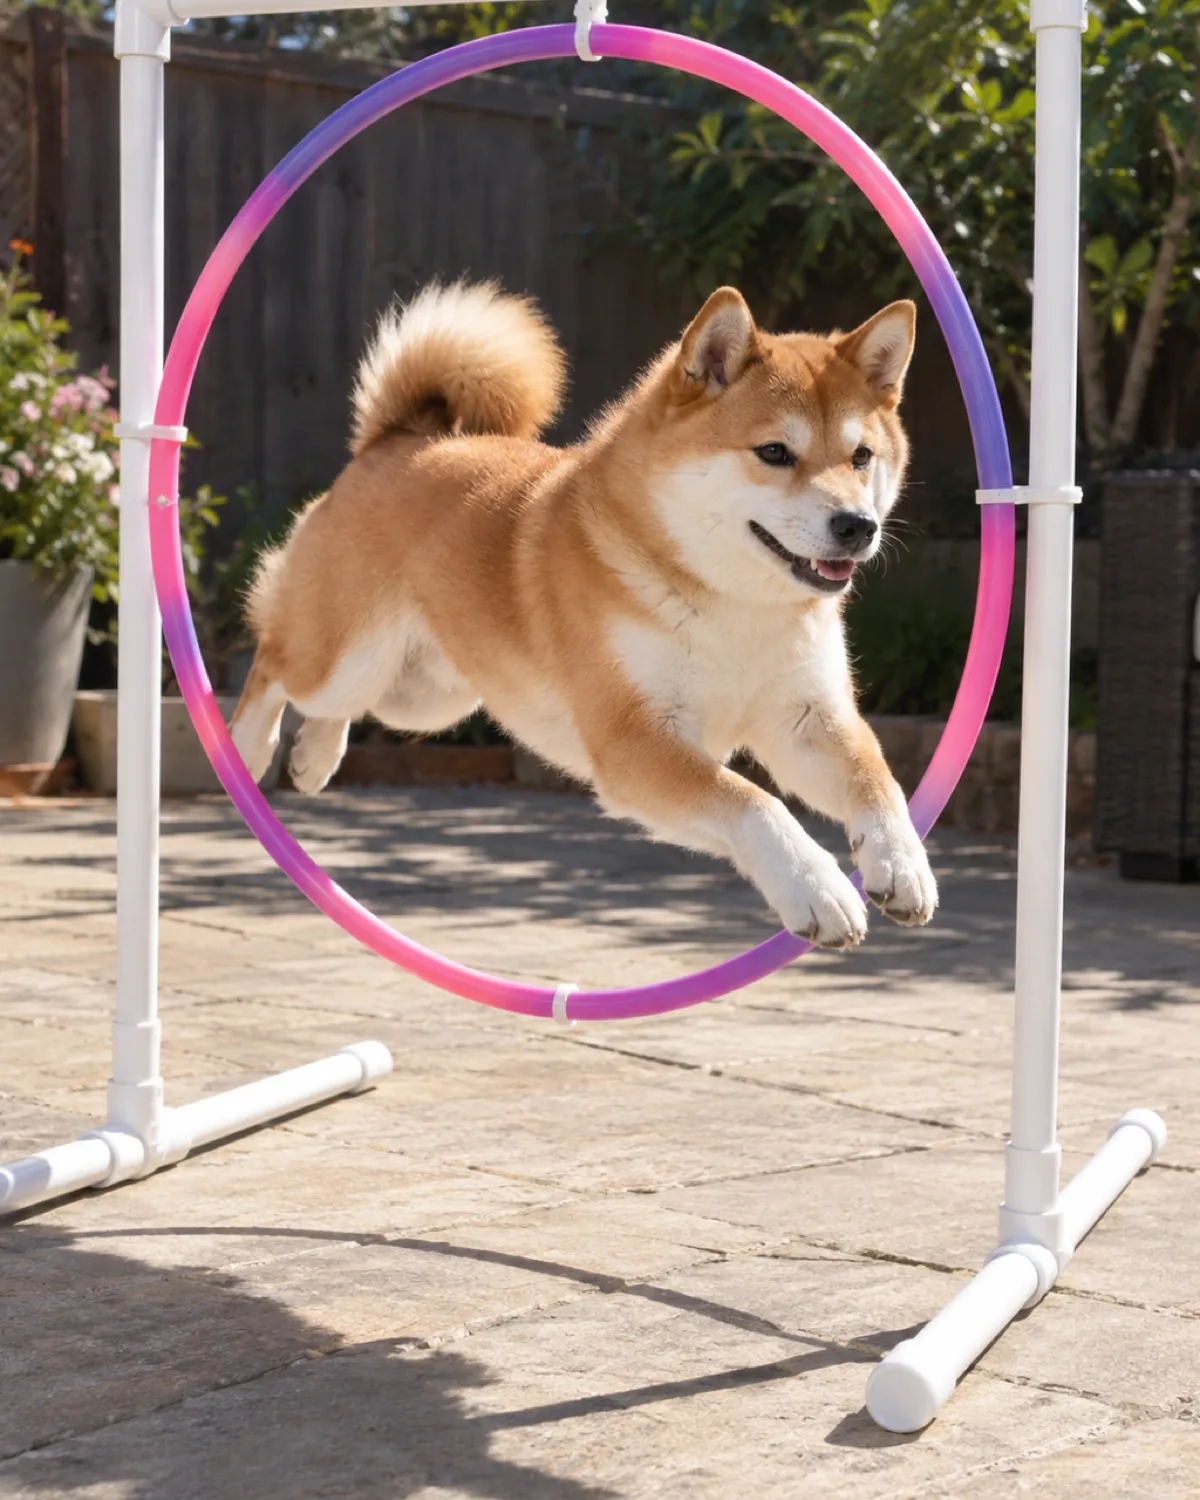
4. Hula Hoop Tire Jump
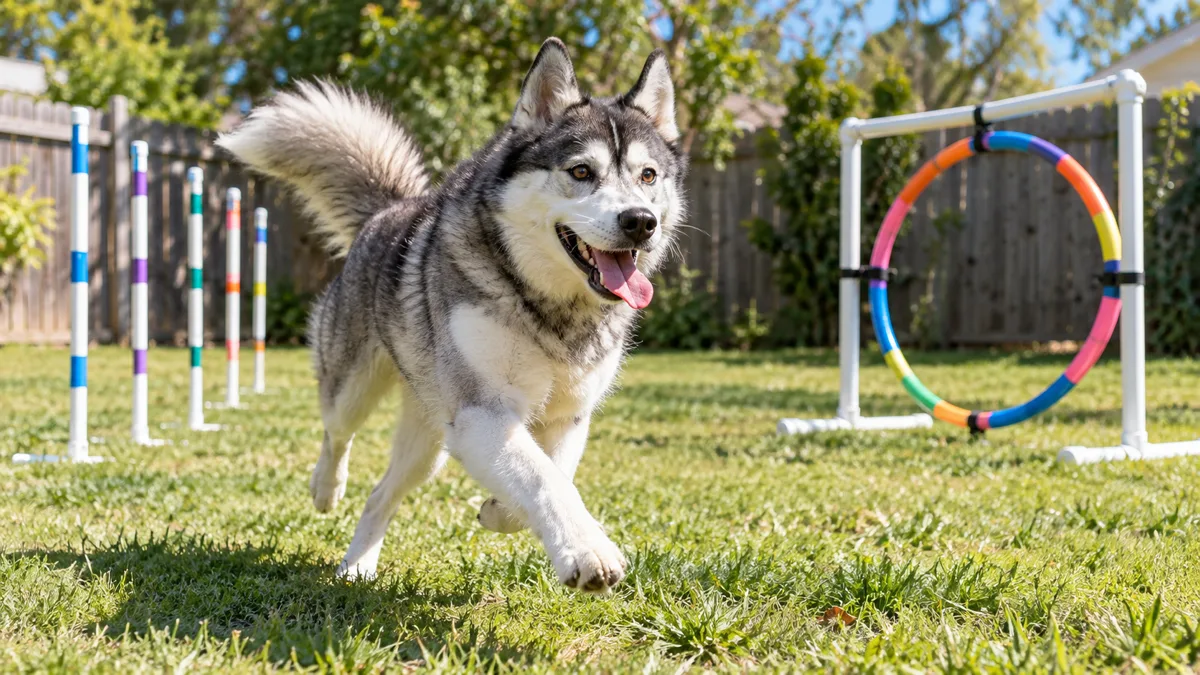
A hula hoop zip-tied between two upright PVC frames gives your dog a tire jump that collapses flat for storage.
Build two T-shaped PVC frames from one-inch pipe and elbows. Zip-tie the hula hoop to the crossbars at the height you want. The whole thing breaks down in thirty seconds by popping the friction-fit joints apart.
Materials: 1 hula hoop, PVC pipe and elbows for two T-frames, zip ties
Frame height: adjust by changing the vertical pipe length
Storage: disassembles flat against a wall or fence
The hoop teaches a different skill than a bar jump because the dog must gauge the opening and aim through the center rather than just clearing a height. Start with the hoop low and close to the ground so the dog can almost walk through it, then raise it gradually.
Dogs that are nervous about jumping through an enclosed shape respond well to you holding a treat visible on the other side of the hoop. The visual target pulls them through faster than verbal encouragement alone.
Build safe and keep it fun
4 safety rules for backyard agility
Homemade obstacles are only as safe as the setup. These four rules keep your dog confident and injury-free through every session.
Check every joint before each sessionPVC friction fits loosen over time. A wobbling frame mid-jump teaches the dog to distrust the obstacle. Twist each joint snug and test the frame with your hand before the dog touches it.
Use only knock-down bars and lightweight materialsRigid bars that stay put on contact punish a miss and build avoidance. Pool noodles, broomsticks, and hula hoops fall away on contact, keeping every attempt safe and painless.
Train on grass, not concrete or gravelAgility involves jumping, turning, and sudden stops. Grass absorbs the landing impact and gives paws traction. Hard surfaces stress joints and cause pad scrapes on tight turns.
Keep sessions under ten minutesTired dogs lose coordination and start clipping obstacles they cleared five minutes ago. Short, frequent sessions build skill faster than one long marathon that ends in sloppy runs.
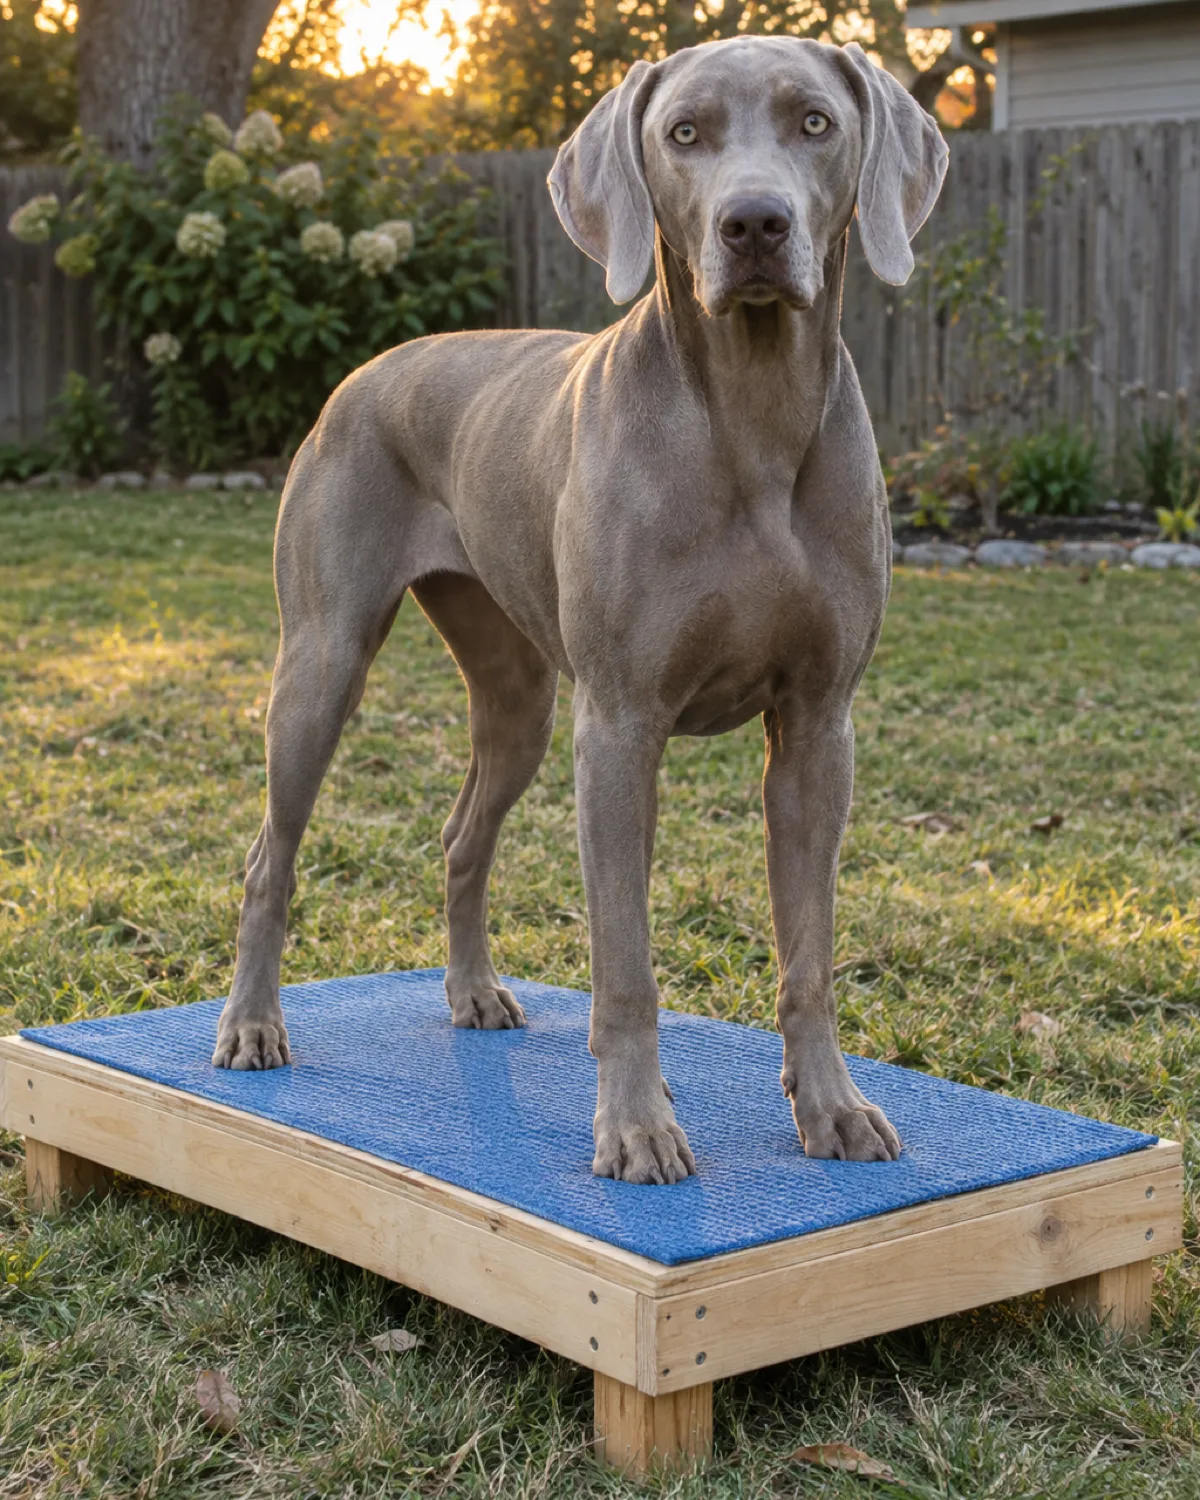
5. Blanket-Over-Table Pause Platform
A pause platform teaches your dog to stop and hold position between obstacles, which is the skill that turns a wild sprint into controlled agility.
Use a sturdy low side table, a wooden pallet with sanded edges, or a shipping crate lid. Cover the top with a non-slip rubber mat or yoga mat so paws grip on the landing.
Height: keep it under twelve inches so the jump up is easy and the jump down is safe
Dual use: drape a blanket over the sides between sessions to turn it into a covered den
The pause is harder to teach than it looks because the dog wants to keep moving. Use the stay command here: ask for a sit or down on the platform, mark the moment all four paws are still, and release after two seconds. Build duration slowly.
The blanket trick turns agility equipment into a comfort spot. Dogs that associate the platform with their rest den approach it with confidence during a run instead of skipping past it.
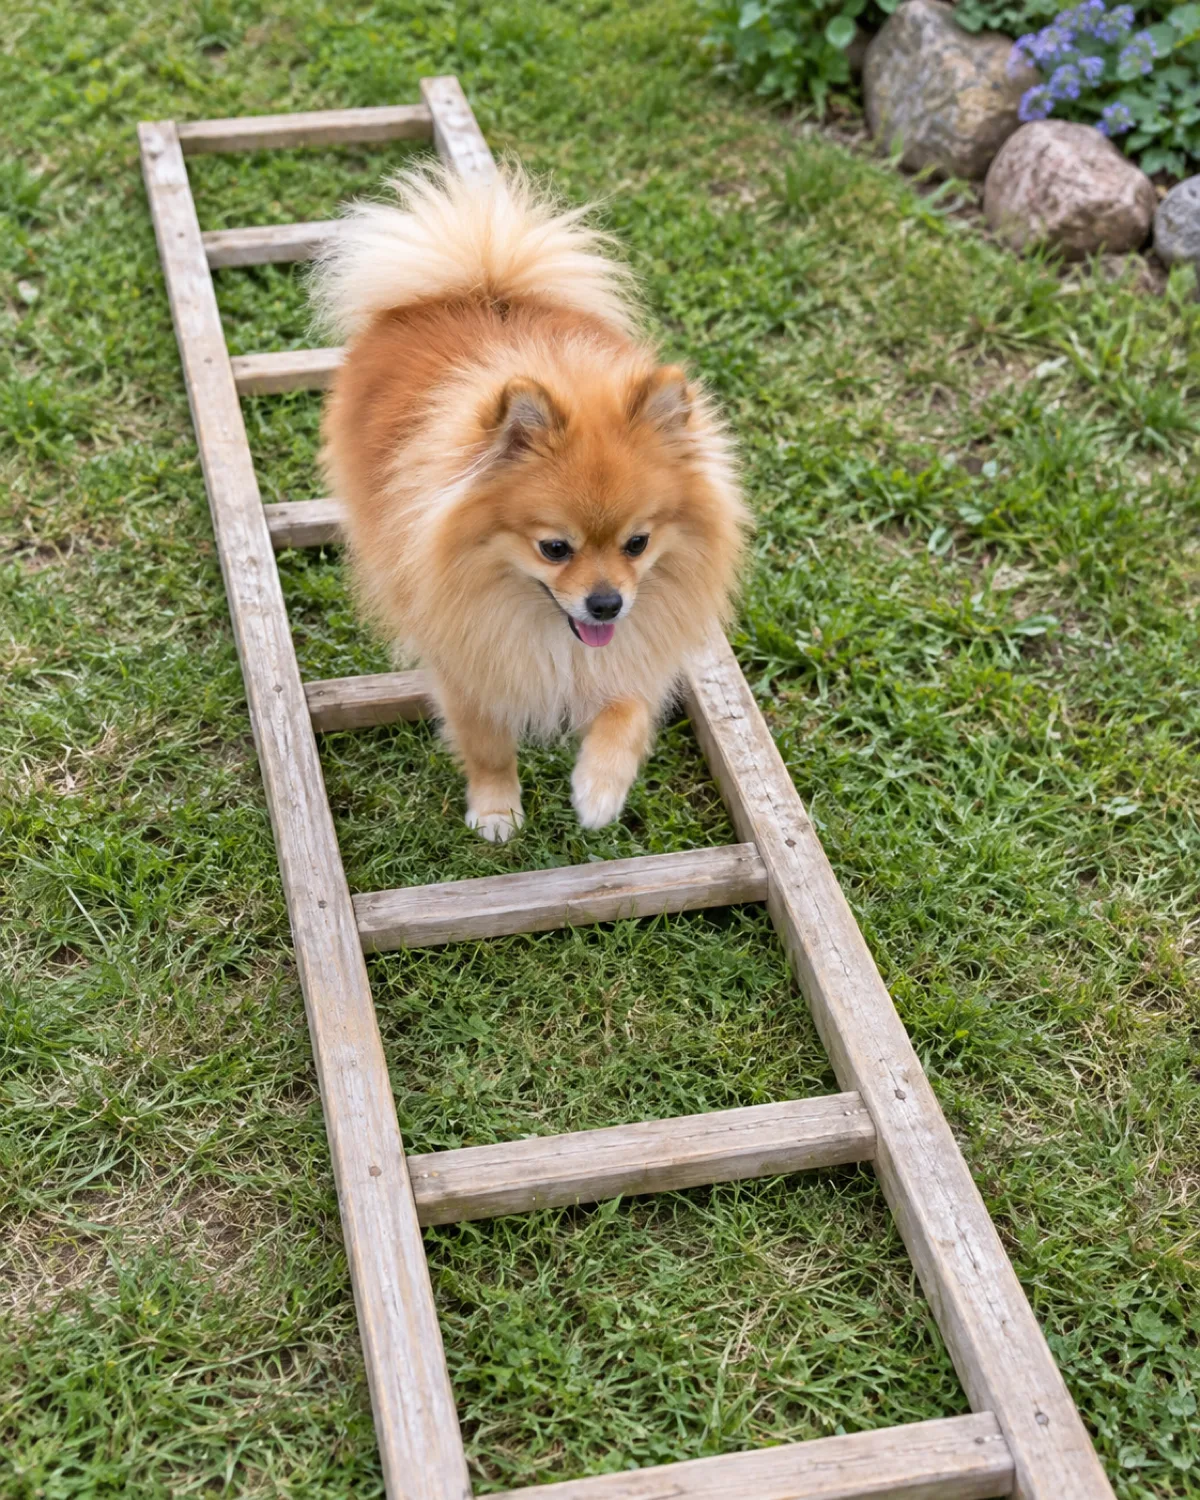
6. Ladder Footwork Grid
Laying an old wooden ladder flat on the ground forces your dog to think about each paw placement, building the body awareness that makes every other obstacle easier.
Set the ladder on a level patch of grass. The rungs create evenly spaced compartments that the dog must step into and out of without touching the wood.
Materials: 1 old wooden ladder (a six-foot stepladder works perfectly)
Setup: lay flat on grass, no propping needed
Progression: start at a walk, build to a confident trot
This obstacle is pure coordination work. Dogs that rush through agility obstacles without thinking about their feet clip bars, miss weave entries, and stumble on contact equipment. The ladder slows them down and teaches deliberate foot placement.
Walk beside the dog the first few times and reward each successful rung crossing. Most dogs try to step over the rungs at first and end up straddling the ladder, which is fine. They figure out the stepping pattern within a few passes.
Small dogs and puppies benefit the most because their short legs demand precise placement. If your dog needs more exercise variety, the ladder doubles as a rainy-day indoor obstacle when laid on a hallway floor.
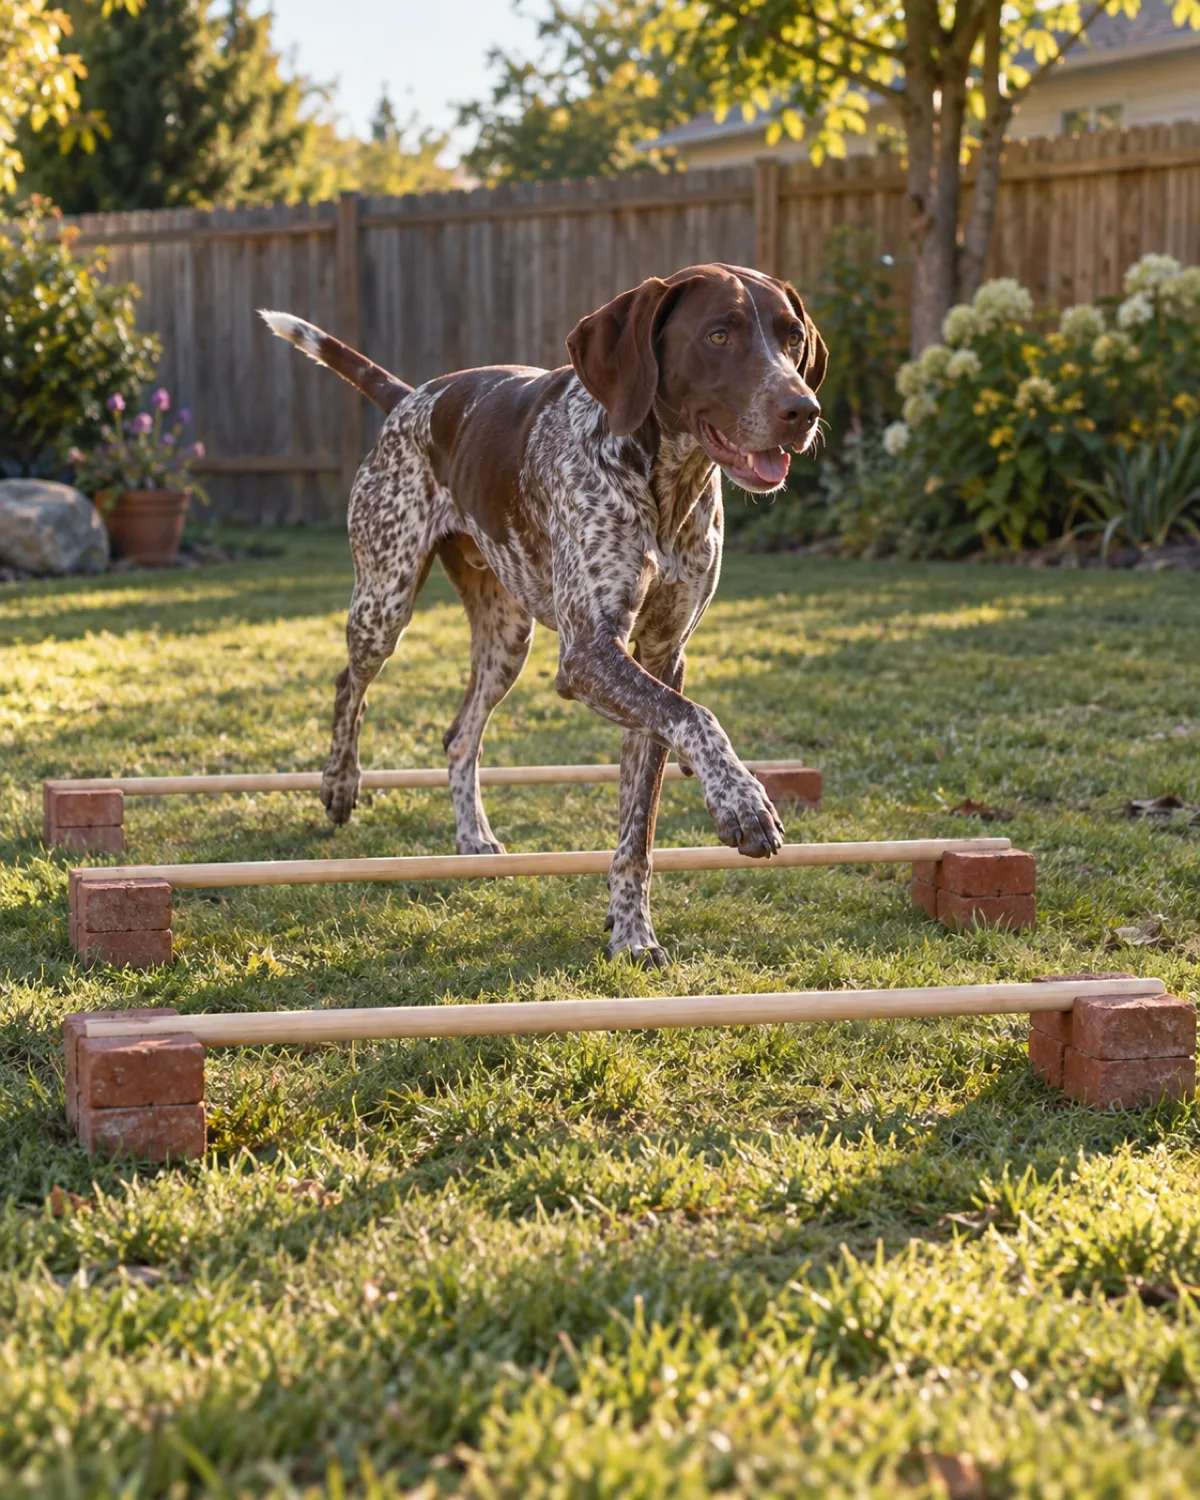
7. Broomstick Cavaletti Rails
Cavaletti rails at ankle height build the same trotting fitness that horse trainers have used for centuries, and three broomsticks across brick pairs is the simplest build on this list.
Rest each broomstick across a pair of bricks or cinder blocks. Space the rails at your dog's natural trotting stride length, usually about the distance from shoulder to hip.
Materials: 3–5 broomsticks or dowels, 6–10 bricks or cinder blocks
Height: keep the sticks at or below your dog's elbow height
Spacing: measure from your dog's shoulder point to their hip point for the ideal stride gap
Cavaletti work strengthens the muscles that lift and extend each leg, which directly improves jumping form and weave pole agility. The dog learns to pick up their feet instead of dragging them, and the rhythmic stepping builds cardiovascular fitness without the joint impact of running.
Set up three rails for a beginner dog and add more as their coordination improves. The broomstick rolls off the bricks if the dog clips it, so there is no injury risk from a misstep.
Match the obstacle to your dog
Which obstacles should you build first?
You do not need all eleven at once. Pick the starting point that fits your dog's size, age, and energy level.
Puppy or brand-new to agilityStart with the ladder footwork grid and the cardboard tunnel. Both are ground-level, zero-impact, and teach body awareness before any jumping.
High-energy dog that needs to burn off steamBuild the weave poles, the pool noodle jumps, and the bucket slalom. String them together for a fast course that channels sprinting into controlled movement.
Cautious or older dog building confidenceStart with the pause platform and cavaletti rails. Low height, slow pace, and lots of treats at each station.
You want the full backyard courseBuild all eleven over two weekends. Start with ground-level obstacles (ladder, cavaletti, tunnel) on day one, add jumps and the slalom on day two, finish with the A-frame, dogwalk, and teeter-totter on weekend two.
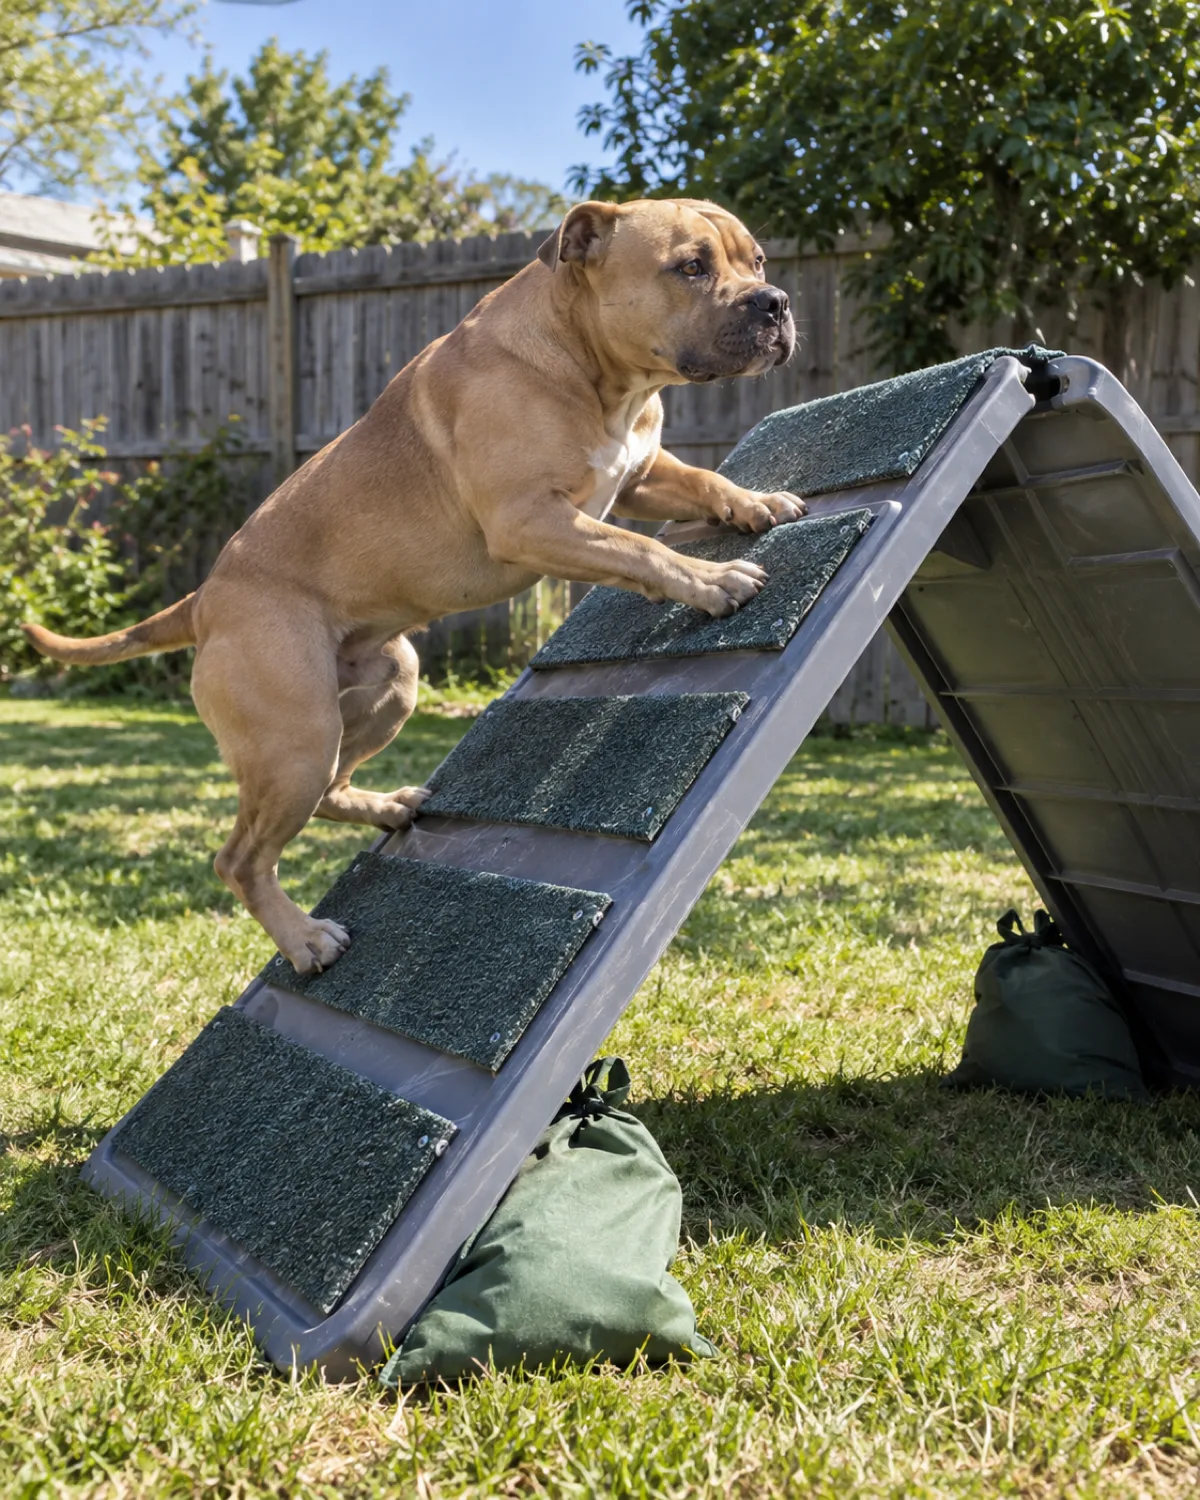
8. Storage-Bin A-Frame
Two large storage bin lids leaned together in an inverted V create a low A-frame that teaches contact-zone skills without the height risk of a full-size version.
Lean the lids together so they meet at the top and brace the base of each side with sandbags or heavy bricks. Cover each surface with strips of outdoor carpet glued or stapled on for traction.
Materials: 2 large flat storage bin lids, outdoor carpet strips, sandbags, adhesive or staples
Height: the peak sits about eighteen to twenty-four inches off the ground
Surface: carpet strips every six inches give paws a solid grip on the incline
The A-frame teaches two skills at once. The climb up builds hindquarter drive, and the descent teaches the dog to control their speed on a slope. In real agility, the dog must touch the painted contact zone at the bottom, and you can simulate that by painting a yellow strip on each lid's lower six inches.
Guide the dog over the frame with a treat held just ahead of their nose. Go slowly the first few times so the dog feels the surface shift under their weight and learns to trust it. Once the dog moves over confidently at a walk, let them build speed on their own.
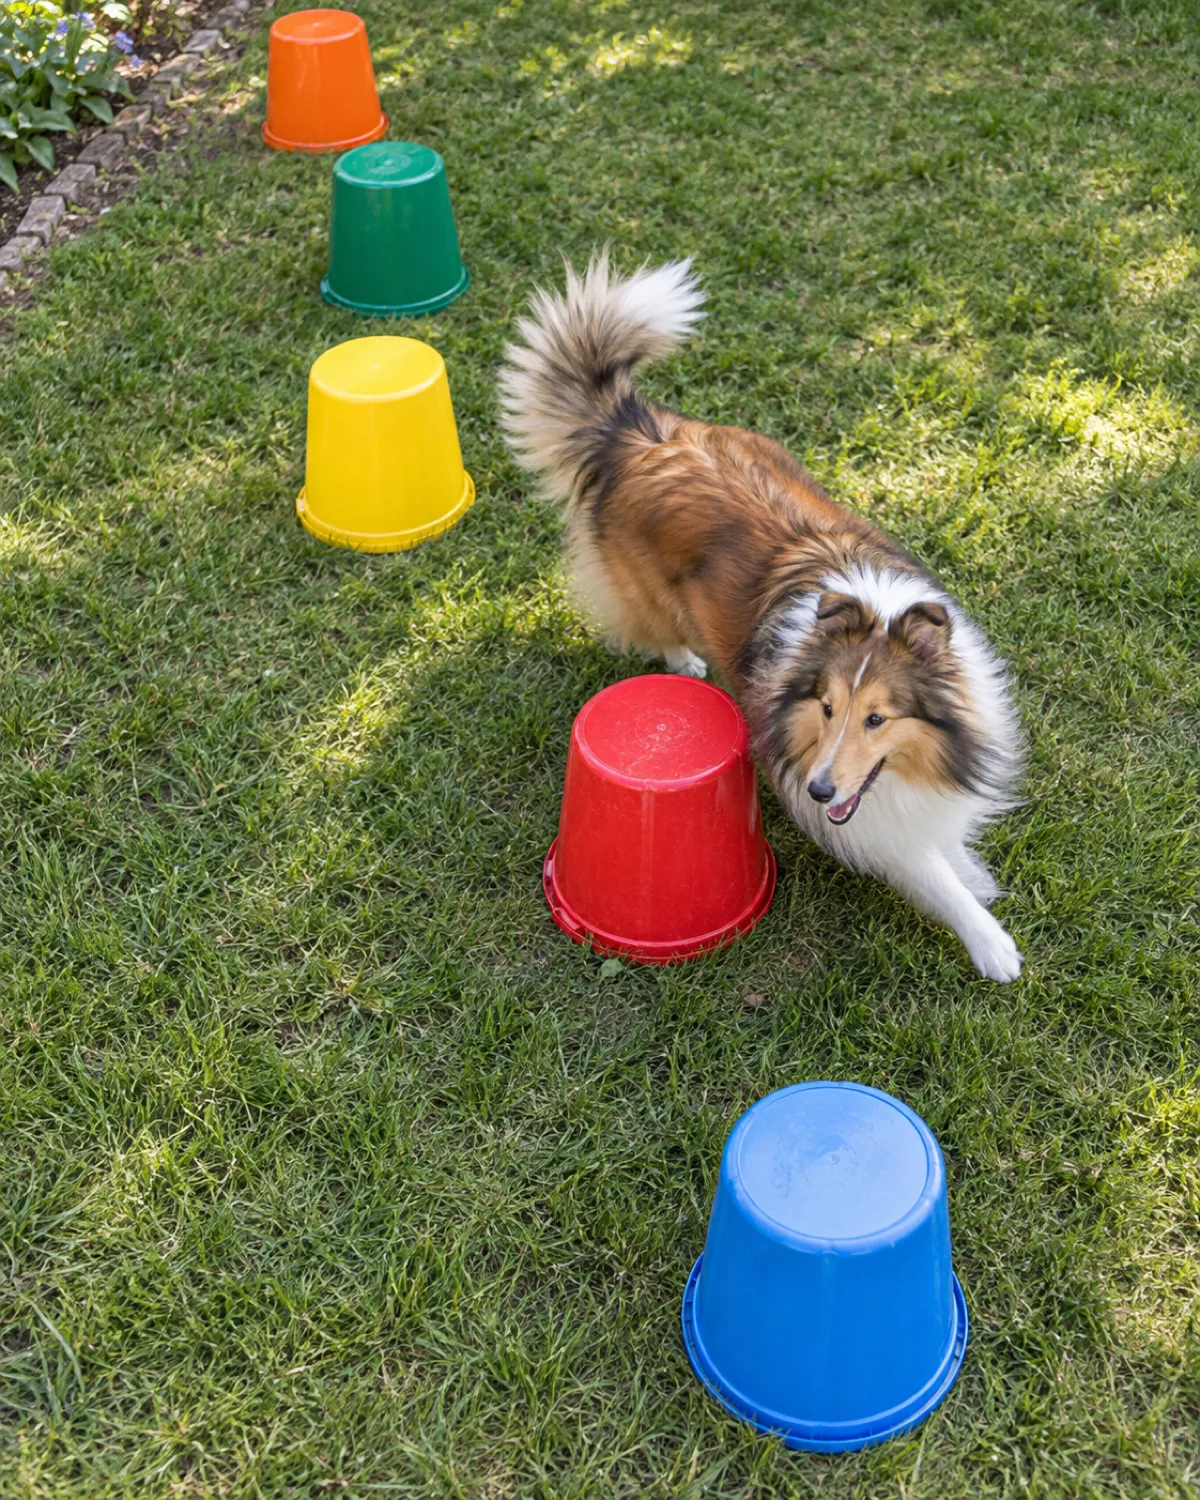
9. Bucket Slalom Course
Upside-down buckets in a zigzag line create a slalom that teaches tight turns and directional changes at speed.
Flip five-gallon buckets upside down and fill each one with sand or gravel through a hole in the bottom before flipping. Space them four to five feet apart in a zigzag pattern. Paint each bucket a bright color so the dog reads the path visually.
Materials: 5–7 five-gallon buckets, sand or gravel, spray paint
Spacing: 4–5 feet apart in a zigzag for medium dogs, 3 feet for small dogs
Weight: sand-filled buckets stay put even when a dog brushes against them at full speed
The slalom differs from weave poles because the turns are wider and the dog runs around each bucket rather than threading between poles. This makes it a better fit for dogs that are still learning directional cues because the wider gaps give more room for error.
Run alongside your dog the first few times, using a treat to guide them around each bucket. Point your body in the direction of the next turn so the dog reads your motion as well as the obstacle layout. Most dogs pick up the weaving pattern within two sessions.
P
About the author
Jess Calloway
Jess Calloway edits Pawliqa, where she shares dog care, grooming, training, and new-owner tips — plus DIY and pet-friendly home ideas — for anyone who wants a happy, well-cared-for dog. As a dog mom to three very different dogs, she writes the honest, tested version of what actually works. Every guide is image-led and reviewed for clarity, usefulness, image accuracy, and Pinterest-to-page alignment before it goes live. Visit the About page.
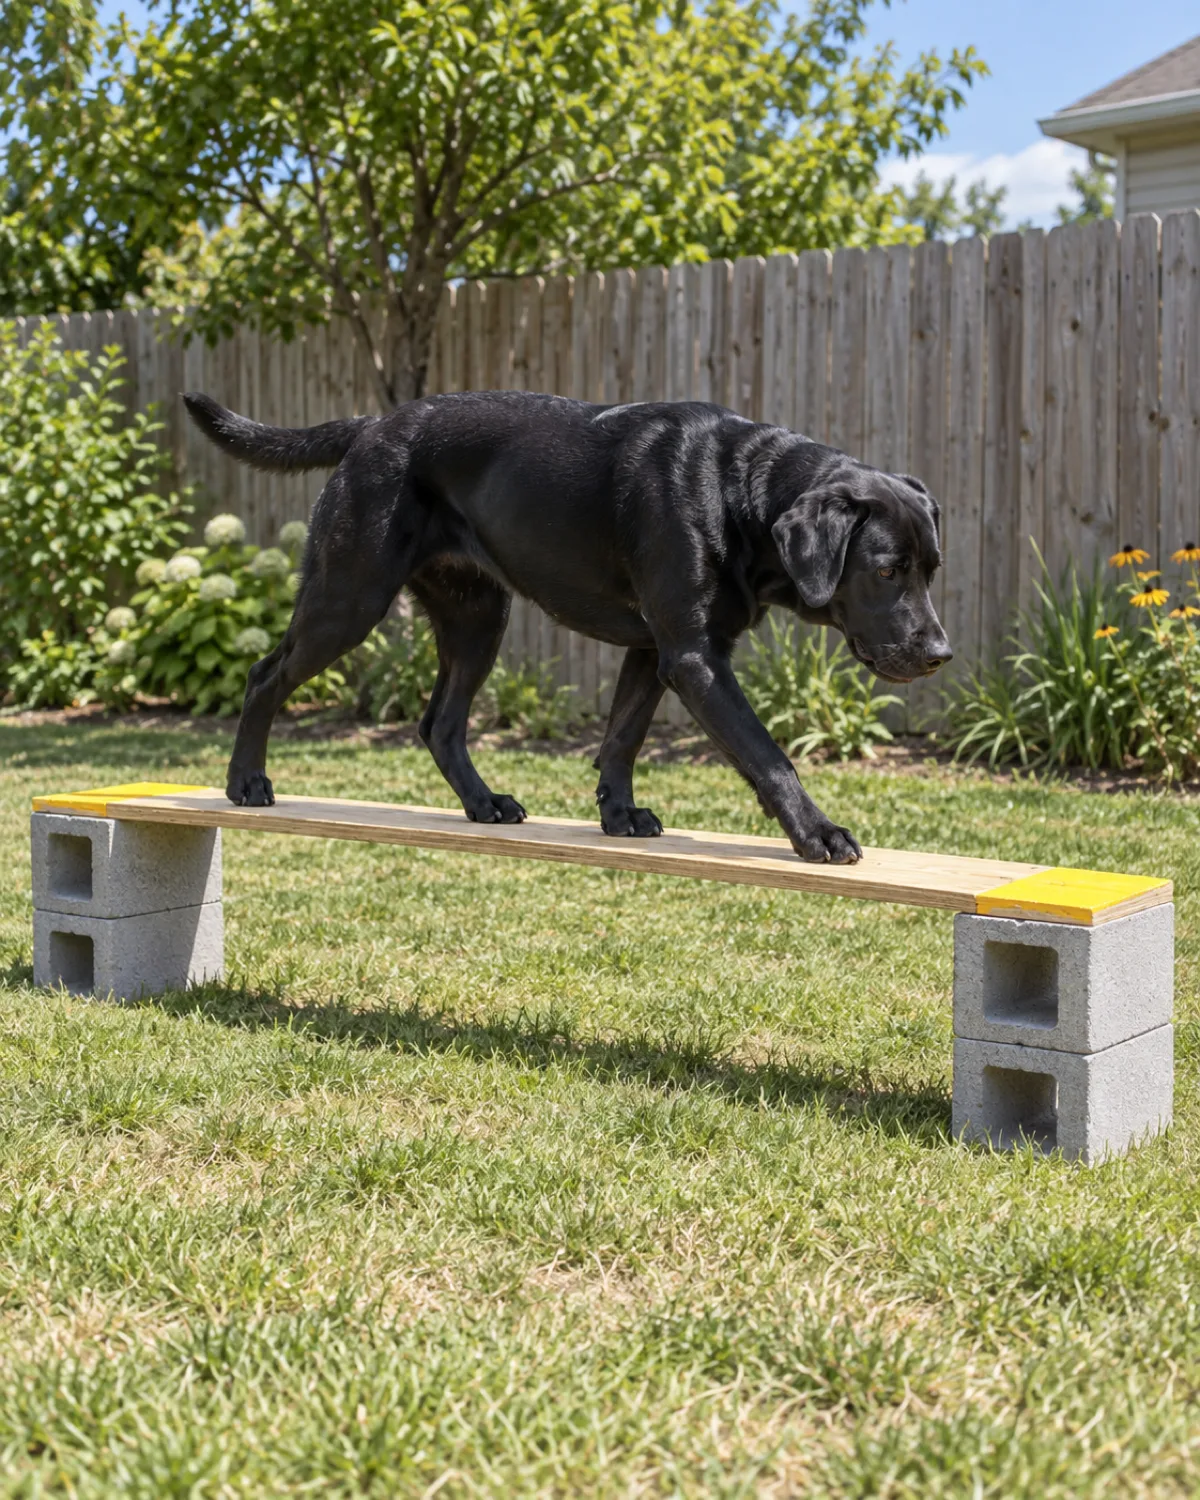
10. Plywood Dogwalk Plank
A single eight-foot plank on two cinder blocks gives your dog the feel of a real dogwalk at a height where a misstep is a step-off, not a fall.
Use a twelve-inch-wide plywood board resting on a cinder block at each end. Sand the edges smooth and paint a six-inch yellow stripe at each end to mark the contact zones, just like the real thing.
Materials: 1 sheet of 3/4-inch plywood cut to 8 feet by 12 inches, 2 cinder blocks, paint
Height: roughly eight inches off the ground on standard cinder blocks
Surface: optional non-slip strips or a coat of textured deck paint for grip
The dogwalk teaches balance and forward focus. The narrow width forces the dog to place each paw carefully, and the slight elevation introduces the concept of walking on a raised surface without any real danger.
Walk beside the plank with a treat held at your dog's nose height to guide them across. Reward when they step into the yellow contact zone at each end, which builds the contact-zone habit early. Some dogs try to jump off the side at first, which is fine at this height. They learn quickly that walking straight across earns the treat.
If you already explored crate setup ideas for your dog's indoor space, this plank is the outdoor training equivalent of teaching them to navigate a defined path.
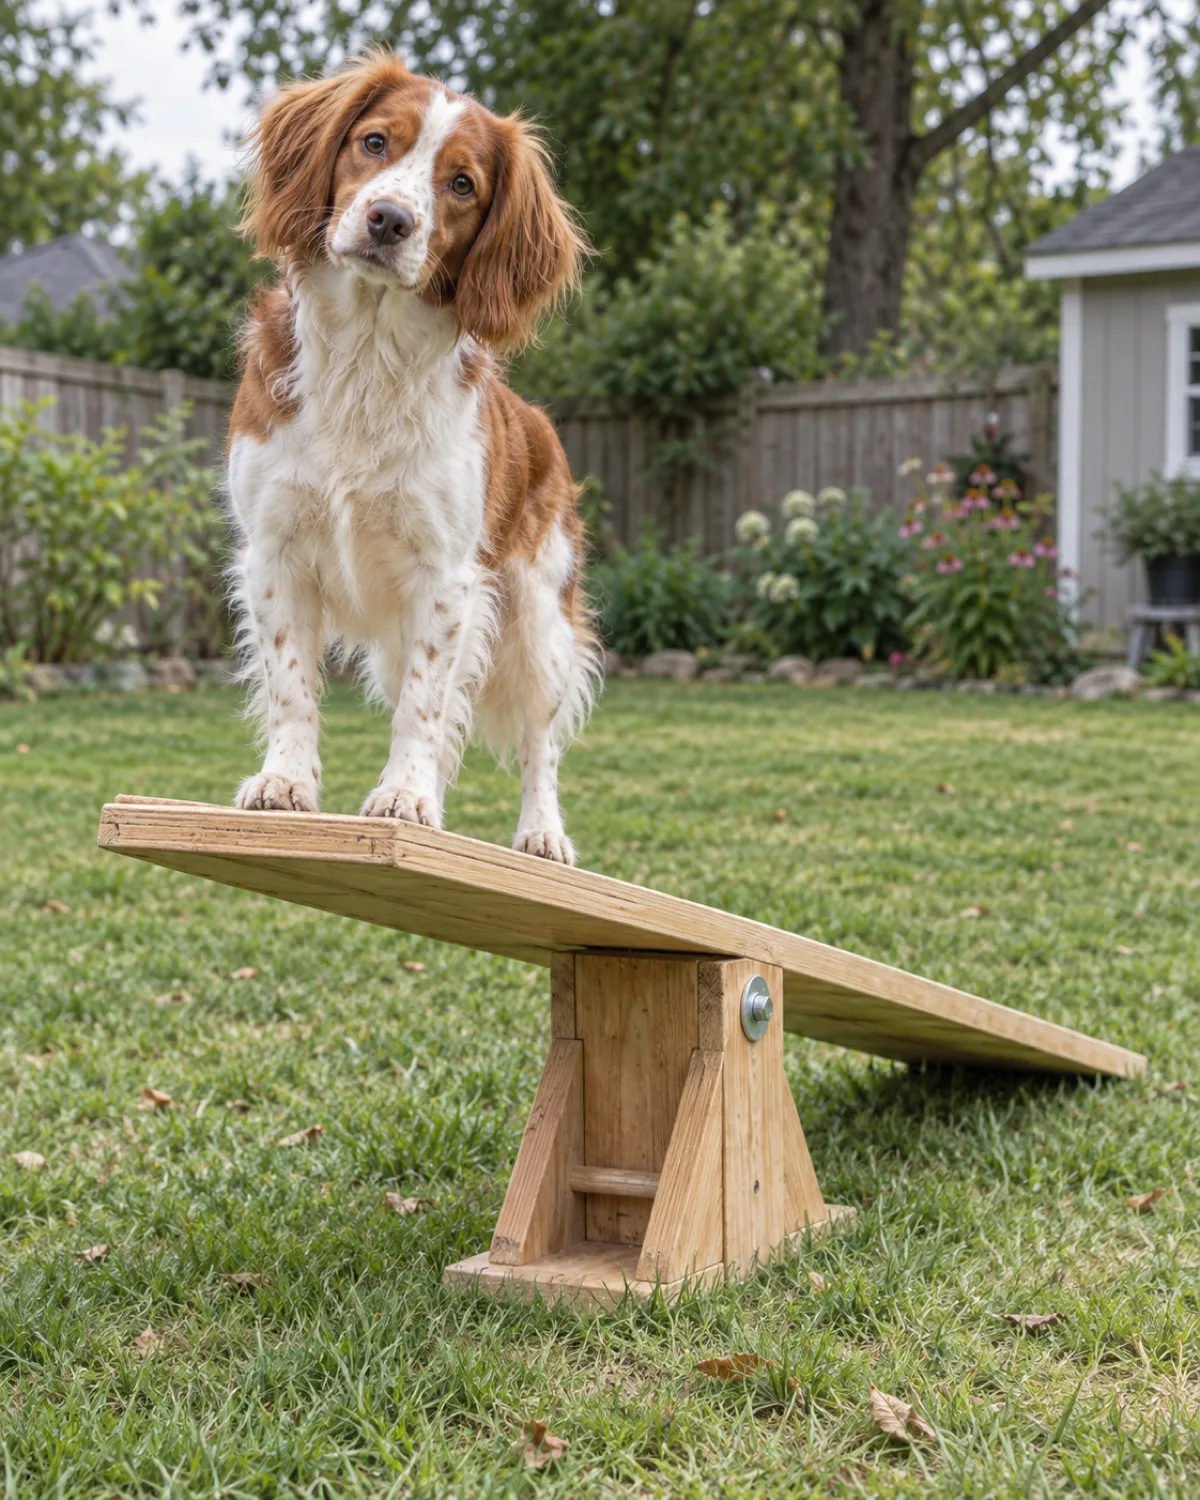
11. DIY Teeter-Totter
A homemade teeter-totter is the most advanced obstacle on this list, and it is the one that builds noise confidence and balance at the same time.
Bolt an eight-foot plank to a central fulcrum block — a 4x4 post section cut to four or five inches tall works well. Weight one end with a brick taped underneath so the board tips slowly rather than slamming down.
Materials: 1 plank (8 feet by 12 inches), 1 fulcrum block (4x4 post, 4–5 inches tall), 1 bolt with washers, 1 brick, duct tape
Pivot speed: the taped brick on one end controls how fast the board tips — heavier brick means a slower, gentler pivot
Surface: sand the plank and add non-slip strips near the pivot point where paws need the most grip
The teeter-totter teaches two things that no other obstacle covers. First, the surface moves under the dog's weight, which builds the balance and confidence needed for real competition teeters. Second, the thump when the board hits the ground desensitizes noise-shy dogs in a controlled way.
Start with the dog walking only halfway across so they feel the board shift without experiencing the full tip. Reward that halfway confidence before asking for a full crossing. Building up to a solid exercise routine alongside agility work keeps your dog's muscles ready for the balance demands.
The fulcrum bolt should be snug enough that the plank does not slide side to side but loose enough that the tipping motion is smooth. Check the bolt before every session because repeated impacts loosen hardware.
What materials do I need for a basic DIY dog agility course?
PVC pipe, pool noodles, five-gallon buckets, cardboard boxes, broomsticks, bricks, and plywood cover every obstacle on this list. A hardware store run for about thirty to fifty dollars gets you enough material for a full eleven-obstacle course, and you may already have some of these items at home.
How much space do I need to set up a backyard agility course?
A twenty-by-thirty-foot area fits a basic course with four to five obstacles spaced far enough apart for safe running. You do not need the whole yard at once. Start with two obstacles in a small corner and expand as your dog learns the course.
At what age can a puppy start agility training?
Puppies can start ground-level obstacles like the ladder grid and cardboard tunnel as young as four months old. Hold off on jumping obstacles until the growth plates close, which is around twelve to eighteen months depending on breed size. A veterinarian can confirm when your dog is ready for jumping work.
Is agility good exercise for older dogs?
Agility is excellent for older dogs when you keep the obstacles low and the sessions short. Cavaletti rails, the ladder grid, and a low pause platform provide mental stimulation and gentle physical work without stressing aging joints. Skip high jumps and fast turns for senior dogs.
How do I teach my dog to use agility obstacles?
Start every obstacle with a treat lure at nose height. Walk beside the dog, guide them through at a slow pace, and reward the moment they complete the obstacle. Build speed and independence gradually over weeks, not days. Clicker training is the fastest way to mark the exact behavior you want during agility practice.
Save this for later
11 DIY Dog Agility Course Ideas
1PVC Pipe Weave PolesOne-inch PVC stakes pushed into the lawn at 24-inch intervals for a cheap, height-adjustable weave set.
2Pool Noodle Bar JumpsA pool noodle across stacked buckets that rolls off on contact so the dog never clips a rigid bar.
3Cardboard Box TunnelLarge moving boxes taped end to end with flaps removed for a free straight or curved tunnel.
4Hula Hoop Tire JumpA hula hoop zip-tied between PVC frames for a lightweight tire jump that collapses flat.
5Pause PlatformA low table or pallet with a non-slip mat that teaches the stay command between obstacles.
6Ladder Footwork GridAn old ladder laid flat so rungs force deliberate paw placement and build body awareness.
7Broomstick Cavaletti RailsBroomsticks across brick pairs at ankle height for rhythmic trotting fitness work.
8Storage-Bin A-FrameTwo bin lids leaned together and covered in carpet strips for a low-risk contact-zone trainer.
9Bucket Slalom CourseSand-filled painted buckets in a zigzag for tight turns and directional changes at speed.
10Plywood Dogwalk PlankAn eight-foot plank on cinder blocks with painted contact zones for balance and focus.
11DIY Teeter-TotterA plank on a fulcrum block with a weighted end for balance training and noise confidence.
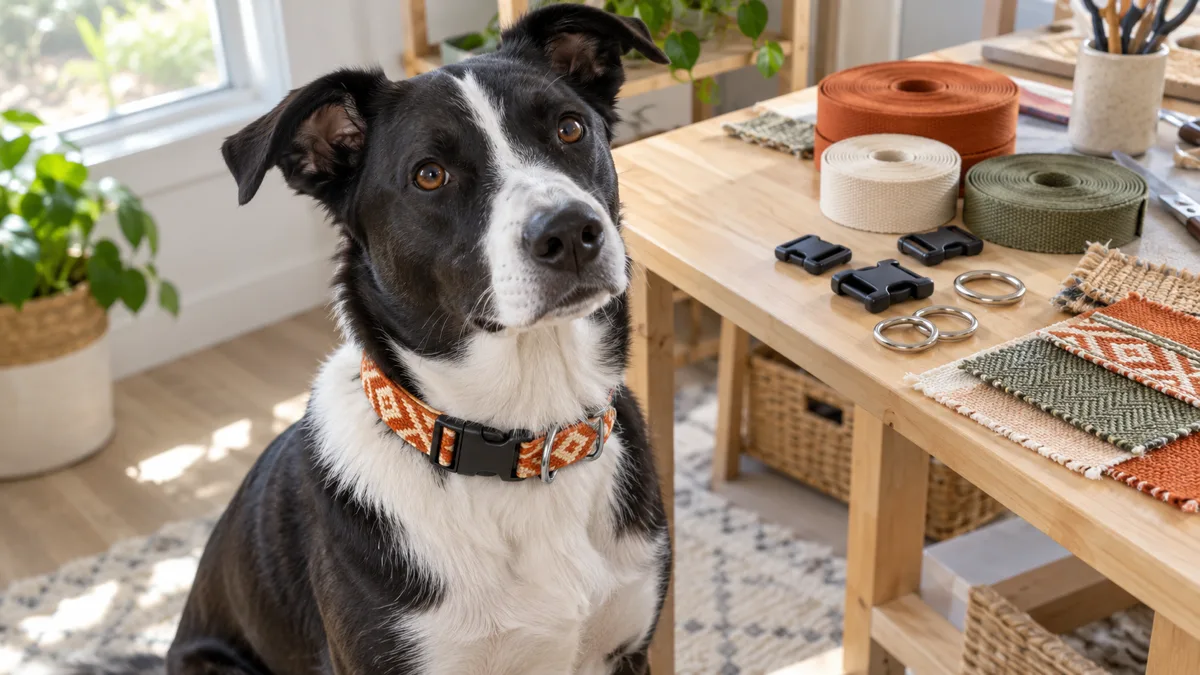
Making a dog collar at home gives you full control over fit, material, and style. This guide walks through picking the right webbing, threading hardware, hand-sewing a box stitch that holds, and running the safety checks that matter before your dog wears it out the door.