Most owners hate trimming their dog’s nails because the first time they tried, the dog yelped, blood appeared, or the dog vanished into another room. That fear loop is the reason nails get long enough to deform a paw — not the nails themselves.
This is the calm, at-home version of nail care: how to read the quick, which tool fits your dog, the tiny-sliver rule that almost never hits a blood vessel, and what to do if you do slip.
I have three dogs and one of them used to disappear under the bed at the sound of a clipper. The reason this routine works for her now is that I stopped treating “the trim” as the moment, and started treating the whole week around it as the work.
This is the calm, low-stress way to trim your dog’s nails at home — built around the quick, the right tool, tiny slivers, and what to do if you slip. Skip to whatever you need right now.
- 1How to tell the nails are too long
- 2Find the quick before you cut anything
- 3Clipper or grinder: which one suits your dog
- 4Desensitize the paws before you touch a tool
- 5Choose a calm spot and position
- 6Hold the paw so the toe stays still
- 7The tiny-sliver rule
- 8How to cut dark nails safely
- 9If you nick the quick: the 90-second drill
- 10Don’t forget the dewclaws
- 11How often to trim
- 12The 14-day clipper restart
- 13When to let a groomer or vet take over
How to Tell Your Dog’s Nails Are Too Long (and Why It Matters)
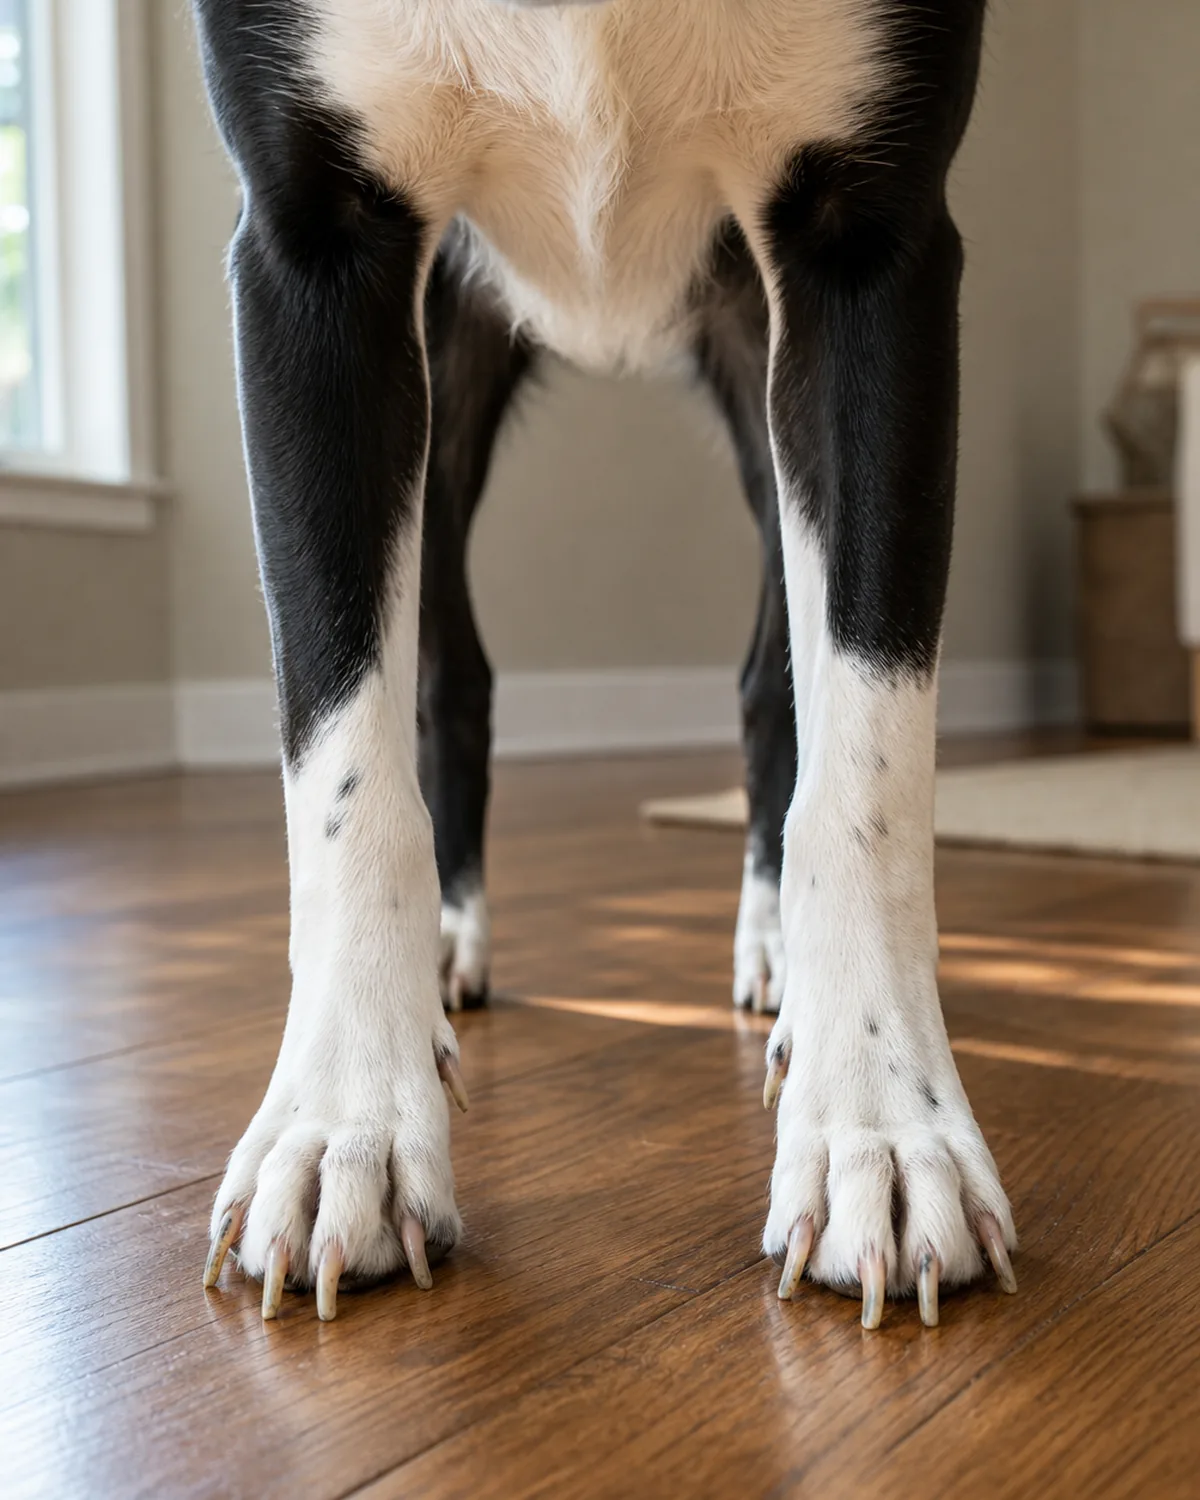
The cheapest length check is your ears. If you can hear a click-click-click as your dog walks across a hard floor, the nails are touching down before the foot pad does, and they’re too long. From the side, the tips should sit at or just above the pad line, not below it.
Long nails are not just cosmetic. Every step pushes the toe and wrist into an unnatural angle, and over months that becomes a slightly braced, flat-footed gait. Older dogs with overgrown nails often look “stiff” when the real issue is that their feet have been sore for a year.
- Listen for a click on hardwood — that sound means the nails are past the pad line.
- From the side, check that nail tips sit at or above the pad, not below.
- A flat, splayed-out stance often traces back to long nails, not age alone.
Find the Quick Before You Cut Anything
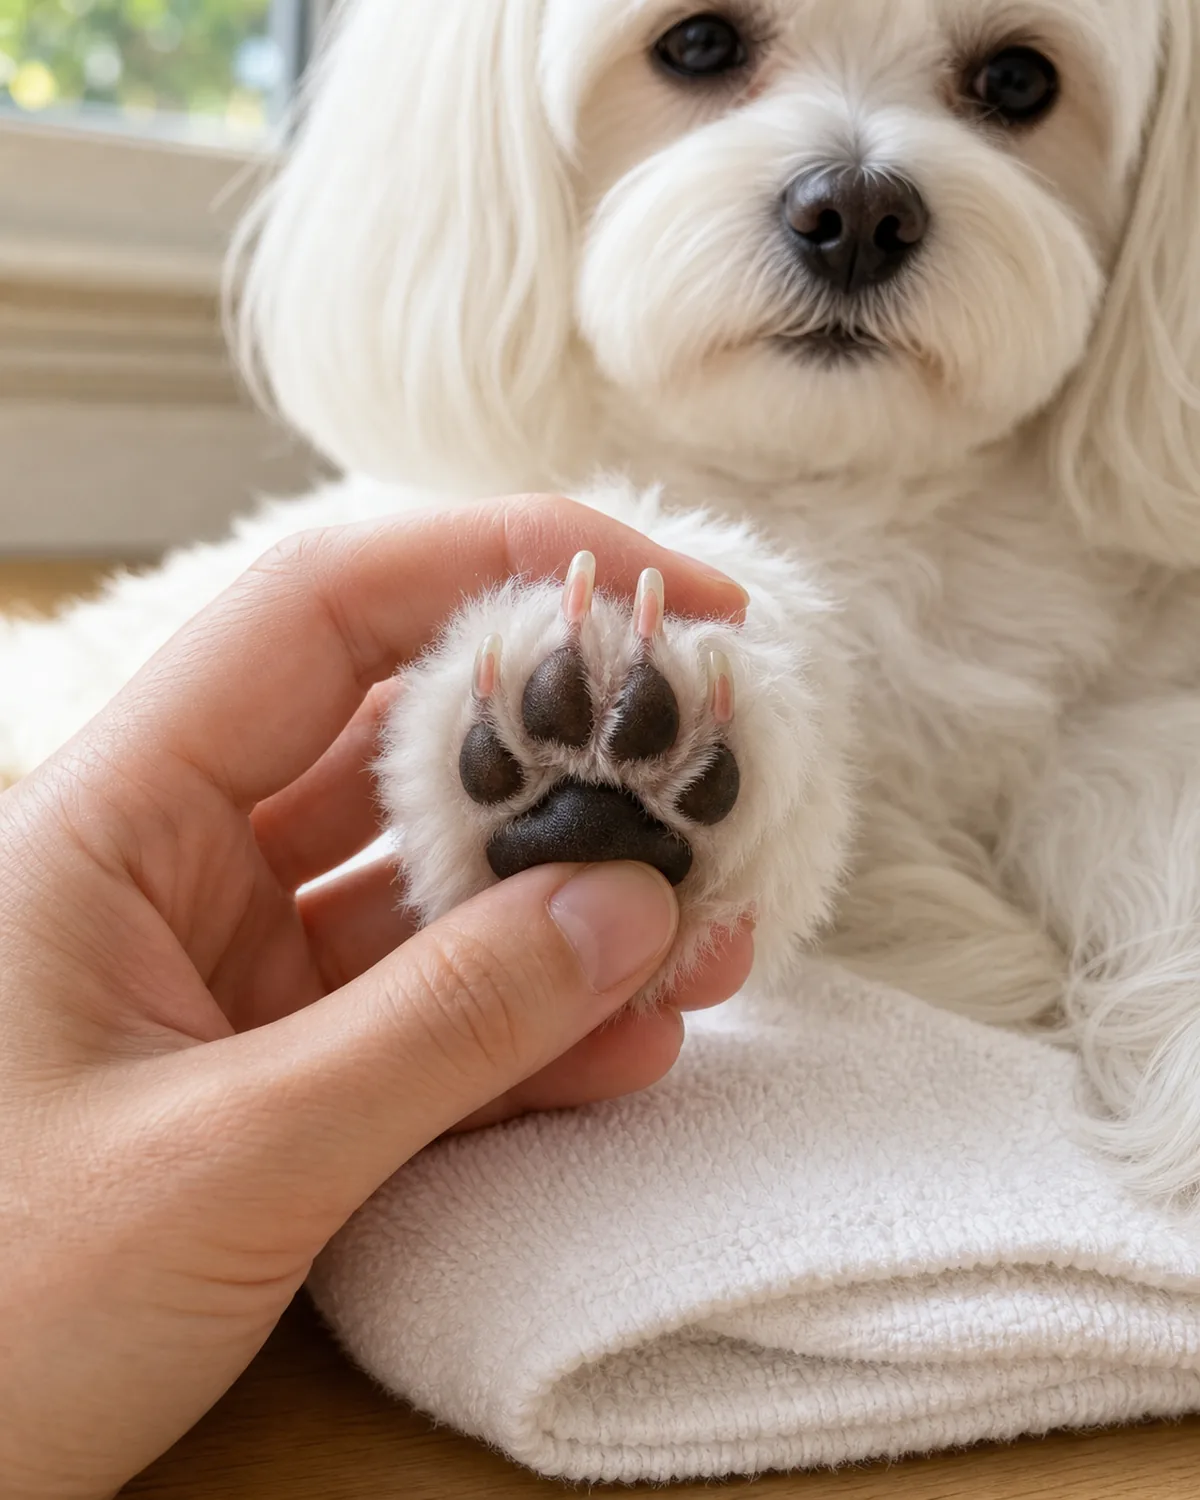
The quick is the live core of the nail — a small blood vessel and nerve that runs partway down the inside. On light, translucent nails you can see it as a pink shadow under the surface. The free tip past the pink is the part that’s safe to trim.
On dark nails you can’t see it from the outside, so you read the cut face instead, which is its own step further down. Either way, the quick is almost always closer to the tip than people guess, which is why we trim a sliver and check, never a chunk and hope.
- On light nails, look for a pink shadow centered inside the nail.
- The tip past the pink is the safe zone; trim there, not into it.
- On any nail, assume the quick is closer than you think and start small.
Clipper or Grinder: Which One Suits Your Dog
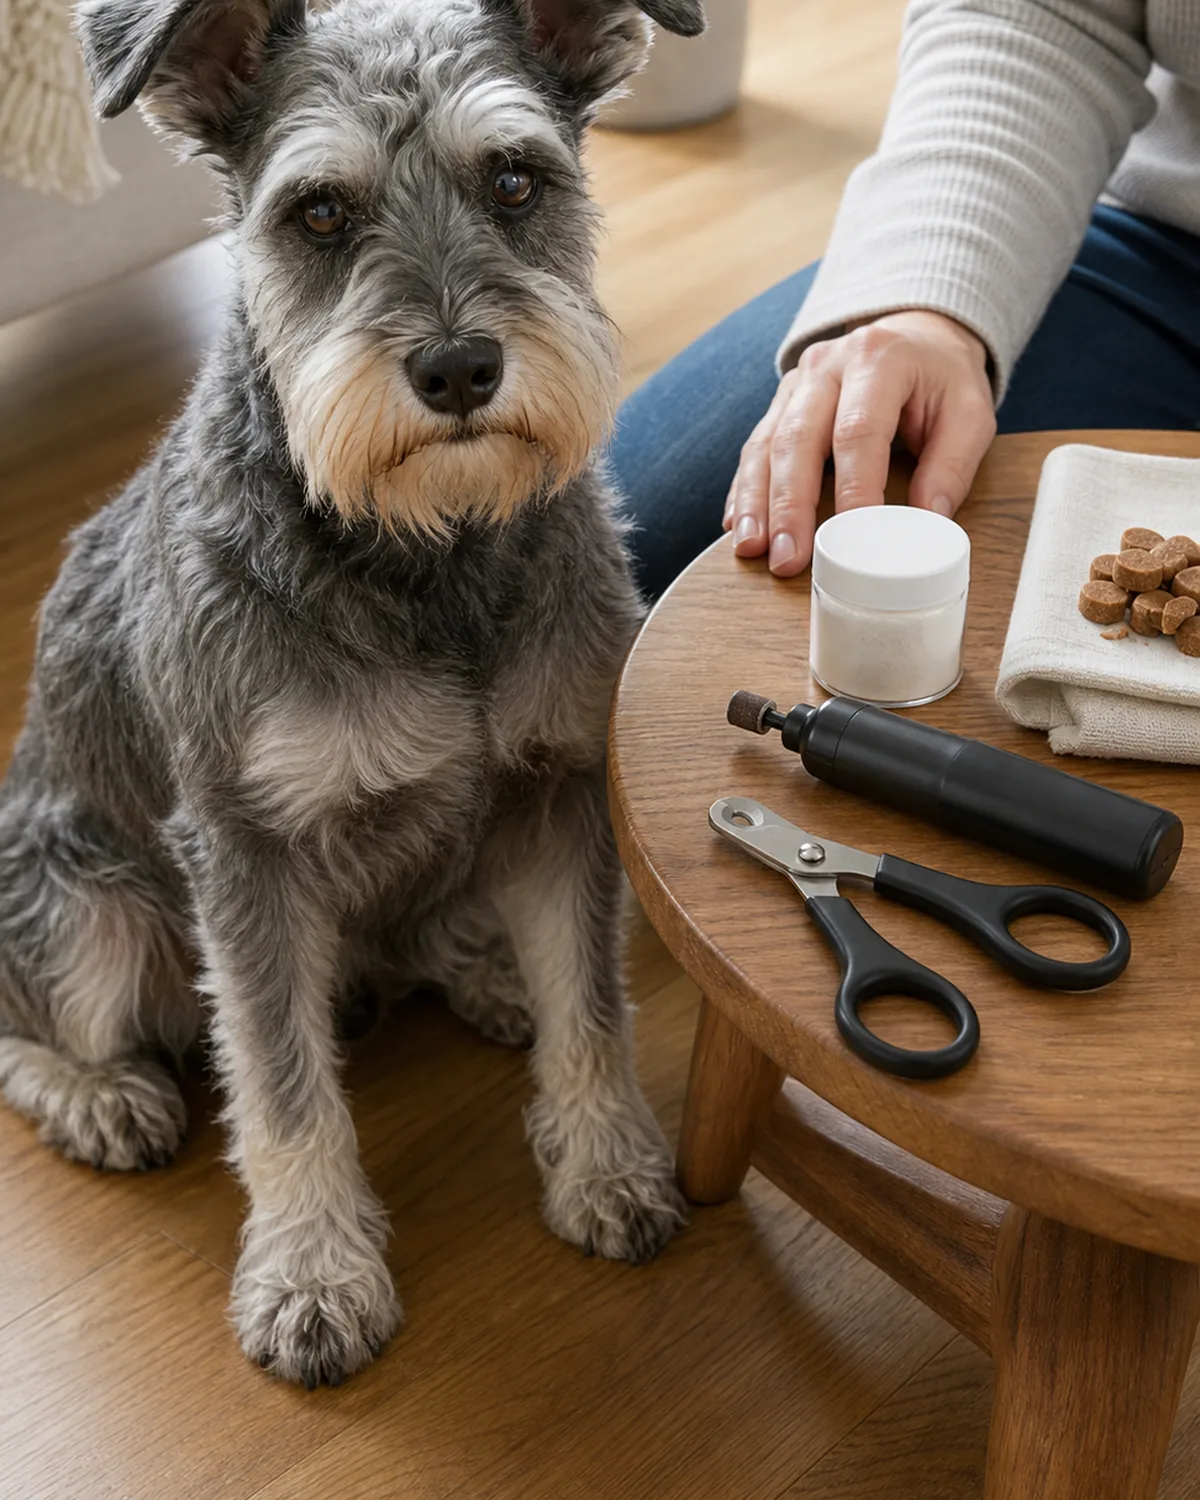
A scissor-style or guillotine clipper takes a clean slice in one squeeze. It’s fast, requires less patience from the dog, and works best on dogs who already sit through paw handling, and on light nails where the quick is visible.
A small rotary grinder removes the nail a thin layer at a time. It buzzes and vibrates, which some dogs hate, but it almost never nicks the quick and it leaves a rounded edge. Many homes end up with both: the clipper for the main cut, the grinder for a quick smoothing pass.
- Use a clipper for calm dogs, fast trims, and clearly visible quicks.
- Use a grinder for dark nails, anxious dogs, or to smooth jagged edges.
- It’s not a forever choice — keep both around and pick by the day.
You do not need every step at once. Find the version of “your dog” below and begin there.
Desensitize the Paws Before You Touch a Tool
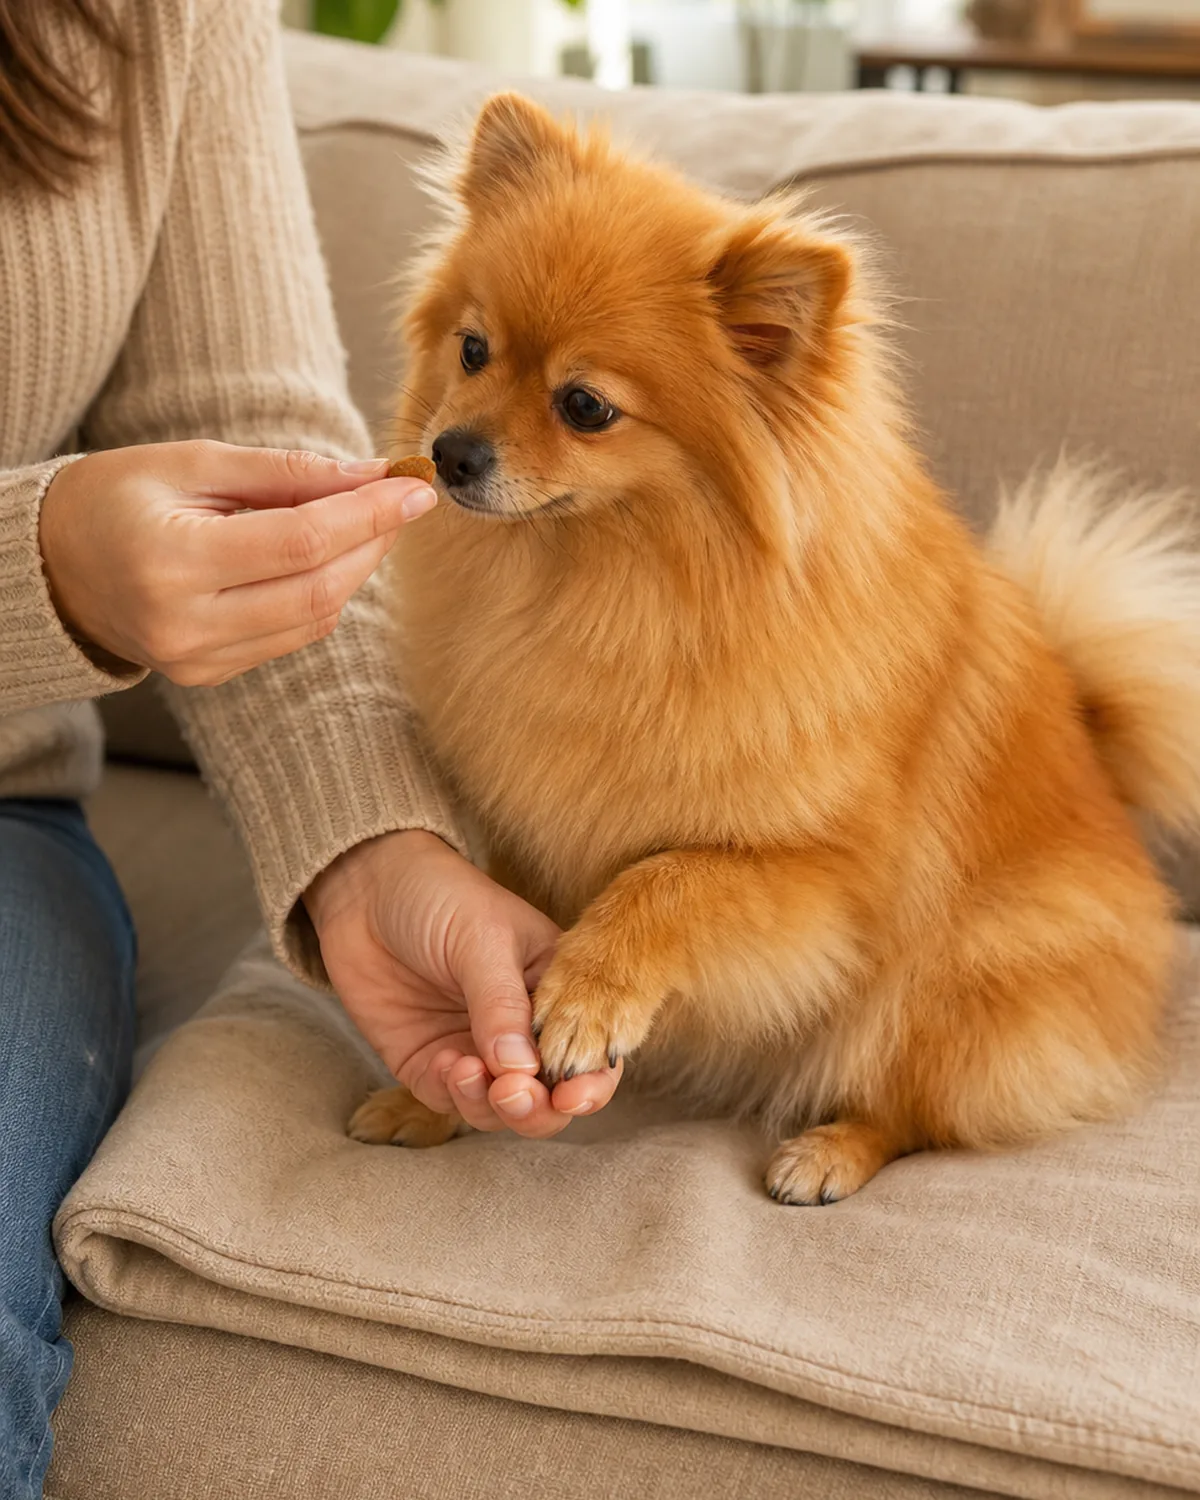
Before any clipper or grinder shows up, a paw touch should already mean a treat. Sit beside your dog, hold one paw for a single second, treat, let go. Repeat with each paw, thirty seconds total, once a day for a week.
After a week, hold two seconds. Turn the paw over and look at the bottom. Touch between the toes for a beat, then treat. If your dog gets fidgety at any step, you went too fast — drop back a level and stay there another few days. The clipper joins later, after this part is boring.
- Pair every paw touch with a treat, before any tool appears.
- Build up from one second to a calm paw inspection over a week or two.
- If the dog gets jumpy, drop back a level — never push through it.
Choose a Calm Spot and Position
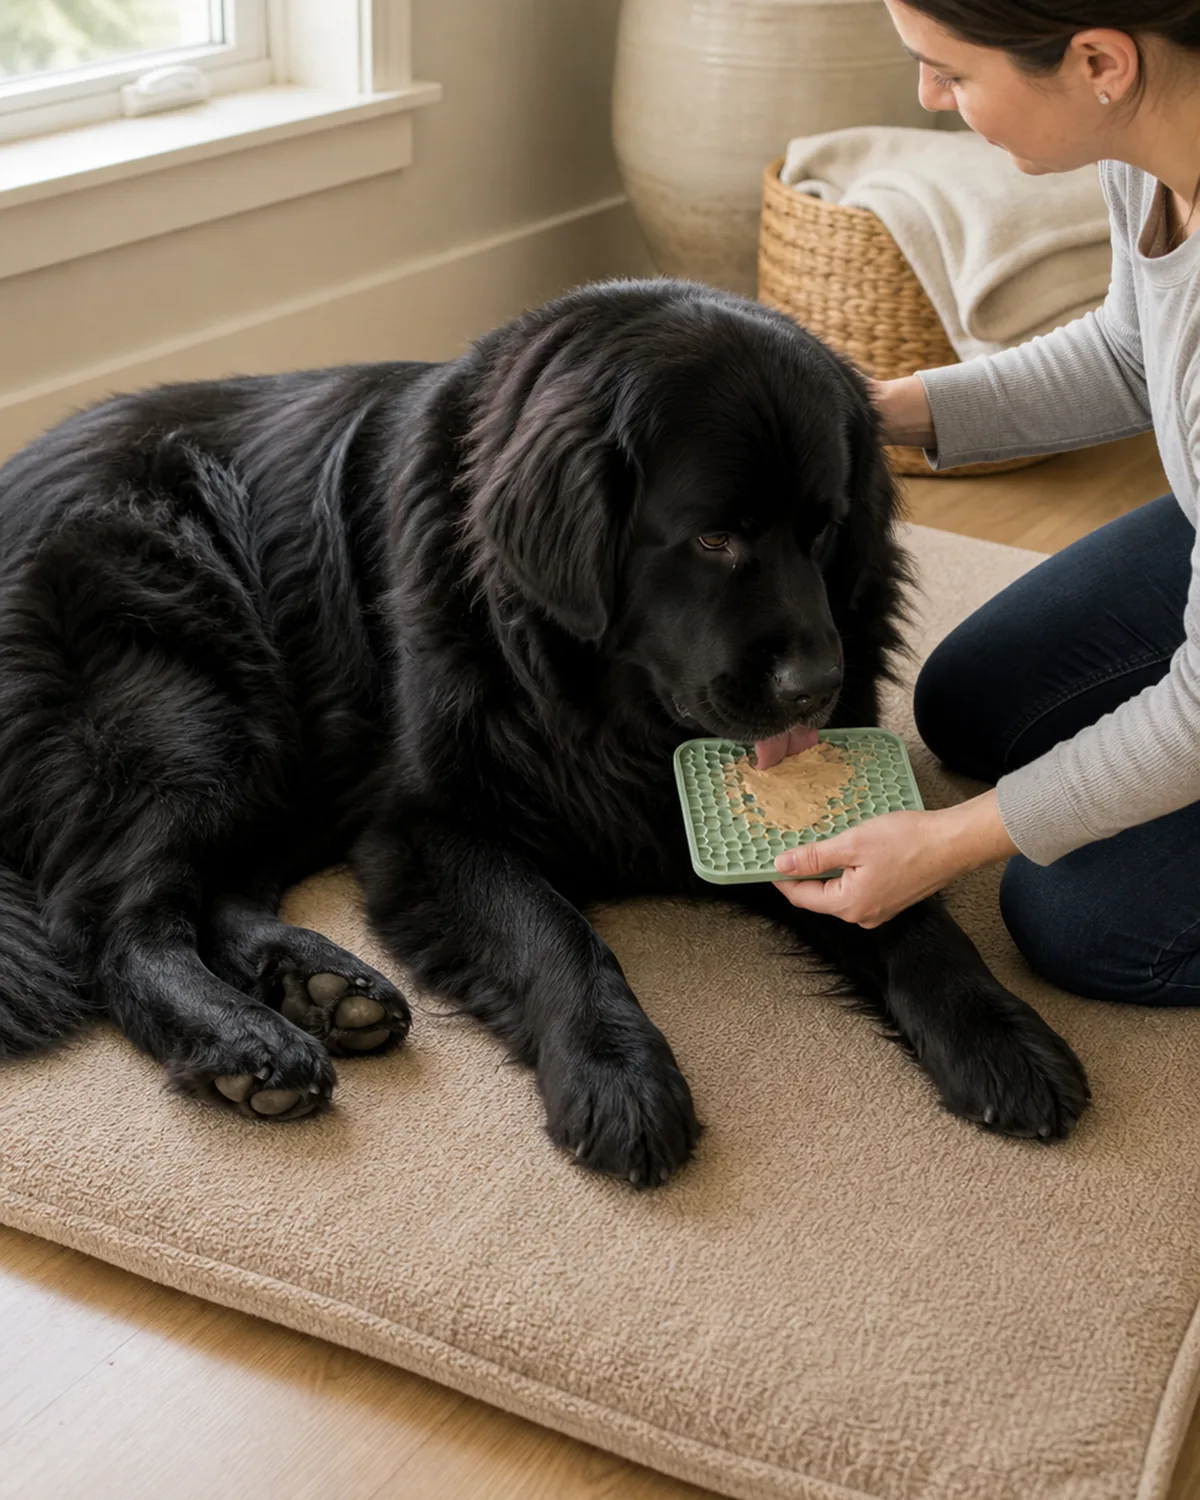
The middle of the living room with the TV on is the wrong place. Pick a quiet corner, put down a non-slip mat or a folded towel, and dim the action around the room. The dog should feel like nothing big is happening, because nothing big is.
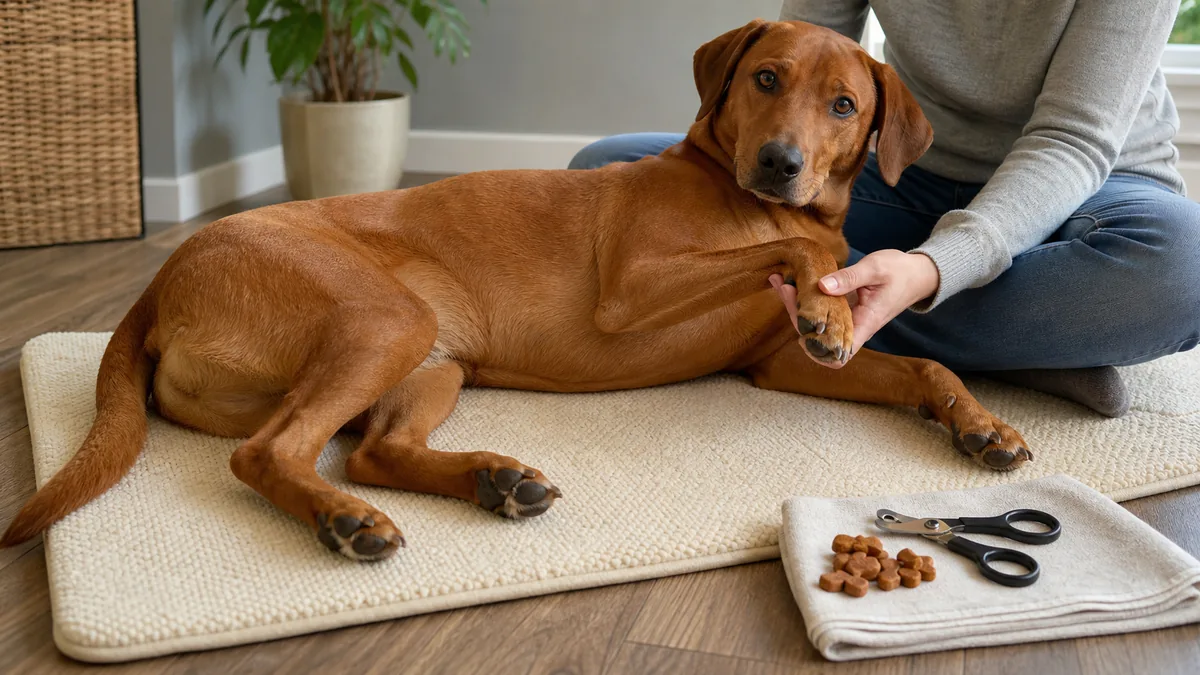
Small dogs do best across your lap in a side-lie. Medium and large dogs do best lying on their side on the mat with you kneeling at the hips, not the head. Never trim face-to-face — you can’t see the nail clearly and you can’t stop a leg from pulling back. A second person at the nose with a lick mat is the cheat code.
- Pick a quiet corner with a non-slip mat or towel under the dog.
- Put medium and large dogs in a side-lie with you at the hips, not the head.
- Use a lick mat or a helper at the head to keep the dog facing away from the work.
Hold the Paw the Way That Keeps the Toe Still
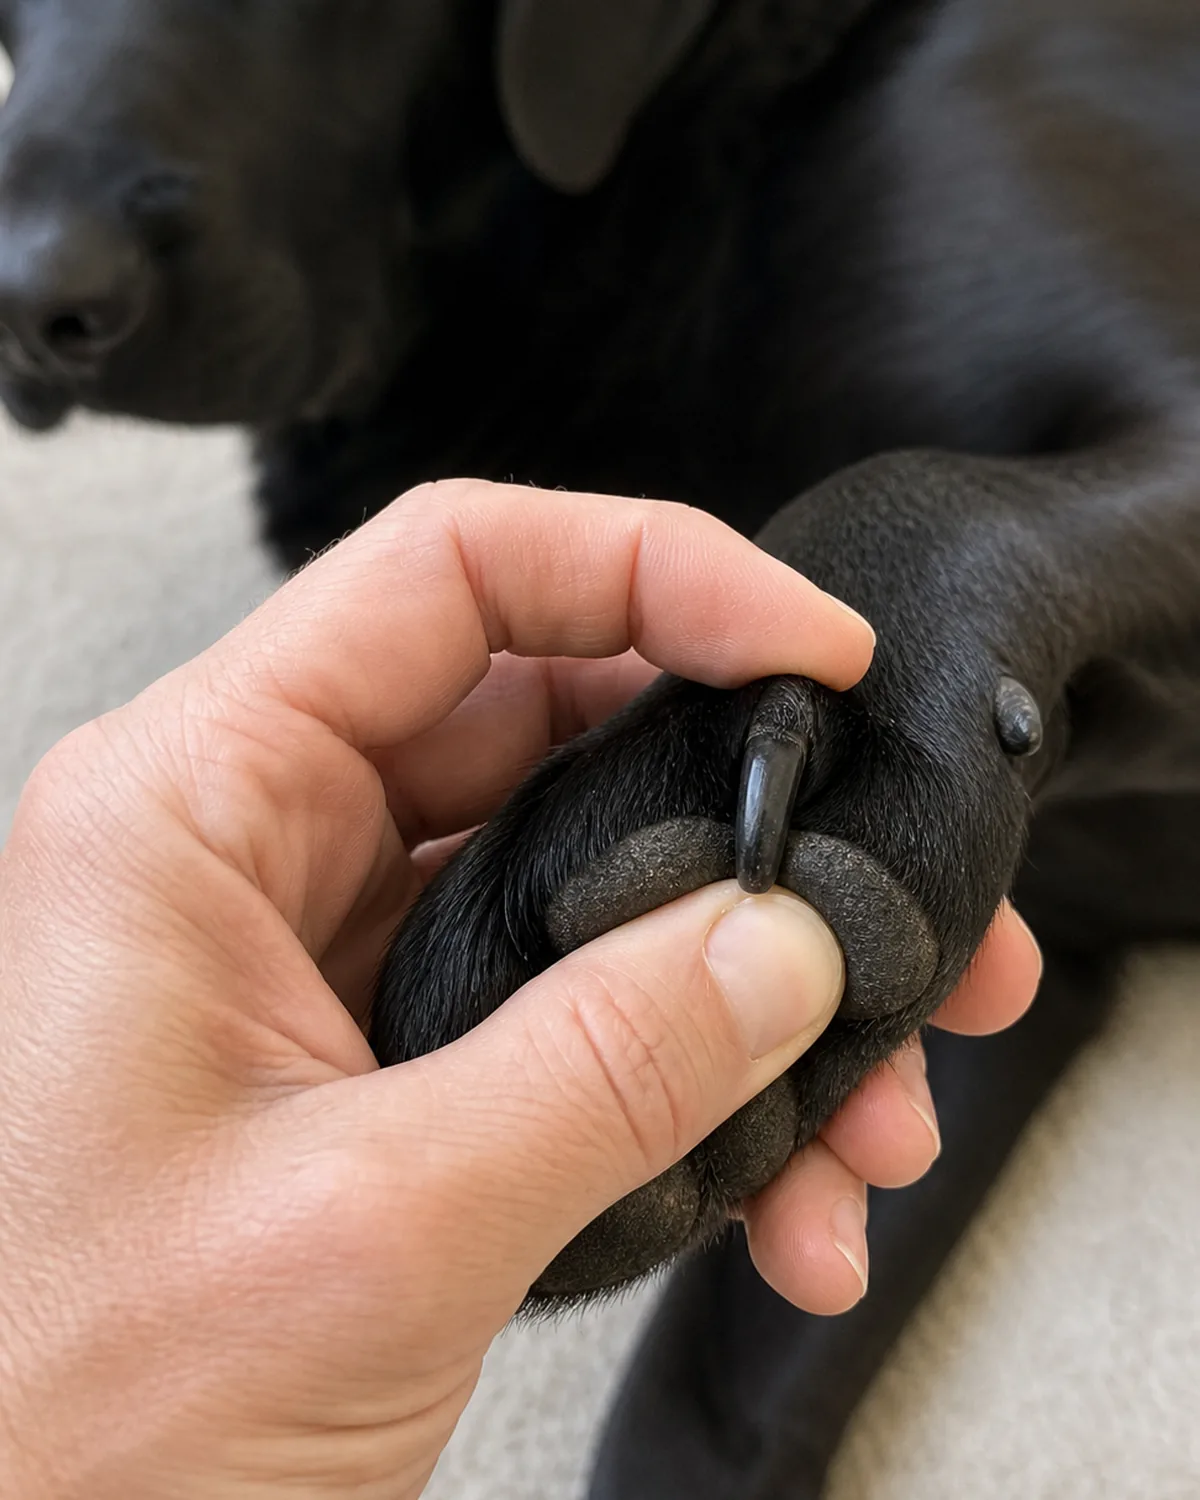
The hold is the part nobody teaches. Cup the paw in your palm. Press your thumb up on the foot pad to push the toe forward and expose the nail. Brace the toe knuckle with the side of your index finger. Tuck the other toes under your remaining fingers so only the one you’re about to trim is sticking out.
Keep the leg in a natural position — bent the way it would be if the dog were standing. If you yank the leg up high or stretch it backward, the dog pulls back on reflex, every time. The hold should feel like a steady cradle, not a clamp.
- Cup the paw, thumb on the pad, index finger on the knuckle.
- Tuck the other toes under your hand so only one nail is exposed.
- Keep the leg at a natural angle — never reach the leg up or backward.
The steps work because of four ideas underneath them. Get these right and a trim becomes a routine; ignore them and these are exactly the mistakes that turn the clipper into the enemy.
The Tiny-Sliver Rule: Cut Less, More Often
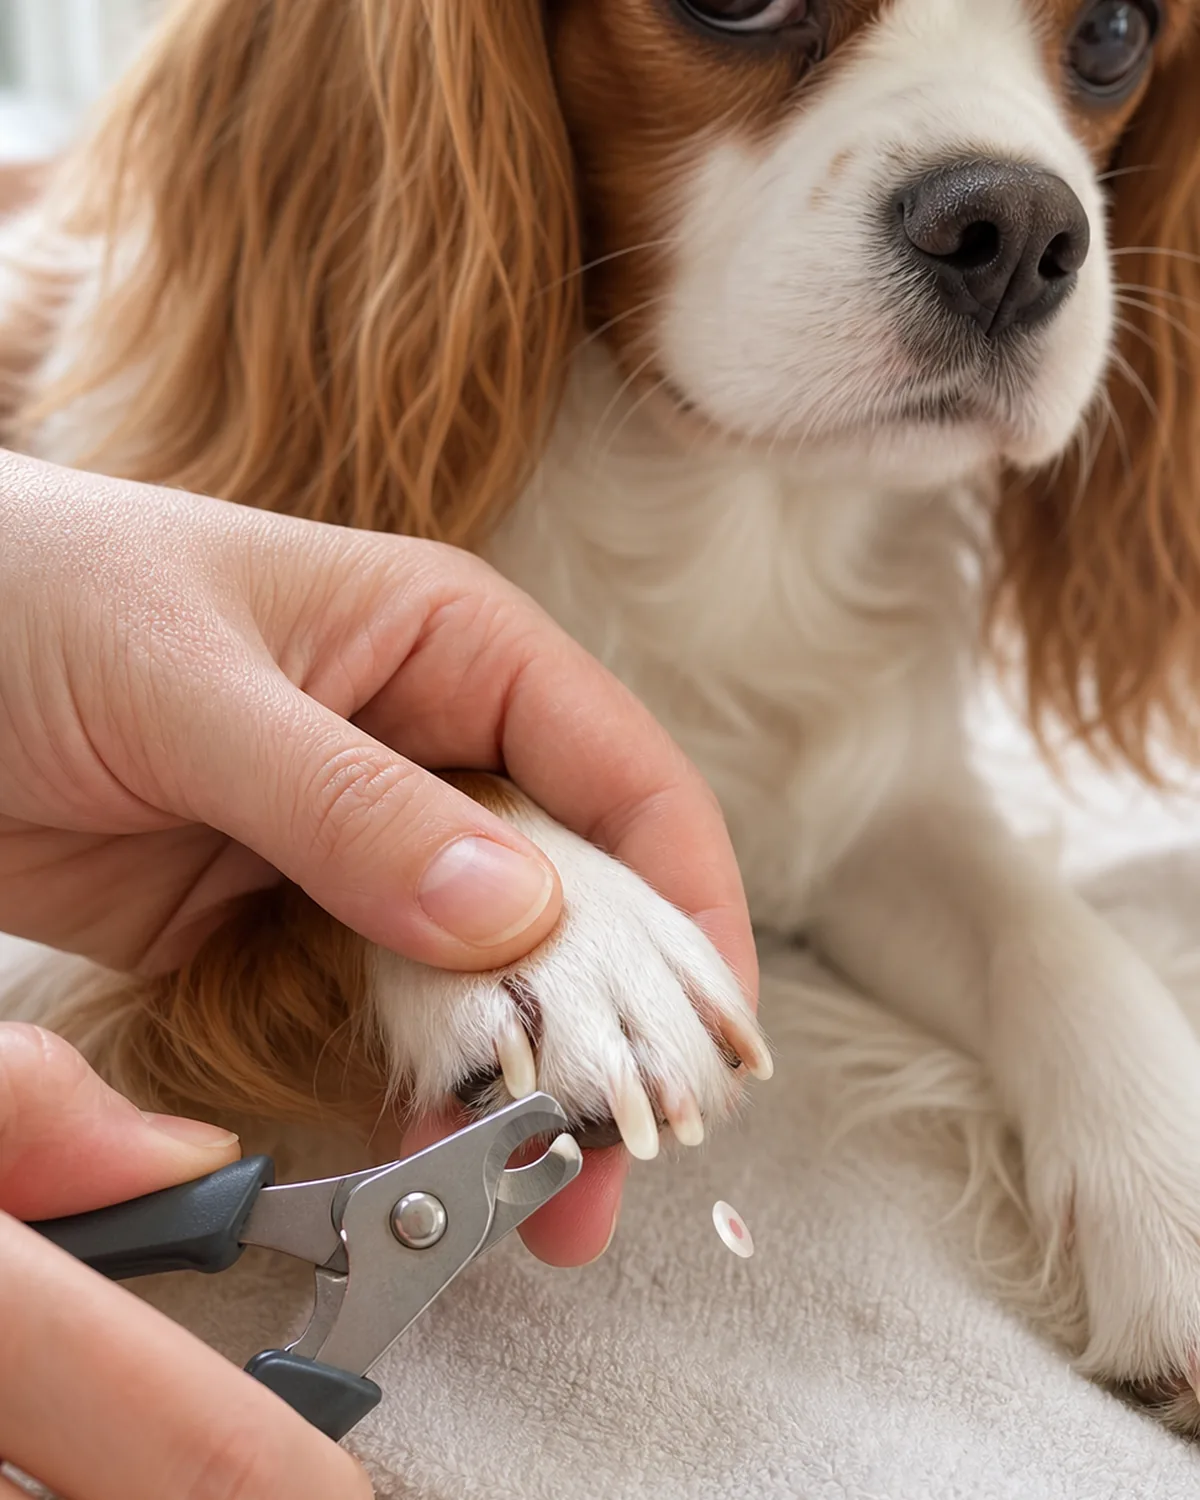
The single best trick I learned was to stop trying to “finish a nail” and start trying to take one thin sliver. Position the clipper so it would only shave about a millimeter off the tip. Squeeze. Look at the cut face. Reposition. Take another sliver if it’s safe.
After three or four slivers, you’ll see a small white ring with a faint pink dot inside the cut face — you’re getting close to the quick. Stop on that nail and move on. A “good” trim across all the toes is several small slivers each, never one big chunk.
- Take a sliver about a millimeter at a time, never a long bite.
- After each sliver, check the cut face before going again.
- Stop the moment you see a pink dot showing up in the center.
How to Cut Dark Nails Safely (Layered Slices)
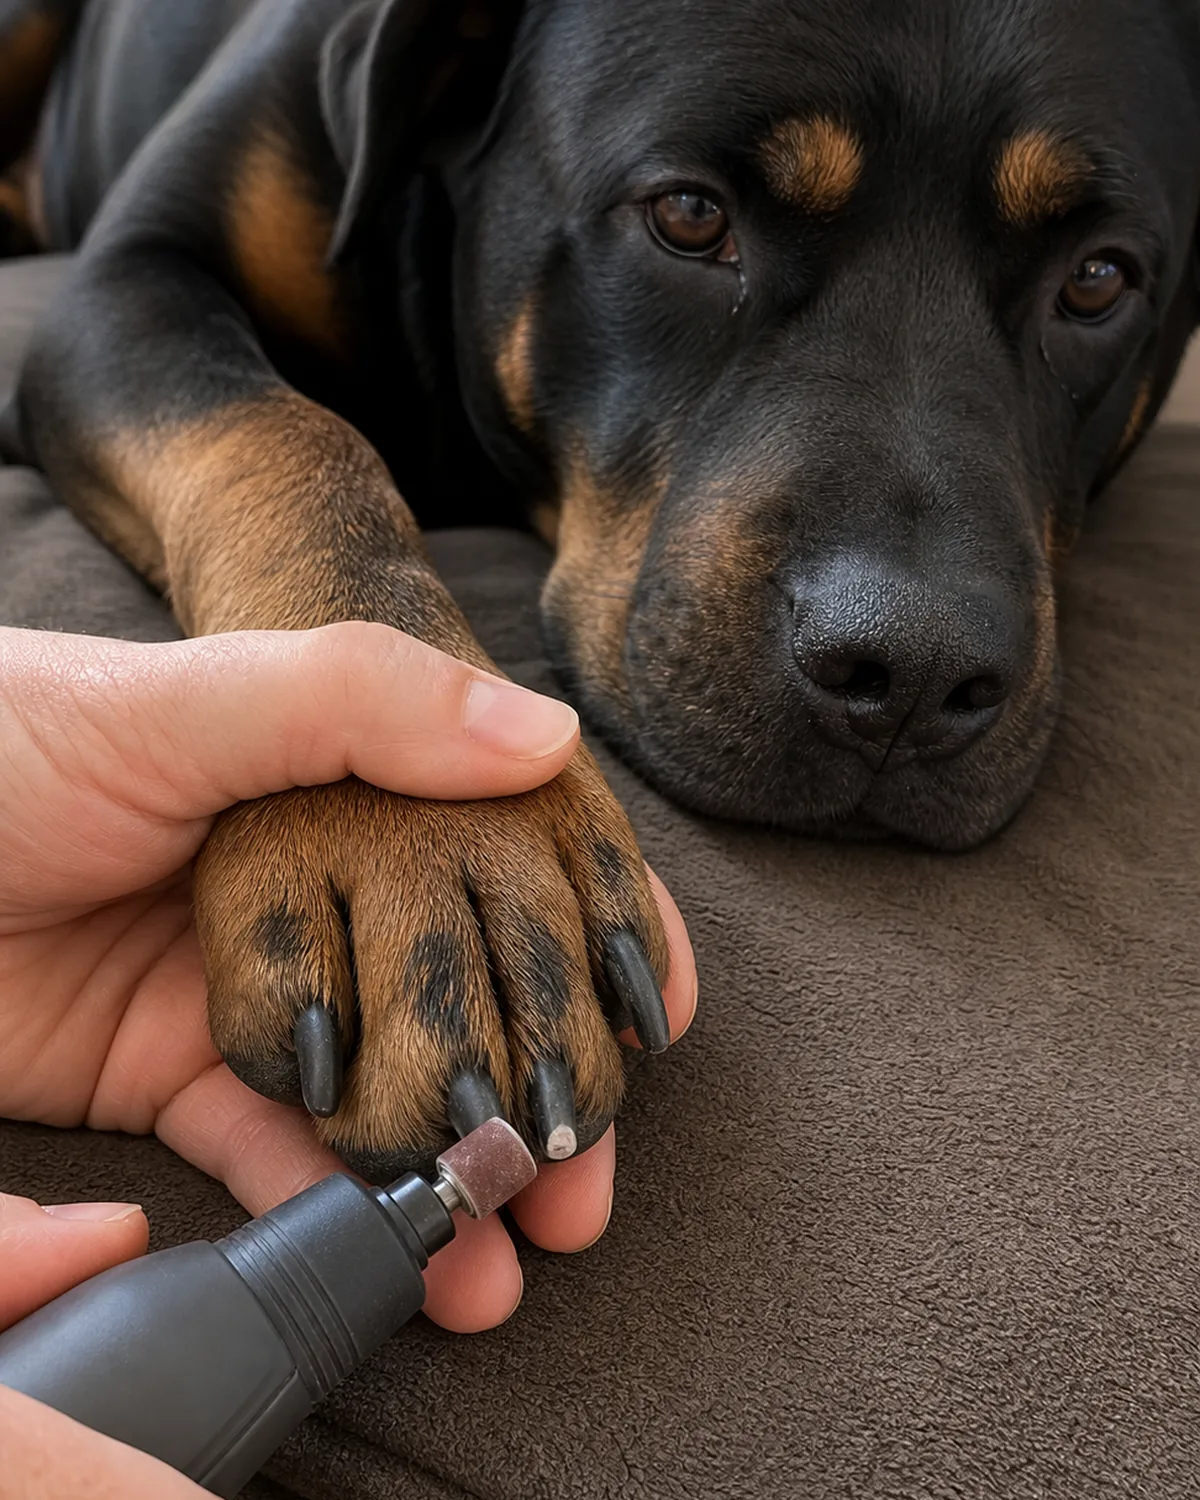
Dark nails hide the quick, but the cut face tells you everything. Take a very thin slice — half a millimeter is plenty — and look. A clean chalky-white surface, dry and even, means you can take another. Repeat one tiny slice at a time.
The signal to stop is a small dark, moist-looking circle that appears in the center of the cut face. That circle is the quick about one slice away. Set the clipper or grinder down on that nail. If the edge is jagged, give it a few passes with a grinder to round it off and call that nail done.
- Take half-millimeter slices on dark nails and check the cut face each time.
- A chalky-dry white surface means it’s safe to take one more pass.
- A dark moist center means stop now — the quick is one slice deep.
If You Nick the Quick: The 90-Second Stop-Bleed Drill
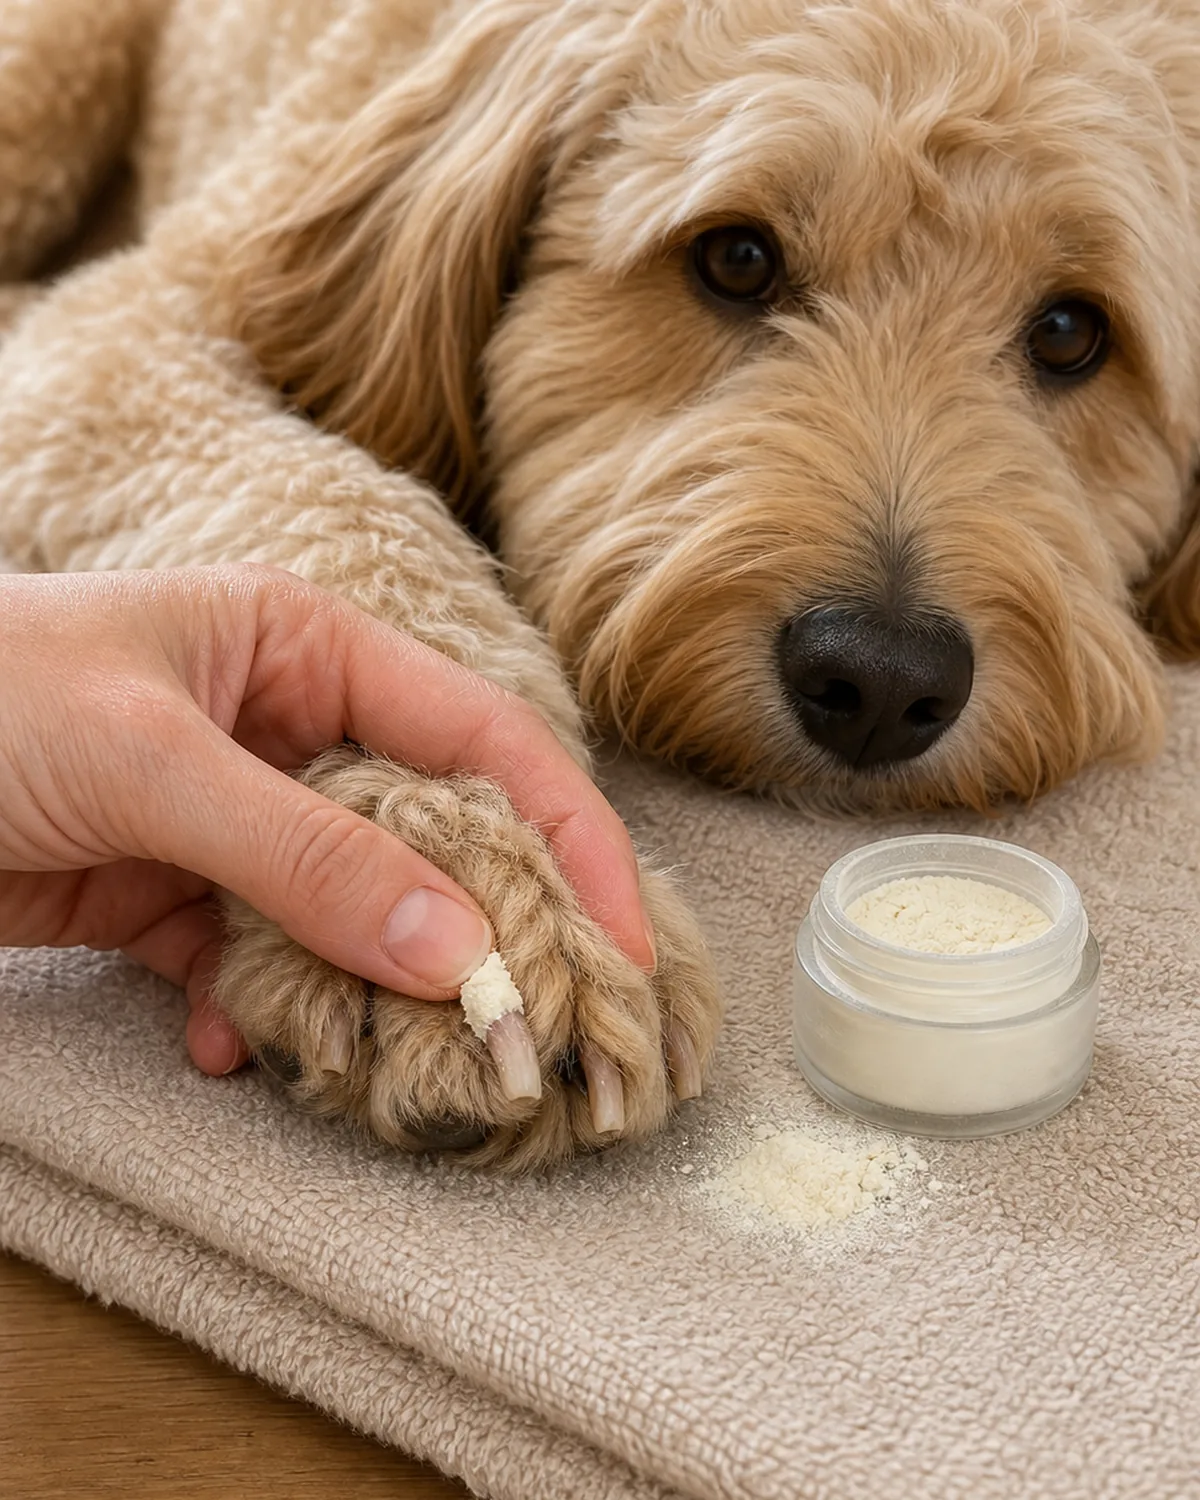
Even careful people nick a quick eventually. Stay calm and let your hands do the work, not your panic. Wet your fingertip, dip it in styptic powder — cornstarch or plain flour work in a pinch — and press it firmly onto the cut face. Count to thirty. Do not lift to check.
Most nicks stop in under a minute. If you keep peeking, you wipe away the clot and start over. After thirty seconds, lift gently, see if it’s holding, and if not, press again for another thirty. Bleeding past five minutes, a limp, or any swelling — call your vet. Whatever you do, end the session on a treat, not a fuss.
- Press wet powder firmly on the cut face for thirty seconds — no peeking.
- Repeat the press once if needed; most nicks stop inside a minute.
- Call your vet if bleeding goes past five minutes, or if the dog limps or swells.
How to Trim Dog Nails at Home Without the Drama
- 1Check the lengthClicking on hard floor, nails dropping past the foot-pad line — time to trim.
- 2Find the quickPink core on light nails; on dark nails, stop a sliver before the moist dot.
- 3Pick the toolClipper for fast cuts and light nails; grinder for dark nails and worry.
- 4Touch paws dailyA week of “hold one beat, treat, release” before the clipper appears.
- 5Calm corner + non-slip matSide-lie position, you at the hips, lick mat at the nose.
- 6Isolate one toeThumb up on pad, finger on knuckle, the rest tucked under your hand.
- 7Sliver, not chunkOne millimeter at a time, read the cut face, four small passes per toe.
- 8Dark nails layeredHalf a millimeter, check chalky-white vs dark moist circle, stop on dark.
- 990-second stop-bleedWet finger + styptic powder, press 30 seconds, count, do not peek.
- 10Find the dewclawsInner side, above the wrist — front legs always, back legs sometimes.
- 11Trim every 2-3 weeksIndoor dogs every 2-3 weeks, pavement walkers stretch to 4-6 weeks.
- 1214-day restartClipper near, touched, clicked, set on nail — no cutting for two weeks.
- 13Reset with a proOvergrown quicks? One groomer or vet reset, then home maintenance.
pawliqa.com
Don’t Forget the Dewclaws (Inner Side, Higher Up)
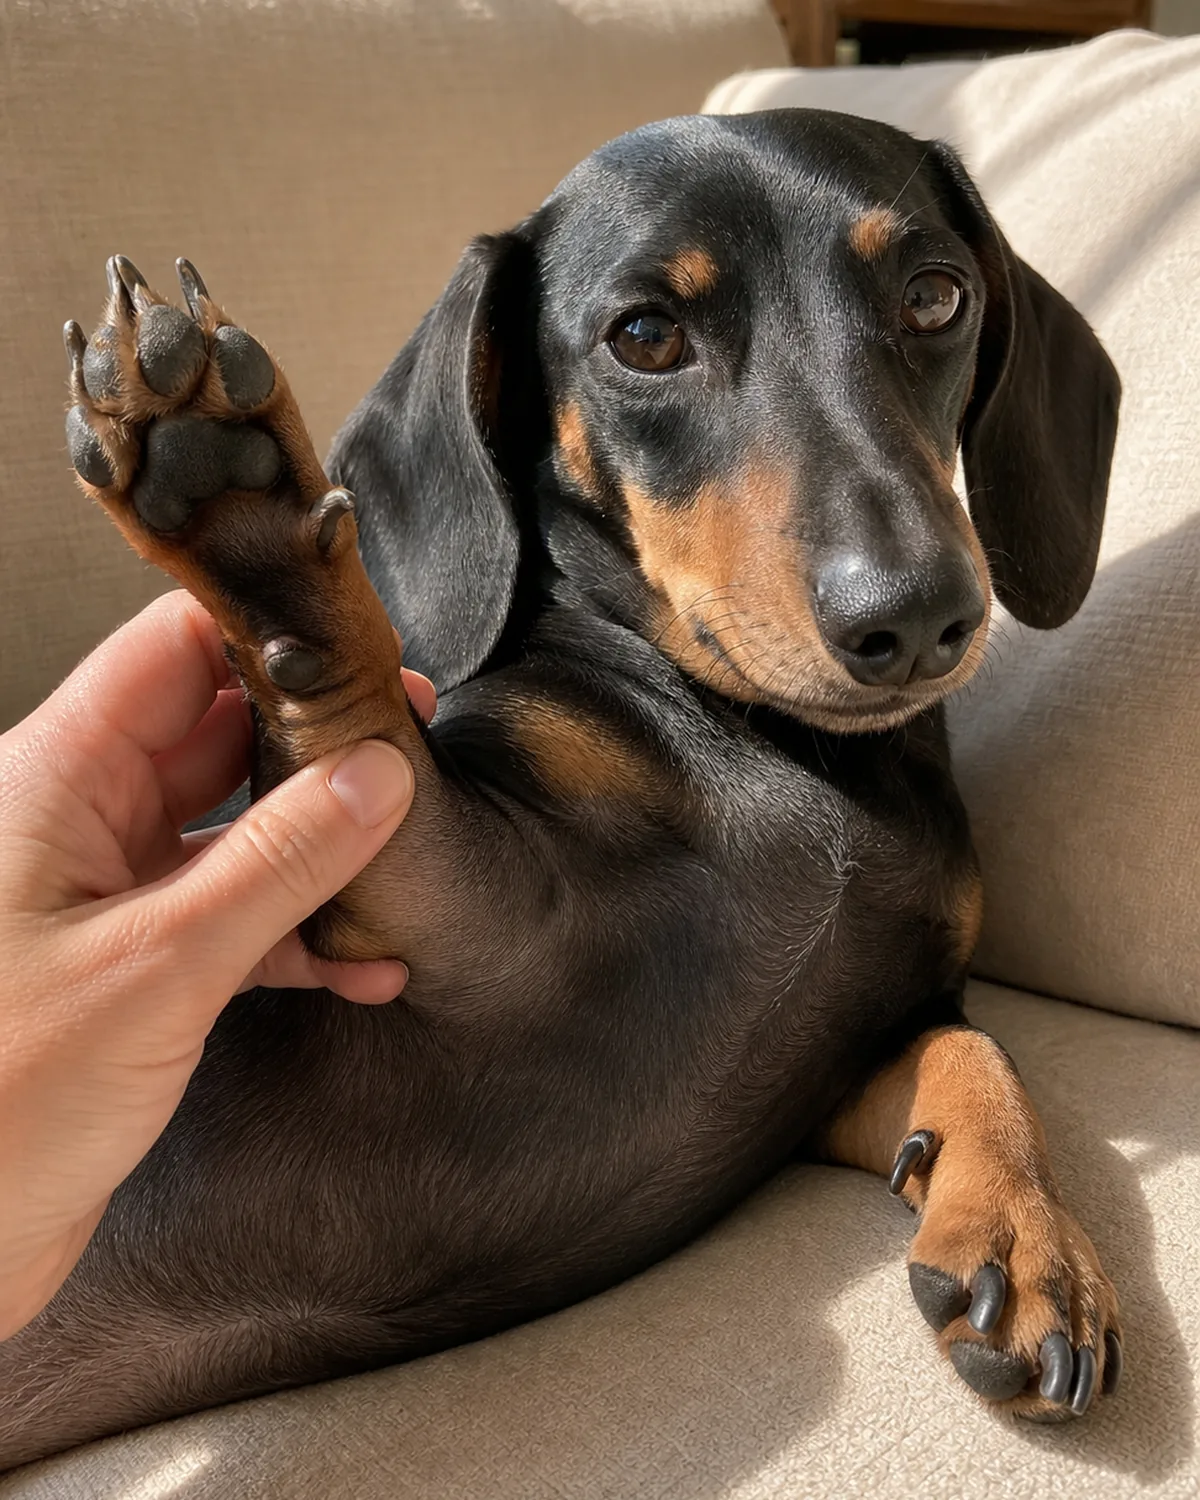
Dewclaws are the small “thumb” nails on the inside of the leg, higher up than the toes that touch the ground. Front legs almost always have them. Back legs are a coin toss — flip your dog’s leg over and look. Some dogs have one back dewclaw, some have two, some have none.
Because they don’t touch the floor, dewclaws never wear down on their own. Left alone for months, they curl back and grow into the pad. They take the same sliver treatment as any other nail, just from a slightly more inward angle.
- Look for dewclaws on the inner side of every leg, above the wrist.
- Check the back legs too — some dogs have them, some don’t.
- Trim dewclaws on the same schedule as the toes; they don’t self-wear.
How Often to Trim: A Rule of Thumb by Activity
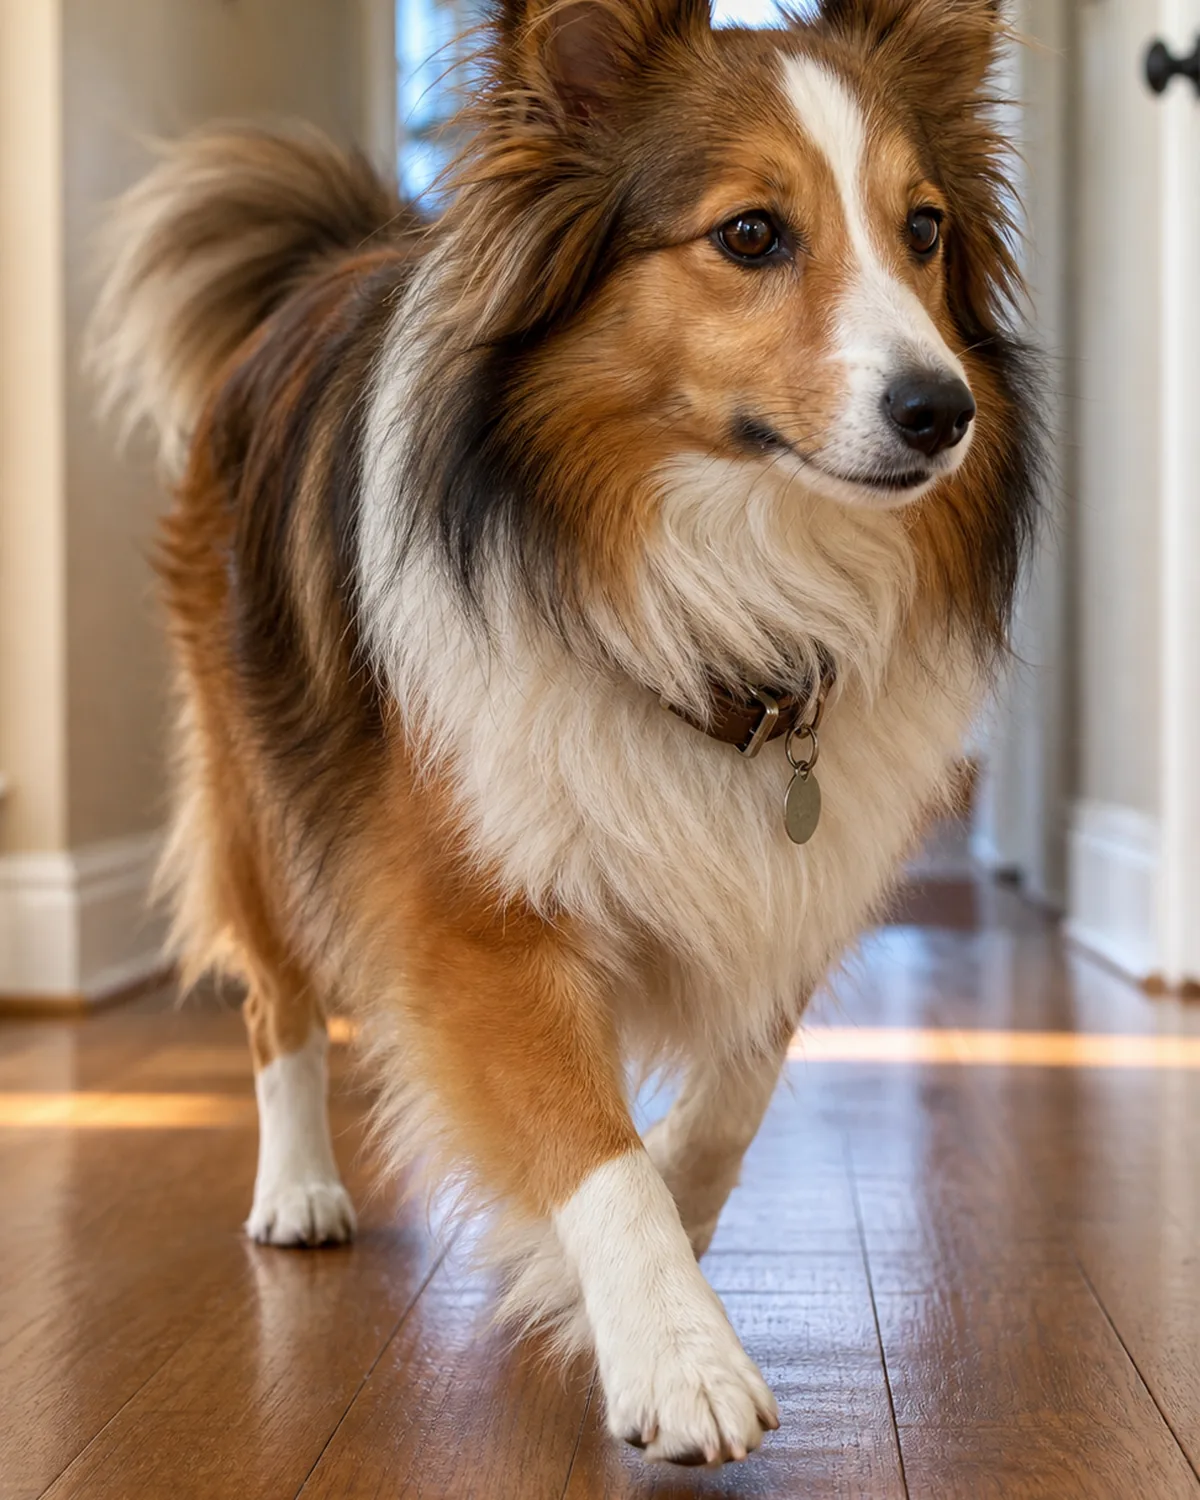
For most indoor dogs on soft floors, every two to three weeks is the right rhythm. Dogs that walk long distances on pavement may stretch to four or six weeks because the sidewalk acts like a slow grinder.
The simplest signal that the timing is off is the click on hardwood. When you hear the click coming back, you waited too long. Puppies start at eight to twelve weeks — not to remove real length but to install the routine. A puppy who learned that paw handling is calm at twelve weeks is the easiest adult to trim.
- Trim most indoor dogs every two or three weeks as a default.
- Pavement walkers can stretch the rhythm to four or six weeks.
- The click coming back on hardwood means it’s time to trim again.
When Your Dog Already Hates Clippers: The 14-Day Restart
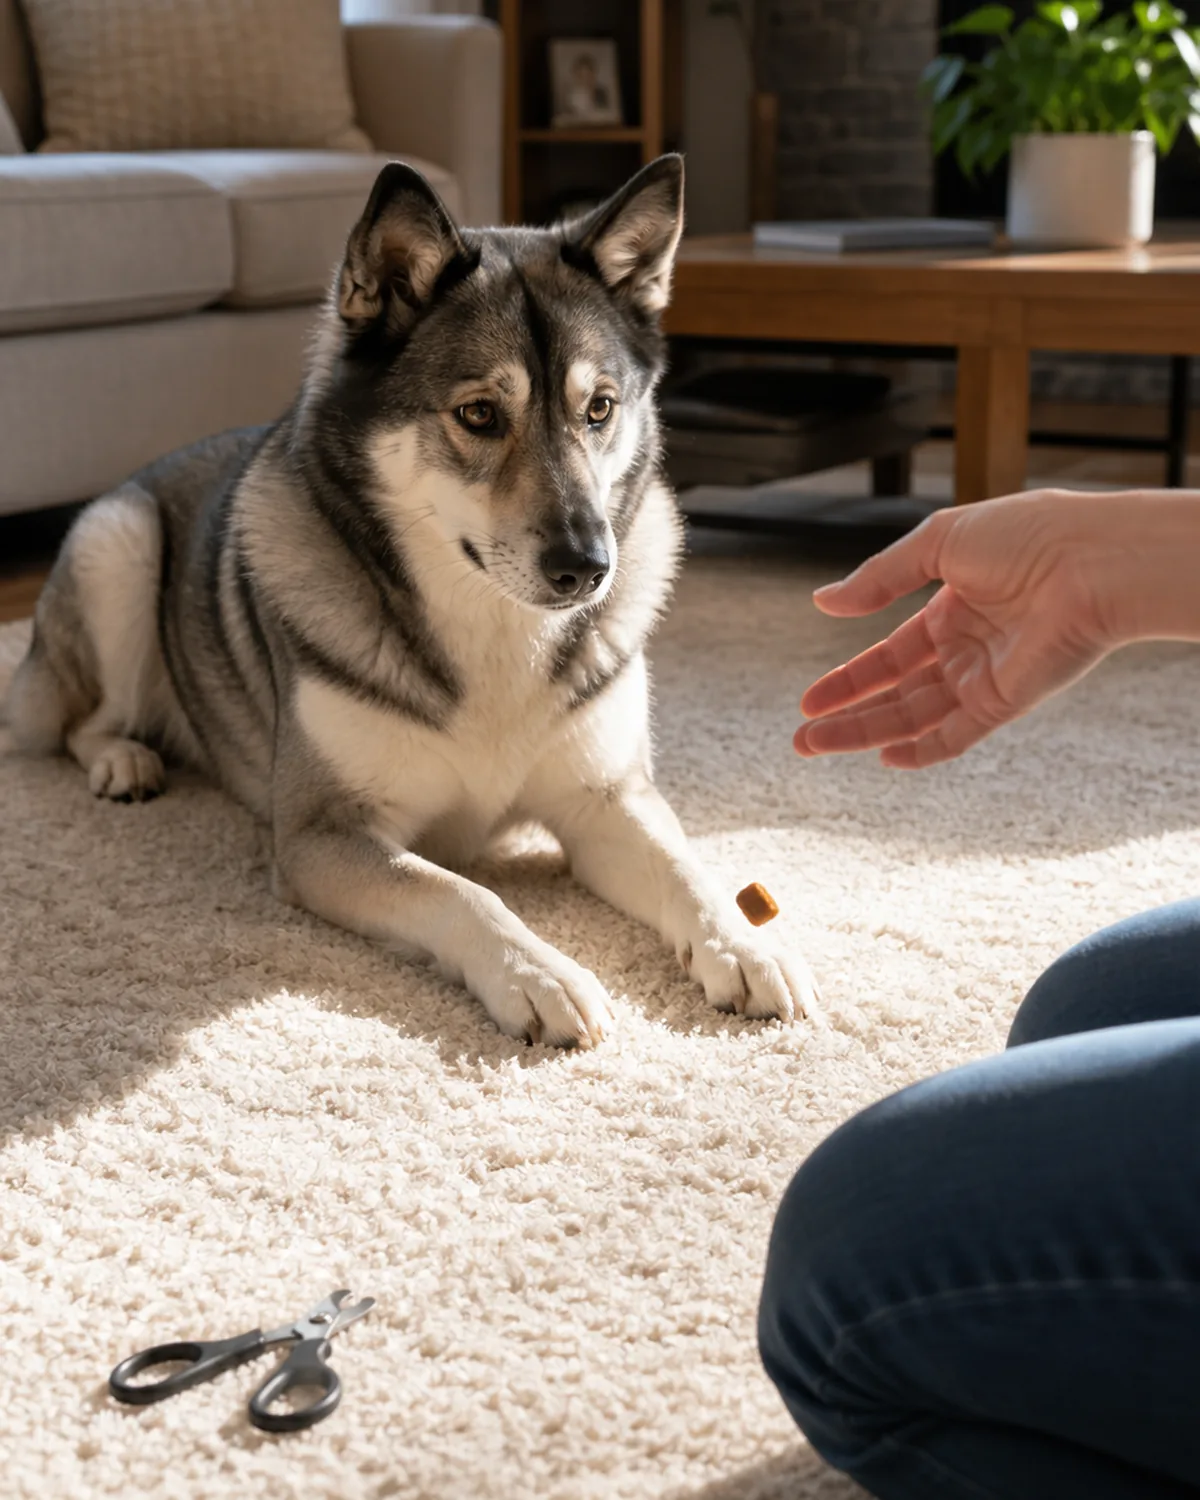
If your dog is already spooked, the worst thing you can do is “just one more trim.” Put the clipper in a drawer for two weeks. For those fourteen days, the only goal is to break the clipper-equals-grab link your dog already built.
A day-by-day version: clipper on the floor near the dog, treat. Clipper touched to a paw for a second, treat. Clipper opened and closed in the air, treat. Clipper rested on a nail for zero seconds, treat. Cut nothing for two weeks. On day fifteen, trim one nail and put the clipper away. For a deeply spooked dog, a familiar crate corner with a chew makes a good decompression base before and after.
- Put the clipper away for fourteen days while you rebuild the link.
- Each day pair the clipper appearing — on the floor, on a paw, opening — with a treat.
- On day fifteen, trim one nail only, then stop and treat again.
When to Let a Vet or Groomer Take Over (Especially Overgrown Quicks)
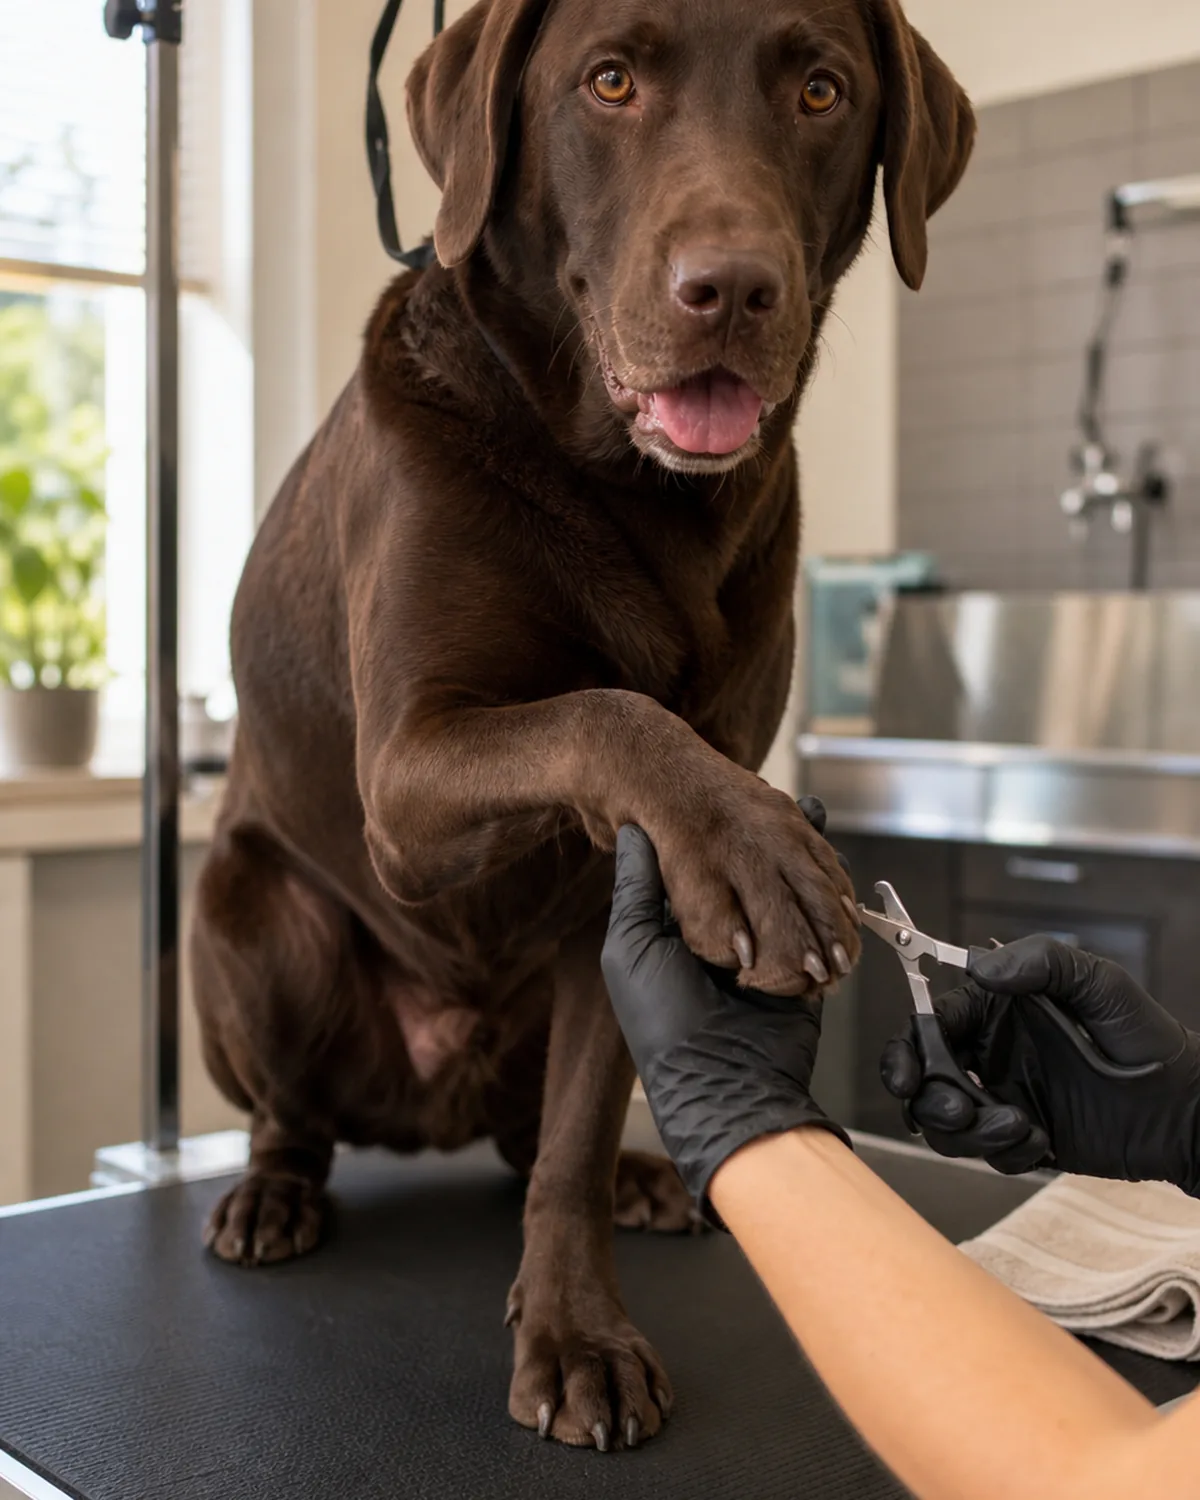
A dog whose nails haven’t been trimmed in months usually has overgrown quicks too — the blood vessel grows out along with the nail. Trimming that back at home is slow and risky. A single groomer or vet session to reset to baseline is often the smartest move, sometimes with a mild sedative if your dog is panicked.
Once the length is back where it should be, the quick gradually retreats — but only if you keep the home trim rhythm tight, every one to two weeks. Senior dogs with sore joints, tiny dogs who tremble at the sight of a clipper, owners with shaky hands — outsourcing the trim is not failure, and a calm brushing routine at home keeps you connected to the paws between visits.
- Book a reset trim with a groomer or vet for badly overgrown nails.
- Once it’s reset, hold a weekly or every-other-week home rhythm.
- Outsourcing for senior, painful, or panicked dogs is sensible, not a defeat.

Jess Calloway edits Pawliqa, where she shares dog care, grooming, training, and new-owner tips — plus DIY and pet-friendly home ideas — for anyone who wants a happy, well-cared-for dog. As a dog mom to three very different dogs, she writes the honest, tested version of what actually works. Every guide is image-led and reviewed for clarity, usefulness, image accuracy, and Pinterest-to-page alignment before it goes live. Visit the About page.